
Last updated on December 17th, 2020 at 05:51 pm
Back in the day, the only way to make it in the music industry was to get a deal with a Label.
However, in today’s world it’s getting easier and easier for home recording musicians to make it for the simple fact that the gear required to record high-quality music has become a lot more affordable.
Not only that but you can now record everything on your own on to a simple computer with some basic equipment.
Music distribution is now very quick and simple since you can distribute an entire album in a matter of days for about $20.
If there’s ever been a time for aspiring musicians to make it without having to spend a fortune, it’s today!
The issue I see most people having, and this is something I struggled with a lot too, is getting their music to sound professional.
This is why in this post I’ll go over every single step you need to be able to sound great while doing everything without leaving your home.
I will cover what equipment you should use, the sound treatment required, how to properly record the songs, how to fix issues in your tracks, how to mix them, how to master them, and more.
Let’s get straight into it…
1. Using the right Equipment
One of the benefits of today’s industry is that you have a lot of equipment at your disposal that is really affordable.
However, there’s also an issue associated with this…
How can you decide what to buy if there are so many alternatives? It’s absolutely confusing, right?
Don’t worry, since I’ve already gone through all of that myself and done a lot of research on the topic, I’ll simply give you a list of what I consider to be the bare minimum gear for you to get;
Audio Interface
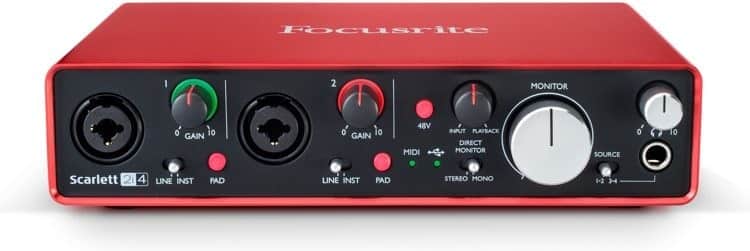
Without an Audio Interface there’s just no way that you will be able to record high-quality music at home.
An Audio Interface works as a translator between your gear and your PC, meaning that it converts the analog signal of your mic/guitar into a digital signal which your computer can “understand”.
The good news is that you don’t need to spend a fortune to get a high-quality one…
If you check my Recommended Gear page, you’ll find that I listed two Audio interfaces.
If you’re on a budget I’d recommend you go with the Behringer one since it provides really high recording quality and plenty of inputs.
Otherwise feel free to check out these articles I wrote about Audio Interfaces;
Note: Every single one of those Audio Interfaces, even the cheapest ones, are perfect for any home studio.
Two inputs should be more than enough if you’re the only one doing all of the recording.
Microphones
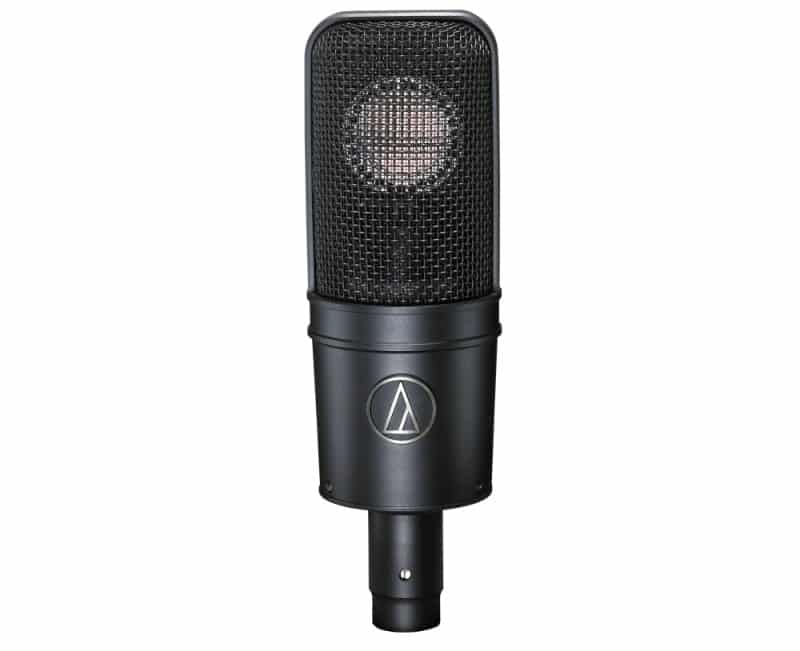
If there’s one piece of equipment that you’ll find a lot on the market of, it’s microphones…
When it comes to home recording, I generally recommend getting a good large diaphragm Condenser Microphone first, since you can record almost anything with it.
After this you should consider investing in a dynamic mic and also a pair of pencil microphones.
Here are a couple articles I wrote about microphones. Feel free to check them out!
Moving on…
Digital Audio Workstation (DAW)

No matter what equipment you own, none of it will be of any use to you if you don’t have software to record with.
The great thing about DAWs is that you don’t necessarily need to get something like Pro Tools or Cubase which generally cost around $500.
There are plenty of free ones that work just as well while not costing you a dime!
I have a complete list of the best free DAWs which you should absolutely check out!
I personally am using Cakewalk by Bandlab right now even though I own a copy of Cubase… I just like it more and it’s completely free.
Other alternatives would be to use the Light versions of premium DAWs such as Cubase LE, which come with some of the Audio Interfaces I listed earlier.
If you want to get a premium DAW, here’s a list of the best ones out there.
Headphones
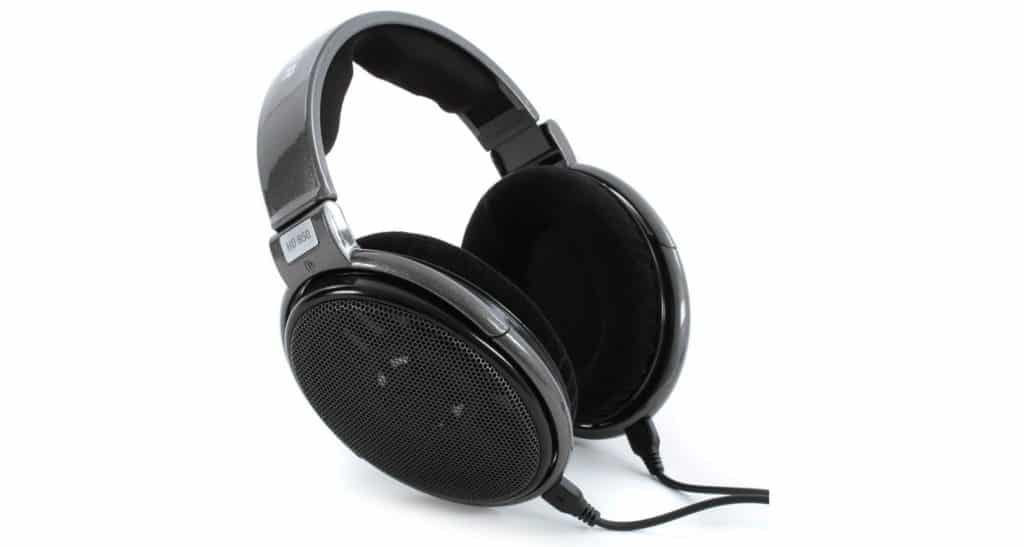
Studio-grade headphones are a must for anyone who wants to record music at home properly.
There are two kinds of headphones that are commonly used in a studio setting; Open back- and closed back headphones.
In this case I’d recommend you go with closed back headphones, even though open back headphones tend to be better for mixing…
But closed back headphones will be much better overall since you can use them to record without having any bleed issues.
Classic example: Audio-Technica ATH-M50x.
Next on the list…
Studio Monitors
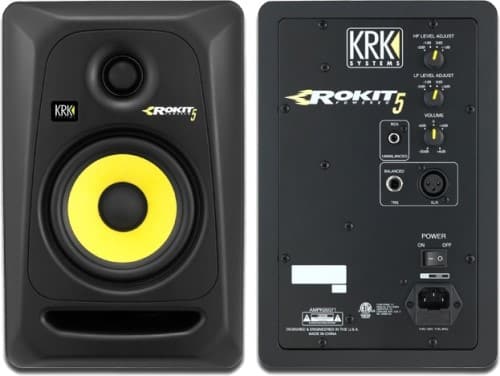
Studio monitors are an absolute must when it comes to music production.
You need to be able to hear everything that’s going on in the track without any distortion in the sound.
Studio monitors, contrary to the regular hi-fi systems, produce a flat and accurate sound which will allow you to better decide how to process the song.
Classic example: KRK Studio Monitors.
Pop Filters
This is something that a lot of people overlook, but it’s damn important!
Once you recorded a track which has plosives in it, it becomes near impossible to fix it… so just get a simple pop filter to avoid picking them up from the get-go.
Classic example: Aokeo pop filter.
If you’re interested in finding out about what ALL the essential home studio equipment is, check out this article I wrote on that topic.
Moving on…
2. Acoustic Treatment and Soundproofing
If there’s one thing I’ve learned over the years it’s that acoustic treatment is by far the most important thing you need to get right in order for your tracks to sound professional.
Acoustic Treatment
Acoustic treatment reduces the reflections of sound in the room, making the soundwaves die out much faster…
This means that the track you record will have a lot less of the room’s natural sound.
Soundproofing
Soundproofing consists on eliminating outside noises by blocking them out.
It’s different from acoustic treatment because you are not trying to absorb the sound but rather block it out entirely.
To learn how to properly do it here’s an article by soundproofanything.com where you will find out exactly what needs to be done, both regarding soundproofing and acoustic treatment for a home studio.
3. Don’t get ahead of Yourself
This is something that everyone struggles with, at least a bit.
We start writing a song and even before half the song is finished, we start recording it, adding processing, mixing and doing all kinds of stuff to it.
The issue with this is that it will take you ages to finish a single project, plus it’s just confusing.
Here is how you should go about it;
- Compose until the song is completely finished.
- Practice until you can play it perfectly. If you’re recording other musicians tell them that… they should be absolutely prepared.
- Record all the tracks.
- Select which tracks you’re going to use since some of them you might not end up needing.
- Mix the Song.
- Master the Song.
The whole point of having a plan is to be more efficient and not waste time.
Try and follow these steps without getting ahead of yourself and you should be good to go.
4. Audio Quality
Another important aspect of choosing a good Audio Interface is that it will allow you to record at a higher quality.
Here you should consider both bit depth and sample rate;
Sample Rate
The standard has always been 44.1kHz – 48kHz which in all honesty is more than enough… even for a pro studio.
Using higher sample rates like 192kHz is completely possible with the newer Audio Interfaces, but it’s not really worth it in my opinion.
Bit Depth
In this case, the standard has always been 16-bit – 24-bit.
You could definitely use any of them, but recording at 24-bit will add more detail to your recordings.
Important note: The higher the sample rate and bit depth the larger the size of the audio file.
If storage is an issue, go with 44.1kHz and 16-bit.
Otherwise go for 44.1kHz – 48kHz at 24-bit.
5. Tracking properly
Ok, here we get into the fun part which is recording all the tracks.
This goes back to one of my previous points which is; Be prepared!
You, or the band you’re recording, should be able to play the entire song without even thinking about it, which simply means that practice is key!
Another extremely important part of recording properly is being able to play to a click track, which is easier said than done since almost no one practices this way…
Lastly you need to decide how you are going to record and which microphones are going to be used.
If you are only recording vocals and maybe one or two extra instruments separately and the rest is just created digitally, then you might get away with just using one microphone and record one track at a time.
Recording a whole band simultaneously will be completely different…
So, let’s get into every one of these points separately;
6. Decide on how you are going to record
Like I just mentioned, it’s important to have a plan in place so you know exactly what needs to be done.
If you are only recording vocals and the rest is done digitally, then it’s a pretty simple process…
But let’s imagine that you are recording a full band where you need to record the drums, bass, acoustic and electric guitars, vocals and backing vocals.
Sure, you might want to record everything at once and there is nothing wrong with that, in fact that’s how everything used to be recorded back in the day.
Having said that, if you decide that some things should be recorded separate, this is how I’d recommend you approach it;
Record the Foundations of the track first
By this I mean simply record the drums and bass.
One thing I’ve found is that if the drummer can properly play to a click track, he should do so.
After this, when it’s time to record the other instruments nobody needs to listen to the click track anymore since the drums have already been recorded in time, although they should.
This would be the ideal scenario since you, or whoever needs to record, can record on top of the actual drums that will go in the song, making it much more realistic than only playing to a click track.
However, and if possible, still use the click track even if you’re listening to the recorded drums.
Add the Harmonies
After the foundation of the song is set in place, you should focus on adding all the instruments that provide the harmony to the song.
In this case I’m talking about keyboards, piano, acoustic guitars, electric guitars, etc.
Basically, any instrument that is consistently adding to the harmonies of the song and not the melody.
Add the Melody
Here you would need to add the vocals, any guitar or piano solo, or any other instrument that needs to be featured.
After this has been accomplished you can then move on to adding the backing vocals, a second guitar that supports the solo in certain parts, etc.
The reason to do it this way is so that you don’t waste time adding melodies, for example, when the foundation of the song isn’t properly in place, because more often than not, you will end up deleting those melodies and re-recording them.
7. Choosing the right microphone for each application
Even though there isn’t just one best mic for each application, there are some basic rules that you can follow in order to properly record each instrument.
There is also an important factor which needs to be considered which is the placement of the microphones which I will also explain.
Let’s go over which mics should be used to record the most common instruments;
Acoustic Guitars
Here you have two option; Either use one large diaphragm condenser microphone or two pencil microphones, also known as small diaphragm condenser microphones.
Mic placement;
If you’re using one condenser mic then I find that the best way to get a good sound is by not moving the mic. Instead you move yourself and the guitar accordingly.
Aim it at the 15th fret and them twist and move around a bit until you like how it sounds.
If you decide to record it using two mics then you should use the X/Y configuration with one mic pointing to about the 5th fret and the other one towards the body of the guitar.
Related: Here’s my complete guide on how to Mix acoustic guitars, make sure to check it out!
Electric Guitar
Electric guitar can be recorded via a direct input using an Amp Sim Plugin or with a real amp using a dynamic microphone.
If you go back to the article I linked about the best microphones for beginners you’ll find a list of the three best dynamic mics which can be used to record a guitar cabinet.
Mic placement;
Again, just like with the acoustic guitar, you should listen to how the mic is picking up the sound.
You could point it directly to the center of the speaker or have it slightly off axis, which is how it’s commonly done.
But in this particular case I think it all depends on how it sounds.
Drums
This is the most complicated one of all, but don’t worry, it can be done!
The ideal setup would be to use one mic for each component of the kit and then two stereo pair mics as overheads.
But you probably won’t be going for that method so let’s see how to do it in a simpler way…
You can record a full drum kit using four mics; One for the kick, one for the snare and two overheads.
If you only have two mics then use them as overheads since this will pick up the entirety of the kit.
Lastly, if you only have one microphone you could place it about a meter or so in front of the kit which will also pick up the entirety of the kit.
Mic placement;
In this case I’d recommend that you watch this video by Sweetwater where they go into detail of how you should mic up the kit as well as how the mics should be placed.
Related: I’ve written an extensive guide on how to Mix Drums which might be super useful to you, so check it out!
Bass
To be completely honest here, you’re probably only going to record the direct bass signal through the audio interface.
However, if you want to mic up the bass amp, you definitely can do it!
Again, move the mic around until you find the sound you’re going for.
Vocals
Contrary to popular belief, condenser microphones aren’t better than dynamic microphones at recording vocals…
They just sound a bit different and depending on what microphone compliments the singer’s voice better, you should use that one.
The only reason not to use a condenser mic is if you’re recording with the whole band in the same room, in that case choose a dynamic one since it won’t pick up as much noise and won’t generate feedback.
8. Record to a click track
This is super important especially if you’re recording the whole band in one go.
What tends to happen when you play a song live with a band is that staying in time can be quite difficult…
For some reason we all tend to speed everything up.
So, having every musician in the band listen to a click track while recording is essential if you don’t want the song’s tempo to drastically change as it goes on.
Even if you are recording everything on your own, with a drum track laid down and everything, it’s still advisable to use a click track on top of the drums.
There’s nothing more frustrating than not being able to stay in time properly, so use a click track!
9. Learn how to edit your tracks
One important point, before I go any further, is this;
Most people think that they fix everything in the DAW by editing the tracks…
And while it might be true to some extent, there’s no replacing a good performance.
Sure, you might be able to adjust the pitch of a note that the singer missed, but unless you’re using pitch adjustment to achieve a certain effect, then I’d recommend avoid using it and instead trying to record a new take.
The same goes for any other processing…
No amount of work you do in post will fix a track that doesn’t sound that good to begin with, so make sure to get the best sounding tracks you can and then simply polish them in the DAW.
Now that that’s out of the way, here are the general guidelines;
- I like to start by organizing the workspace; Color the tracks so that they are easier to identify, add folders, etc.
- Adjust tracks that aren’t in time with each other.
- Use pitch correction if needed.
- Remove unnecessary tracks; an example would be all the different acoustic guitar tracks. Adding more won’t make it sound bigger but rather clutter everything up.
One important thing to remember is that if you go overboard with the editing you risk your track sounding completely unnatural.
After this we get to the other fun part which is…
10. Mix the Song
You recorded the tracks and you edited everything that needed to be edited, now it’s time to mix the song.
Mixing is all about making the song interesting and to take the listener on a journey, which means that you get to be creative here and add some flavor to the song… especially if it’s your song.
How to Mix a song?
Use Buses; This is essential. Create buses for each group of instruments, e.g. one for drums, one for acoustic guitar, one for electric guitar, etc.
This will allow you to process all those tracks through that buss applying the same effects to all tracks simultaneously.
Spend time on the balance; This just means leveling the faders of the instruments accordingly so that they sound great in the context of the mix.
Use EQ; EQ can be used in a multitude of ways. For example; to remove offending frequencies, to remove the low end (high pass filter), to enhance certain aspects of the instrument, etc.
Use Compression; Compression will help level out the peaks which will make everything sound more even. Don’t go overboard with this otherwise the song will have no personality.
Panning; Panning can add width and space to the mix. This will also make everything that’s in the center stand out more, like the vocals.
Check in mono; Consistently check how the mix sounds in mono to avoid phase issues… If it sounds good in mono then it also sounds good in stereo.
Automation; This is the key to making any mix sound interesting. Automation allows you to increase or lower the level of a certain instrument in a certain part of the song.
One of the most overlooked yet important concepts to getting a good sounding mix, is automation.
Effects; Add reverb, delay, phasing or any other particular effect which might add some flavor to the mix.
I’ve written extensive guides where I go into great detail about how to mix certain instruments which will be useful.
In these guides I explain all of these concepts and how to properly execute them.
One additional article that might be very useful is “how to mix an album” since you will need your songs to sound consistent in order to feel as part of one album.
Which brings me to my last point…
11. Master the song
Note: One very important thing to consider when you’re mixing a song is to leave enough headroom for mastering, no matter if you’re the one doing it or someone else.
This means that you shouldn’t apply too much processing to the master bus until you’re ready to do so… You can apply some, just leave headroom for mastering.
What is Mastering?
The purpose of mastering is to balance the sonic elements of a mix and optimize the playback among all systems as well as getting it to a commercial loudness level.
It’s generally done using EQ, compression, limiting and stereo enhancement.
People often times confuse it with mixing, and while they do share a lot of similarities, mastering processes the entirety of the song, more specifically the stereo mix of a song, and even the album so that it sounds coherent.
Note: In order to have a good master you need to have an already great sounding mix… mastering won’t fix anything that’s wrong with the mix.
Why should you master a song?
The whole point of mastering a song is to give it its final polishing.
You could think of mastering as the glue that holds the mix, or even the album together, making it feel as if every instrument is a part of the same song and not just a couple of different tracks all jammed together.
The whole mastering process requires you to have a trained ear since the changes you’re making to the song are extremely subtle, often times just a 0.5dB adjustment, so get ready to practice.
What to do after you Mastered your Songs?
Now it’s time to share your music and to get it onto every single streaming platform like Spotify, iTunes, etc.
It’s a fairly simple and inexpensive process which doesn’t take too long.
Read more about how to get your music out there here!
Conclusion
I know this was an extensive article to read… but I hope you made it all the way to the end.
There definitely is a learning curve to producing high-quality music at home and I know it can be frustrating at first…
But keep at it and try to improve as much as possible because before you know it, you’ll be producing awesome songs.
I hope this information was useful.
Have a wonderful day!
Comments are closed.