Last updated on January 4th, 2024 at 06:07 pm
When you are mixing a project, you have all these tracks, which could be guitar, bass, drums, samples, synths, vocals, you name it.
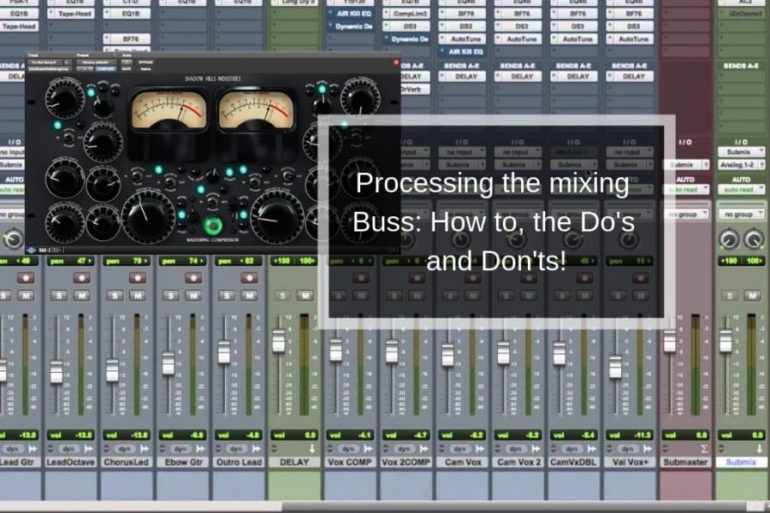
All these tracks get combined into a single stereo channel called the mix buss.
There are several things that you can do with this channel, some are advisable and will make your mixes sound even better, but some others will absolutely ruin it if done incorrectly.
I’m referring to the use of processors which will help you “glue” the mix together, such as EQ, Compressors, Limiters, etc. to also make it punchier and fix slight frequency imbalances.
Important note: There are no “strict” rules here, you should try different things and really listen. If it works for the song, then great.
Some engineers like to apply processors on the mix buss even before the mix begins, while some others prefer not to add anything at all, leaving this post-mix processing stage in the hands of the mastering engineer.
Others apply them after having already mixed most of the song.
There is no right answer in this case, if it works for you better than the other options, then keep on doing it, just make sure to try every option.
However, there are some basic guidelines.
Should you always process the mix buss?
Applying Compression, EQ, etc. to your mix buss can get your mix sounding great very quickly but putting on processing just for the sake of making it louder, especially if you plan on sending the mix to a mastering engineer, Isn’t a good idea.
This may leave your mix with little to no headroom, making mastering nearly impossible.
It can add character and color to your mix though, which is desirable. An example would be if the effects you are adding are for creative purposes.
A lot of mastering engineers will ask you for two versions of your mix, one without any processing on the mix buss and one with all the effects you added.
This will give them a general idea of what type of sound you are going for but without hindering their ability to master properly.
So, if you plan on sending your mix to a mastering engineer, exercise restraint when processing the mix buss.
But, and this is important, don’t rely on the mastering engineer to finish your mix, it’s your job to make it sound how you want.
Note: If you’re going to be mastering yourself, then you should be using the right tools. Here’s a list of the best Mastering VST Plugins currently available that should take your mixes to the next level.
Using Compression on the mixing buss
Compression is by far the most common processor used on the mix buss.
Routing all the tracks of a song through one stereo compressor will definitely help all the elements of the tracks glue together into a more cohesive sound.
No matter the music genre there is one thing each mix must have in common; Cohesion.
You want the mix to sound like a song, like an organic whole, rather than just a number of separate tracks that have been put together.
Applying a single compressor to the master buss not only gives all the tracks a similar sound and color, but most importantly it adds dynamic control.
You need to apply subtle amounts of compression, without squashing the mix. The ratio should be around 2:1 or even 1.5:1, resulting in a gain reduction of just one or two dB.
The point is to reduce the loud peaks and keep the track at a constant level.
The attack is absolutely crucial; Too fast and it will sound unnatural and lifeless.
As a basic guideline, set it up between 10ms and 30ms and adjust to the song’s needs.
The release is a bit trickier; A fast release will feel punchier and energetic while a slower one will give the song a smoother feel.
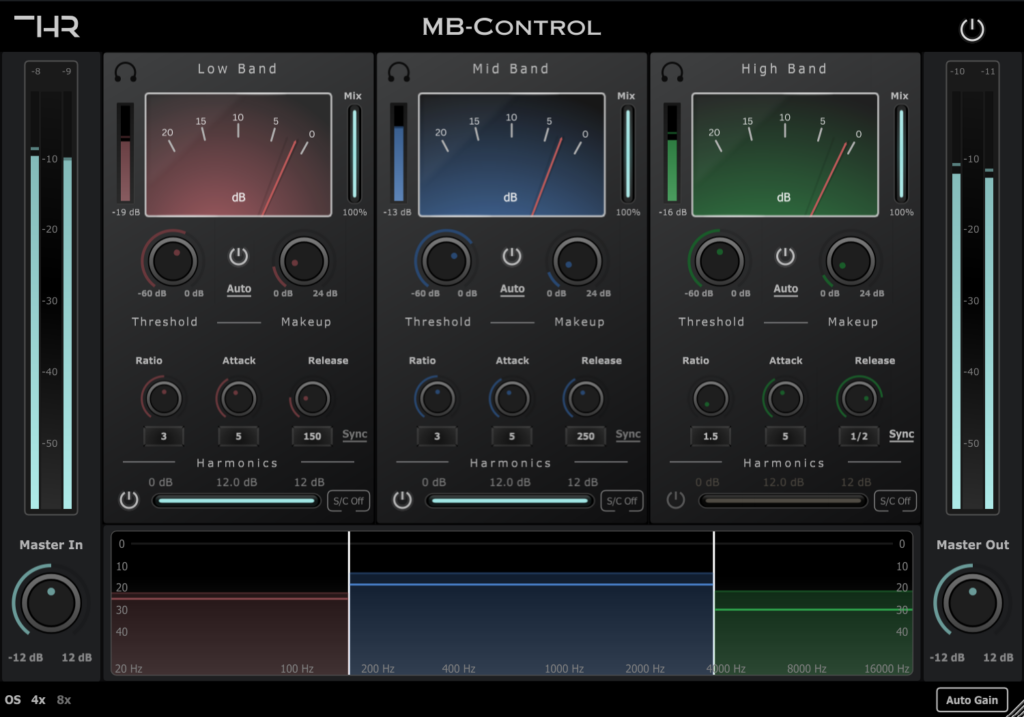
Multiband compressors aren’t usually your go-to choice when compared to wide-band compressor for the mix buss, but these can help control frequency imbalances as well as the dynamics in a simple way.
Note: Don’t use compressors, or any other processors for that matter, to fix your mix. My advice would be to check the individual tracks and fix those separately.
Remember to experiment with these settings, let your ears be the judge.
If you are looking for the best mastering compressors, then you should definitely check out the list I wrote (I tested them in various ways and those are the ones that made the cut).
Using EQ on the mixing buss
One of the most common practices of using EQ on the mix buss is to apply a small boost in the high end.
What this will do is add clarity to the mix, effectively sounding more “airy” and finished.
This is usually done using a high shelf EQ starting anywhere from the 8kHz mark to 12kHz.
You can use EQ to remove some muddiness in the lower frequencies.
This depends entirely on the genre, you may want to remove really low frequencies to clean up the track, while in some other cases you might give them a boost, usually between the 50Hz and 60Hz area, to add that little extra to the kick drum and bass.
Using a high-pass filter to remove the subsonic frequencies, which are usually 20Hz–30Hz, will clean up the track and most importantly, add headroom, which is important when mastering.
Note: When using EQ on the mix buss you should be very gentle with your boosts and cuts.
Anything you touch will affect the entire song, so only cut or boost up to 1-2dB max.
If you feel like it needs a little extra just go back to the individual tracks and adjust it from there.
This is especially important since whatever you do on your mix buss may be difficult to undo later during the mastering stage
When it comes to EQ and compression and which one to put first in the signal chain, there is no hard rule.
Remember to always reference with other songs of the same genre while applying EQ as a way to stay objective.
Use Saturation on Mixing buss with restraint
Restraint would be the key when applying saturation.
It should be used to add warmth and give that “Tape Saturation” vibe.
If you actually can hear the effect, you’ve gone too far.
Saturation can present huge problems in your mix if it’s applied to individual tracks, since it will start to add up.
Therefore, it’s best to apply it to the mix buss, especially in the early stages (this is an area that is highly debated actually).
Saturation is a great candidate for being added to the mix buss early, the reason behind this is that you will be mixing while listening to a subtle tape emulation the whole time.
Your decision-making will be different this way and probably in a good way.
However, not to sound like a broken record but, this all depends on what gives YOU the best result, this may work differently for other people.
Play around with automation
Automate your mix buss level fader.
Automating a song section or a transition to move up or down in subtle amounts, something like 0.5-1dB, can generate a huge impact and keep the listener interested.
Music is supposed to change, no song should be the same from start to finish.
You could make the volume of the intro and the verses lower than the chorus or the bridge. Another good way to do this is to up the volume on the last chorus to really give it the power it needs.
Automation can be used in many ways, not just volume (also not only within the mix buss automation is key when mixing individual tracks to make certain instruments pop out at certain times).
You can use it to change EQ or compression settings as well as turning on or off different effects.
You could change the position of an instrument in the stereo field, just automate the panning.
Automation in general is what tends to give your mixes a lot more personality.
Be Subtle
This is by far the most important point in this article, which I already touched on a couple of times.
Every little thing you do to your mix buss will affect every single track of your project.
Changing an EQ setting in the mix buss, where you only raise the level of a certain frequency range by one or two dB is actually equivalent to applying that EQ boost multiple times, once for every track.
This will affect drastically the sound of your entire mix, for good or for bad.
A good use of the mix buss is one of the best things that can happen to your mix, while on the other hand using it the wrong way will have catastrophic effects.
Avoid Stereo Enhancement unless you know what you’re doing
This goes back to my previous point about being really subtle when applying effects to the mix buss.
There is no hard rule about what processors you should or shouldn’t use on the mix buss, EQ and Compression are definitely the most common ones, but also using a stereo enhancer could be what your mix needs.
However, in most cases, adding a stereo enhancer will create more problems than solutions, especially phase issues.
Make sure to check your mix in mono constantly to make absolutely sure that there are no phase misalignment problems.
This is something that you should leave for the mastering engineer unless you absolutely know what you’re doing.
This brings me to my next point which is…
Avoid using a Limiter
For the longest time we used to think that volume was king, so we ended up trying to increase the volume as much as we could, but this is something that a mastering engineer should really do.
Since the most common delivery of music today is through streaming, you could say that the loudness war is over.
This is because of the simple fact that streaming services process the songs and even out the volume on all tracks.
There is no need for you to try to make it as loud as possible to compete with the others, since the streaming service will simply squash it down.
If you raise the volume too much, you don’t leave any headroom for mastering. This will result in a sub-optimal sounding song, so take that into consideration.
Also, over-using a limiter can squash your songs dynamic range.
If you decide to apply a limiter make sure to check for distortion as well as to really listen to the overall quality, since increasing the volume, as we know, creates that “everything sound great” effect.
Make sure to check with and without the limiter, since this loudness effect can fool you into believing that your mix is sounding better than it actually is.
One way of checking this is to listen to both versions at the same volume, just lower the level of your monitors until the limited version has the same overall volume as the unlimited one.
Are De-essers a good idea?
A De-esser on the mix buss isn’t the best idea, no. Unless you want to use it to attenuate some frequencies, but this should be done during the first part of the mixing stage.
Really dig into every single track and polish it as much as possible, after this, applying processing to the mix buss will be much easier.
Sometimes, don’t apply processing at all
This is a tough one since we tend to think that we need to process every little thing in the song in order to make it sound good.
However, sometimes it’s best to realize that the song doesn’t need much more processing other than the one you applied to the individual tracks that needed it.
This is something that is completely up to you and it’s a valid way of doing things.
Don’t be afraid to go back to your mix
Sometimes you are able to create a fantastic mix even before applying any processing to the mix buss, but as soon as you start to add effects, the balance of the whole mix gets affected in a bad way.
If this happens, then you shouldn’t be afraid to go back to your mix and look to change some settings on individual tracks.
The whole point of the mix buss is to glue an already good mix together and add some final touches and not to fix a bad mix.
What about multi-band compressors?

As I mentioned earlier, the effects you add to the mix buss are completely up to you and what works for the mix, and multi-band compressors definitely have their place but may be harder to use and to get sounding right.
They should mainly be used for creative purposes, but there’s a couple other ways that you should try and see how they feel:
Try using it to compress everything below the 200Hz mark (this of course depends on the actual song, adjust if needed).
Keep the gain reduction somewhere near the 6dB mark and use gain make-up to compensate for the volume loss.
This will help you glue the lower end together, like kick drums, bass, etc. without affecting the mid or high frequencies at all.
The same thing can be done with the mid-section; this will allow the snare, toms vocals, etc. to sound bigger and more exciting.
They jump out from the mix, without affecting its actual balance.
Just remember to compensate for the volume loss, this compressor shouldn’t be used to make anything louder, just to change the character of the mix.
Conclusion
When processing the mix buss, you should try different methods, even the ones they tell you not to, something might work and absolutely blow your mix out of the water.
Don’t rely on the mastering engineer to finish your song, his job is to polish and glue together an already great sounding mix.
You should be the one deciding how it sounds.
Everything you do should be with caution and restraint, every change must be subtle.
Remember, don’t try to fix a bad mix through the mix bus, go back to each individual track and fix it there.
Just practice and have fun!
Very useful stuff. Good job 🙂