
Last updated on April 17th, 2021 at 09:21 pm
Hi, I hope you’re having a wonderful day.
Mixing acoustic guitars isn’t really as hard as some think…
It’s definitely a lot easier than properly mixing drums, for example, however if you want your mixes to truly sound amazing, you’re going to need to learn how to mix acoustic guitars as well.
In this article I’m going to try my best to teach you everything you need to know; from mixing solo acoustic guitars, guitar plus vocals or even mixing it in the context of a whole mix…
I say this because there isn’t just one right way to do this, it all depends on what you’re mixing it with and the sound you’re going for.
Before I get into the actual mixing tips, there’s one thing that’s even more important which should be addressed…
Choose the right Microphone

I know this may seem as if it has nothing to do with “how to mix acoustic guitars”, but it’s essential to use tracks that sound the absolute best that they can.
Trying to fix a bad recording in post is nearly impossible…
Also, why try to fix something when you can easily get it right from the start?
The two most common ways of recording acoustic guitars are;
Using a single Microphone
Here you are generally going to want to use a large- or small- diaphragm condenser microphone, depending on the sound you’re going for.
If you’re an absolute beginner then I’d recommend using this method since it will help you avoid a lot of phase issues later on.
I have an extensive article about the best microphones for beginners where I cover a lot of the large- and small- diaphragm condenser microphones…
Feel free to check it out.
Using Stereo Pair Microphones
If you truly want the best sounding recording of an acoustic guitar, then getting a pair of small diaphragm condensers, or pencil microphones, is your best bet.
You will generally achieve a greater sound with two pencil microphones than with a single large diaphragm condenser, even though this might vary depending on how you want it to sound.
The only downside of using two microphones is what I just mentioned above… phase cancellation issues may arise… more on this later on.
If you’re thinking about recording with two microphones, then here’s a list I wrote about the best budget stereo pair microphones available, which should come in handy.
Now that that’s out of the way, let’s get straight into the mixing tips…
How to mix an Acoustic Guitar

Here I will go over some general Guidelines which you can apply to almost any kind of acoustic guitar mix.
Later on, I’ll give you some specific tips on how to mix them in the context of a whole mix, on their own or with just some added vocals.
Note: The DAW I’m using is Cakewalk by Bandlab which is a fantastic Free DAW.
If you want to know more about it you can check out my post about the best free DAWs available.
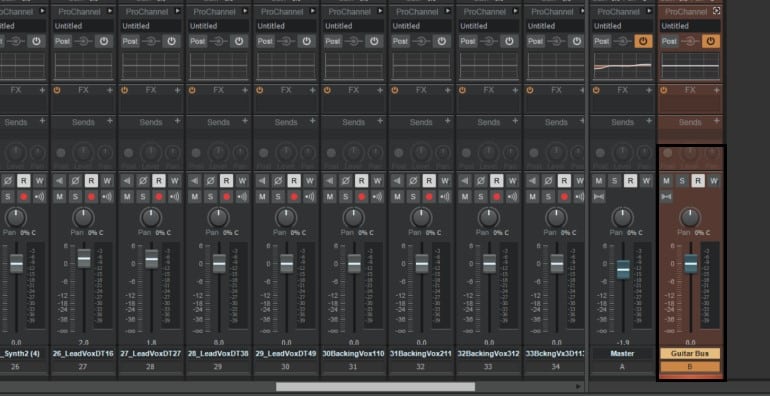
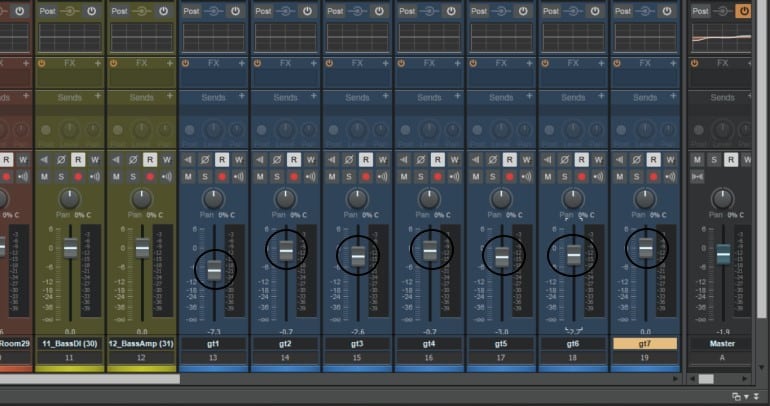
1: Send all the guitars to a Bus
This is something that I didn’t learn right away when I first got into mixing.
But let me tell you… it’s absolutely essential.
For those who don’t know what a “bus” is, let me explain;
A bus is simply a stereo track where you direct all of the guitar tracks to which works sort of as a master fader.
Why is this so good?
Well, on the one hand it lets you process all the tracks simultaneously, cutting down on the resources your PC needs by a ton.
The other thing using a bus does is that it helps the guitars sound more “coherent” and “glued together”, like they are all part of the same mix.
This happens because instead of using different Compressors, Reverbs, etc. on every single track, you’re applying them to the guitar bus…
Now all of the tracks are being processed at once, which means that the exact same settings apply to all of them.
This creates this sort of “acoustic glue” which really helps make the guitars sound a lot better but also, since you’re just using one compressor, one reverb, etc. on one track and not on every single one, you consume less of your PC’s resources.
Believe me, this will save you loads of time in the future… so make sure to always use a bus.
2: Mute Unnecessary tracks
While it might be wise to record the same part multiple times, or record using as many different microphones simultaneously as possible, it’s not necessarily a good idea to use all of those tracks.
While it might make sense to use multiple tracks to make the acoustic guitar sound as big as possible, more often than not it will generate more issues than anything else.
It may cause your mixes to sound muddy, cluttered and it can even create a lot of phase issues, which is why you should be cautious when doing this.
My recommendation is that you should really listen to how those tracks sound; if you start adding them in and they make the guitar sound better, keep them in…
If they don’t… just cut them out and avoid the headache, as simple as that!
3: Spend time on the balance
This is something I also mentioned a lot in my guide on how to mix drums…
After you sent all the guitar tracks that you’re going to be using to a bus, it’s time to set the levels properly.
And by this I don’t just mean balancing them so that the all sound good together, but also balance them to sound good within the entire mix.
Believe me, this is easier said than done… But it’s probably the most important step in this guide.
In fact, if you have really well recorded tracks, just setting the levels properly should already make your song sound damn well with no processing whatsoever.
So again, take your time and listen carefully.
4: Use a High Pass Filter
This is something that should always be done…
The low end doesn’t really do much for an acoustic guitar. This is why I’d highly recommend that you simply get rid of the low end completely.
What this will do is clean up the track, mostly removing the AC sounds, or your foot tapping on the floor, etc.
None of the frequencies where those sounds live do anything to add to the tone of the guitar, so just remove them.
Also, low frequency tends to add up really fast which is something you really want to avoid by cutting them.
How to do it?
The best way to use a HPF and not affect the tone of the acoustic guitar is by increasing the frequency point until you can actually hear it affecting and thinning out the tone of the guitar.
After this just roll it off a bit until you can no longer hear it being affected.
This will effectively get rid of the low end without interfering with the guitar’s tone one bit.
Note: In a solo performance, or vocals plus a guitar performance, go easy on the High-Pass filter… more on this in a bit.
Speaking of removing unwanted sounds…
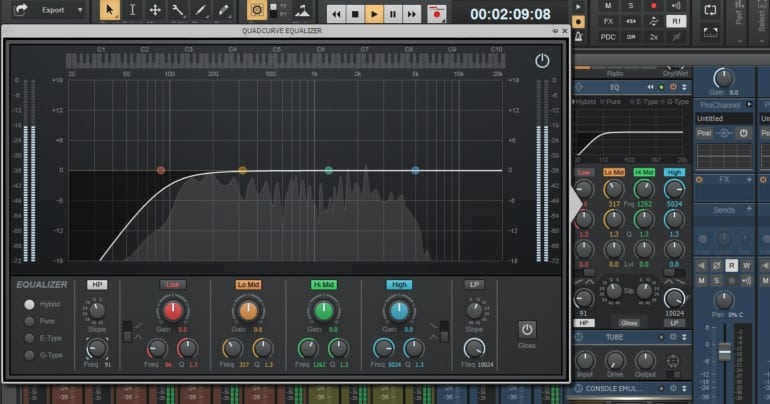
5: Use EQ to Remove Unwanted Frequencies
This is something that will vary a lot on every single track, but the concept is actually quite simple to understand and execute;
If there are some annoying frequencies sticking their head out, just cut them down a bit.
Here’s how to do it;
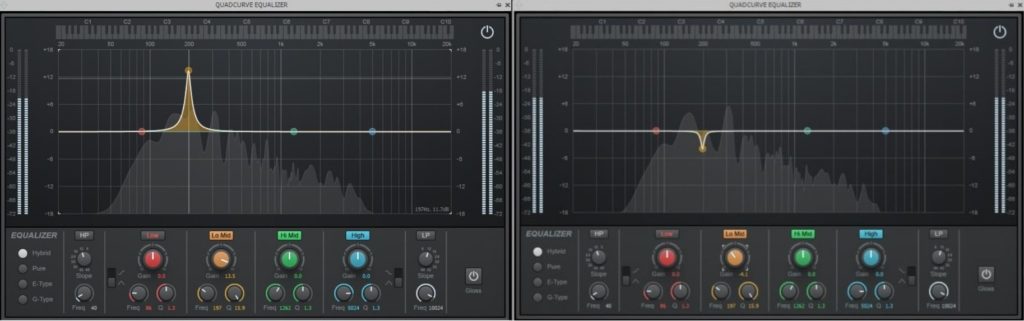
Step 1: Start listening to every guitar track in “Solo” and find out which one is responsible for those frequencies you need to remove.
Step 2: Use an EQ, it doesn’t need to be a premium one since any stock EQ will do fine.
Now use a very narrow EQ to sweep for the frequency that needs to be reduced.
All you need to do is add some dB to the EQ and start moving it from side to side.
Once you reach the offending frequency, the annoying sound should be much more apparent.
Make sure to pinpoint it as best you can.
Step 3: Simply drag the EQ down as far as it needs to go, making sure that it’s as narrow as possible.
This way you will only affect that specific frequency range and not a wider one.
Hopefully, if you’ve done this right, the offending sound should now have disappeared or at least be much lower.
Note: If it can be heard on all the guitar tracks, simply apply this technique on the bus itself.
I find that this generally happens more on strummed acoustic guitars, specifically on the down strum where you can clearly hear how the lower frequencies just jump out.
This can generate a lot of muddiness and boominess in your mixes and should be addressed by lowering those specific frequencies a bit.
I find that it tends to happen around the 150Hz-200Hz range.
Also, and this doesn’t happen as often but it still does, some guitars tend to have some issues in the mid range where they get that “nasally” kind of sound.
It generally seems to be near the 1kHz mark, so also keep an eye out for that!
But in all honesty, just listen carefully and pinpoint the frequencies that need to be removed yourself since it will vary a lot depending on the recording.
Moving on…
6: Compress if needed
This is a highly debated topic; whether or not to compress an acoustic guitar.
However, I find that using compression to tame the acoustic guitar a bit can help… but don’t just compress it because you can, really listen to see if it actually is necessary.
If you compress the acoustic guitar too much you will suck the life out of it, killing the tone, and you really don’t need to go too hard on the compression to make this happen.
One thing to note is that it depends on what the purpose of the acoustic guitar actually is in the mix…
If it’s just an acoustic guitar with some vocals and nothing more, then maybe don’t reach for the compression right away, since you don’t want to flatten it out, unless you feel that it might help the song.
However, if it needs to sit tightly in a rock or pop mix, then it’s a good idea to add some since it will get rid of some of the volume peaks.
This will make it that much easier for the track to really sit in the mix properly.
But like I mentioned, don’t go overboard with it, otherwise it will sound smushed and even sort of “fake” which is a definite NONO!
Some compressors have a mix knob which will allow you to blend the original signal with the compressed one.
This can certainly help you achieve some compression without killing your tone, so play around with it a bit to see how it affects the track.
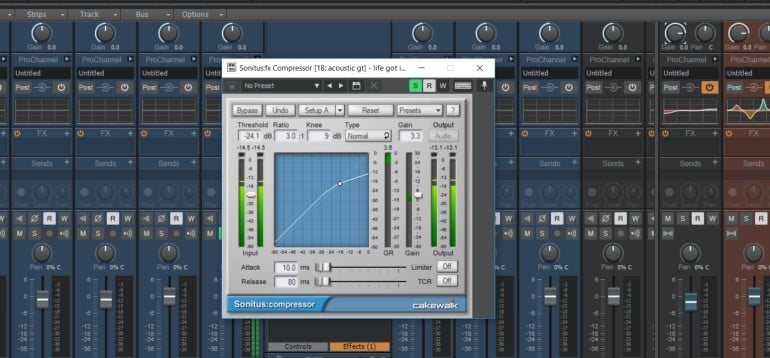
IF I decide that the acoustic guitar does need some compression, these are the settings that I seem to go for the most;
- A really low ratio no higher than 4:1 with the attack somewhere around 30ms (if it’s too fast you may compress the sound of the pick).
- The release should be a fairly fast one, so around 50ms-150ms should be fine!
- Lastly, only aim for a slight dB reduction of max -3dB, otherwise it will get tin the way of the tone.
There’s a cool way to apply compression to acoustic guitars which I learned from a video by Joe Gilder on YouTube (link to his video).
What he does is he turns the threshold and the ratio all the way down and then simply starts to roll up the ratio very slowly while listening to the song, without going over a 1:5 ratio.
This will compress everything, not just the peaks, but very slightly, giving you a very smooth sounding compression.
Neat little trick! You should also subscribe to him… he runs a great channel!
Moving on…
7: Boost the Highs if necessary

Boosting the high end using a high-shelf EQ can really boost the “air” frequencies giving it a bit more sparkle.
But be careful not to add too much here since it can end up sounding harsh!
Note: You generally want to cut before applying a compressor and then boost AFTER the compressor.
8: Add some reverb
If it’s just a solo guitar performance then you could add reverb to that track on its own, however if there are more tracks in the mix then I’d recommend that you create a reverb bus and send the tracks to it.
Of course, how much reverb you want depends on the sound you’re going for and the genre…
But I generally don’t like to be able to hear the reverb but rather be able to feel it.
What I mean by this is that it’s just adding a bit of depth to the instruments without being overwhelming.
Again, this depends on what type of sound you’re going for.
The great thing about using a reverb bus is that you will be able to apply the exact same reverb to all the tracks simultaneously and with the same settings, which will make them sound more “glued together”.
Generally, especially in a bigger mix with more instruments, I like adding a bit more reverb to the acoustic guitar so that it gets “pushed back” in the mix.
However, if the acoustic guitar needs to be featured, then avoid adding too much reverb to it for that same reason… it will get pushed back.
This concept applies to every other instrument as well…
Now I’ll go into a bit more detail on what should be done in every specific situation like mixing a guitar with a whole band, or just with some vocals, or even how to process it if it’s a solo guitar performance.
How to Mix an Acoustic Guitar in context with the Mix
How to mix an acoustic guitar to properly sit in a mix can be challenging at times, especially since there are so many other instruments which may end up competing for the same frequency range…
But to be honest, I often find that it’s easier than just mixing a guitar plus vocals performance.
Of course, all the steps I mentioned earlier are super important here…
Just a quick summary so you don’t have to scroll back up;
- Make sure to send all the acoustic guitar tracks to a bus.
- Mute unnecessary guitar tracks.
- Take time on the balance.
- Use a High-Pass Filter.
- Use EQ to remove unwanted frequencies.
- Compress only if it’s needed.
- Boost the high frequencies.
- Add Reverb.
When trying to make an acoustic guitar part sit properly in the mix it’s not just important to follow those eight steps…
But to also pay special attention to the range allocation, the panning, phase issues and even the effects you add to the guitars… and let’s not forget about parallel compression.
Range Allocation
Range allocation is the process in which you designate a certain frequency range in the mix for every instrument to live in.
This will make it so that no instruments are competing with each other which will make the whole mix sound clearer and less muddy.
How to do this?
Well first you should use a high-pass filter to get rid of the low end since this should only be occupied by the bass and drums.
Next you need to boost the acoustic guitar a bit in the frequency range where it will enhance its natural tone.
Again, this is something that you will need to do by ear since it will completely depend on what is being played both in the track itself and the mix.
What I mean by this is that you’ll have to boost in a completely different place if the guitar is being played with a capo on the 7th fret instead of being played without one.
Once you find the range where it needs to be boosted, do so… but do it slightly.
Boosts tend to be very noticeable, so make sure to give it a wide and slight boost of no more than 5dB.
Finally, once you boosted the section of the guitar that you needed, it’s time to cut in the range where other instruments have been boosted.
This will allow all instruments to better cut through the mix, if done properly.
I will say though… this takes some time to learn and to do properly, but with practice you should master this fairly quickly!
Pan the Guitar
One of the best ways to make room for the vocals, or the melody in general, is by panning things out of the way.
The vocals are always completely in the front and in the center of the mix, but luckily everything else can be moved to the sides to make room for it, even the acoustic guitar.
Not only is this good to give the vocals a presence boost, but it gives the entire mix a much wider feel…
You can pan everything however you want…
For example; I like picturing the band playing in front of me and panning accordingly while keeping the kick, snare, bass and main vocals in the center.
The acoustic guitar can be panned a bit to the left while the electric guitar can be panned slightly to the right.
It all depends on how you want to make it sound, but giving it that sense of space is something that you absolutely should be aiming for.
There’s a neat little technique called LCR panning where you pan everything that you don’t want in the center 100% to each side.
This is great for creating a lot of space and it is more commonly used in heavy rock songs.
Basically, you keep your main vocals, snare, kick and bass dead center and everything else is panned all the way to the sides.
When using LCR, since everything is 100% panned there will never be any phase cancellation issues… unless to decide to play the mix in mono.
Which brings me to my next point…
Check for Phase Cancellation issues
Phase cancellation can be detrimental to any mix since it thins out the sound of whatever is being affected.
If you have more than one acoustic guitar track that’s playing the exact same thing, chances are you’re going to get some phase issues.
If you play the acoustic guitar in the context of the mix and it thins out noticeably when compared to how it sounds when soloed, try activating the “polarity flip” switch.
In many cases it might solve the problem, otherwise you’ll want to really zoom in and slightly nudge the guitar track backwards or forwards so that the phases align.
One really easy way to find out if this is occurring is by listening to the mix in mono… this will expose any kind of phase issues going on since it collapses all tracks together.
I have an entire post on why it’s important to check the mix in mono which you should definitely check out.
I also go into much more detail on how properly deal with phase issues, so if you don’t how to fix this, feel free to read the post.
Up next…
Add Modulation
Adding some modulation like a chorus will further push the guitars back in the mix since you’re taking away some of their “sharpness” by making the pitch shift slightly.
I would only use this if I wanted my guitar to be sitting in the background, but it if I’m looking for a more upfront, rhythmic, “in your face” kind of tone, then adding modulation will probably ruin it.
Now I’ll give you one nifty little trick that will add a lot of flavor to your acoustic guitar sound…
However, it’s not really a mixing technique but rather a different way of recording the guitar completely.
Use Parallel compression on the acoustic guitar
This is something that I got familiarized with just recently.
Using parallel compression on acoustic guitars, or anywhere else on the mix, can either do wonders or destroy the entire mix… so tread lightly.
The way to use it in this case is to parallel compress the guitar a lot… and I mean a lot, and then blend it with the original uncompressed one.
This should simply add a bit of personality to the guitar, not kill the tone. So, make sure to keep the level on the compressed one pretty low.
This works wonders especially on arpeggiated parts which can sometimes sound very uneven.
Extra trick to enhance the acoustic guitar tone
If you want to add some flavor to a guitar part that was recorded then you could record another one on top of it but this time using a guitar that has a different string configuration…
By this I mean replacing the top 4 strings with the high electric guitar strings… yes, electric guitar strings.
You replace the G, D, A and E strings with the high E, B, G and D strings respectively and tune them one octave higher than what the original tuning would be.
What this will do is give you the higher strings of a 12-string guitar without all the lower ones.
Why is this awesome?
Well, it makes playing articulated stuff a lot easier since you don’t have to hit two separate strings at the same time, but also, it’s great to record some strumming on top of an existing guitar part.
You simply play the exact same thing but since the strings are much higher pitched it will give it a whole different texture… similar to a 12-string.
Yes, it’s a pain in the behind to change the strings, which is why I’d only recommend doing this if you have an extra acoustic guitar lying around.
This about covers everything about how to mix the acoustic guitar in context with the full mix…
Next on the list…
How to Mix acoustic Guitar and Vocals
Again, just like I mentioned right at the beginning of this article, the most important thing is to use quality tracks…
No matter how many plugins you use, your mix will never sound as good if you’re using a bad recording…
Now, properly mixing just the vocals with the acoustic guitar sounds like it should be very easy to do, I mean… it’s just two tracks… right?
But more often than not you’ll find that it can actually end up being quite more difficult than mixing it with a lot of other tracks.
Most of the same steps I described earlier apply here too…
However, if it’s just one guitar and one vocal track, the only reason to send them to a bus is for reverb… which you should do.
So, in this particular case I’d focus more on these key points;
- Take time on the balance.
- Use a High-Pass Filter (if it’s really needed)
- Use EQ to remove unwanted frequencies.
- Compress only if it’s needed.
- Boost the high frequencies.
- Add Reverb.
Let’s get into the specifics…
EQ Vocals and Acoustic Guitar
For both tracks you’re going to want to search and destroy any frequencies that might be poking their head out in an unpleasant way.
For example, like I mentioned earlier, if you have a recording of a strummed guitar, it’s quite common to get that boominess when the down strum happens.
Finding the specific frequencies responsible for this and lowering them a bit will make a huge difference in how the mix ends up sounding.
But there are no hard rules here since it all depends on the recording of the tracks themselves.
So, make sure to sweep around with the EQ to find every single frequency that might need some cutting and do it… there might be several.
Another common EQ that I tend to use on my acoustic guitars in a slight boost around the 50Hz-60Hz mark.
This will give the guitar some extra body, and since there are no other instruments in that low end, you may need something to fill it up a bit.
Moving on…
High-Pass Filter
When it comes to the HPF it’s not really that necessary to use one since there isn’t any low end that can get in the way.
I wouldn’t use one on the acoustic guitar unless there’s some stuff going on in the very low-end; like an AC, footsteps, etc.
However, I do recommend using one on the vocals just to get rid of some of the lower guitar bleed.
High-End Boost
This is a very common technique used almost in every guitar and vocal recording.
Giving the high end a slight boost can definitely open up the tracks and give them more “air”.
But be careful to not boost too high since it can end up sounding harsh.
Compressing Acoustic Guitar and Vocals
I know I already mentioned this, but be very careful when compressing the acoustic guitar… you don’t want to suck the life out of it.
The way you’re going to be compressing both tracks is fairly simple;
- Use a very low ratio: I’d say no more than 3:1.
- Don’t squash the sound: Just aim for a slight dB reduction on the peaks since this will even out the performance.
- When it comes to the attack and release settings just play around with them. I like a fairly fast attack of about 10ms and a release of about 80ms…
You can do this in solo but consistently listen in context with the other track to see how the changes affect the entire song.
Next…
Adding Reverb
Lastly you should create a reverb bus and send your tracks to it to add the same reverb to both.
You can play around with how much or how little reverb you want on each track.
Just make sure not to completely drown them in it… but the amount of reverb you add to each of them is a matter of taste.
How to process a Solo Acoustic Guitar Performance

As you can imagine, processing a guitar on its own is much simpler since you don’t need to worry about how the changes are affecting the way it sounds in the context of a mix…
To be honest, if you already have a great sounding recording you may not even want to touch the EQ…
Just adding some slight compression, if you feel like it makes it sound better, and reverb may be all you need.
However, the same rules apply in this case; If you feel like it needs a bit more low-end, simply boost it a bit until it sounds like you want.
If there are some ringing sounds, or some frequencies that you don’t really like, lower them a bit using the EQ.
The great thing here is that you can really focus on the guitar itself and adjust everything you like without needing to worry about how it’s going to fit in a mix.
And lastly…
Summary of How to Mix an Acoustic Guitar
In order to properly mix acoustic guitars you should really focus on;
- Sending the guitars to a bus
- Muting unnecessary tracks
- Spend time on the balance
- Use a High-Pass filter
- Remove unwanted frequencies with EQ
- Compress only when needed
- Boost the High-End using a shelf EQ
- Control the range allocation
- Pan the guitars
- Maybe add some modulation and lastly
- Add reverb
Conclusion
After reading the entire post you might be thinking that this is way too complicated and that every mix is going to take you forever…
But you can actually go through these steps in no time and achieve a killer guitar sound.
You just need to get used to it…
Follow all these steps and I promise that your mixes will be sounding better in no time!
I hope this information was useful.
Have a wonderful day!
Thanks for your really useful and clear summary of what’s needed in this process.
Am I glad I found you!
I am brand new to this at 84 yo.
Your STEP-BY-STEP, plain, simple, easy to understand explanations using everyday language is a RARITY. I do recording as a hobby, now that I have the time. I’ve learned more from you in three weeks than from others in three months, only because you explain tech jargon in step-by-step simplicity.
Thank you