Last updated on February 12th, 2021 at 11:12 am
When recording, we have a huge array of choices and setups we can use.
Using the X/Y configuration is one of the most common ones, but there is also the Mid-side configuration which can give you some added flavors. Some people seem to think that this one is the better option.
This begs the question, is recording using the mid-side configuration better?
Mid/Side allows you to use one cardioid microphone to record facing the instrument and a bi-directional mic to record the sides (in a 90-degree angle to each side from the cardioid microphone), and this allows you to control the stereo image by increasing or lowering the side microphone’s volume.
X/Y uses two cardioid microphones in an X/Y fashion and also creates a stereo image, but doesn’t allow for additional control of it.
The basic difference is that mid-side allows for greater stereo control.
Let’s start by going over what both of these setups are and how they work, which will give you a better understanding of when to use them.
What is the Mid-Side configuration?
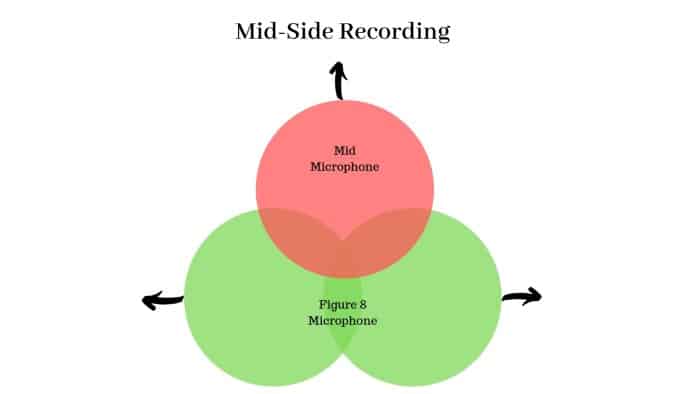
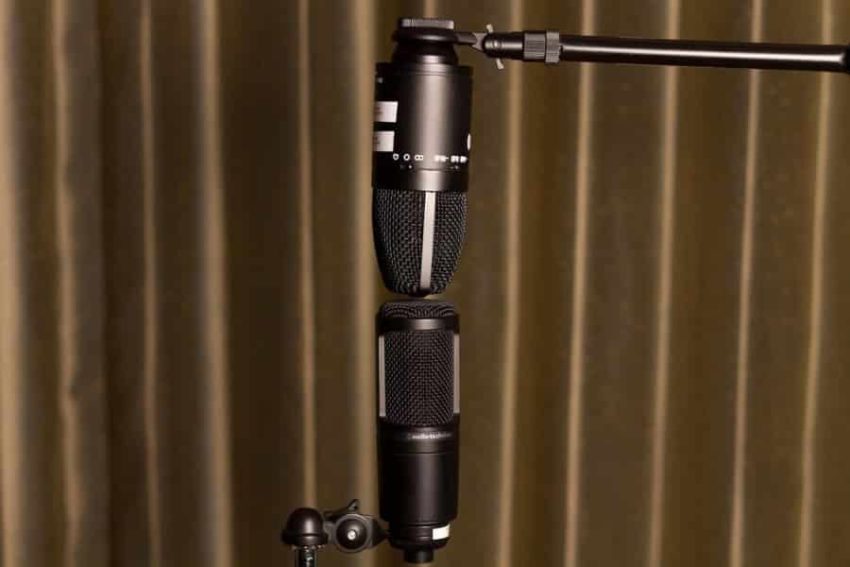
The mid-side configuration uses two microphones with different polar patterns which are stacked perfectly on top of each other, one with a Cardioid pattern, which is the “mid” one, and one with a “figure eight” pattern, which is the side one.
The “mid” microphone is set up facing the sound source directly while the “side” one is 90 degrees off-axis.
This means that the mid one will act as a center channel while the side one will be creating more of a stereo image.
By adding or subtracting information from either one of these microphones, you have the ability to change the ambience and directionality…
Need more of a stereo feel? No problem, add more volume to the side mic!
Don’t feel the sound source present enough? Increase the level on the mid mic.
How to use this method properly?
When recording using this method, the signal from each microphone is recorded to its own track.
The next step is to duplicate the side track and create two separate channels.
Then invert the phase on one of them.
If you don’t do this, you will have two centered signals which will add on to each other.
Of course, since you inverted the phase, now you can’t hear anything, because they are cancelling each other out!
Now you hard pan them! One 100% left and the other 100% right. After this you will be able to hear them again.
What you have created now is sort of a “stereo fader” … by increasing the volume on both channels you create more ambience, while reducing it makes the sound recorded by the mid mic feel more present.
When using this method, the best way to go about it is to link the volume faders of both of the side-tracks together and turn their volume to cero.
After this press play and listen to the recording of just the mid microphone.
Slowly start increasing the volume on both the side tracks until you find the desired stereo effect.
What are the benefits of Mid-Side recording?

Versatility.
Being able to control how wide you want the stereo image to be by increasing or decreasing the volume of the two side-tracks AFTER it has been recorded, would otherwise be impossible using the something like the X/Y configuration.
Give it a try, and while at it, try lowering the Mid microphones volume while increasing the one from the Side microphone and see if you to feel the sound source sort of “move away” as the stereo field increases.
Mono compatibility.
Remember that you had to invert the phase on one of the tracks? Doing this helps a lot when listening back in mono!
This is because the side tracks, that you panned, will now be put together and cancel each other out. This will create a perfect monaural signal.
Another great benefit is that most of the ambient sound that can be picked up while recording using this method will be picked up by the side mic, and since both tracks are cancelling each other out once collapsed into mono, all that ambient sound will be eliminated, which increases the clarity of the mix.
You don’t need matching microphones!
Since the stereo information comes from only one mic with a “figure 8” polar pattern, there is no need for both mics to be identical.
I wrote an entire post about stereo pair microphones which might be useful to you, make sure to check it out.
Let’s talk a bit about X/Y!
This is the most common stereo recording technique out there and it’s the one most people lean first. It’s used for instance to record a solo acoustic Guitar.
The way to approach this is by using two identical cardioid microphones, usually small-diaphragm condenser microphones, that you position at right angles or 90 degrees.
The most common way is to stack them on top of each other, this way the capsules are in perfect alignment, which will help with avoiding phase issues.
Of course, you could increase or decrease the angle. It’s most commonly used from 90 degrees all the way up to 135 degrees, which will determine how wide of a stereo image you are getting.
Each one of the tracks recorded using this method should be panned, one right and the other left, otherwise you don’t get the stereo effect.
One issue you can have while recording using the X/Y method is when switching to mono, which is something that could happen if your songs are played on the radio, for instance.
Switching to mono in this case will sum both channels, contrary to the mid-side configuration, where the side tracks cancel each other out.
Unless the mic placement has been done perfectly, you can get some phasing issues.
The mid-side configuration, in a sense, is kind of equivalent to the X/Y. When adjusting the side signal, it ends up being similar to changing the angle on a X/Y: Less side volume is equivalent to a narrower X/Y angle and vice versa.
So, why choose one over the other?
Versatility!
Using Mid-side will give you much more control over the perceived stereo image, plus it’s really easy to do!
The X/Y technique, is a stereo recording after all, which will allow you to manipulate it in various ways in post, but not with such a precise control as with the mid-side.
Mono compatibility.
Mid-Side will definitely make this easier, but remember that since the side signals cancel each other out, once it turns to mono it might sound empty, since only the mid signal is coming through the mix.
When to use one or the other?
Now, in this next point I should make it very clear that it comes down to preference. You should try them both and see which one is best for a given situation.
There is no best technique in this case…
Having said that, I usually use X/Y mostly for my SOLO acoustic guitar performances, while mid-side suits me better when recording two or more musicians.
Placing the lead musician in the middle so the Mid mic will pick up more of his performance, while placing the other two musicians a bit more to the side.
Now you have a better control over which instrument / musician sounds more present through adjusting the side mics volume.
You could use both of these methods with two separate microphones OR you could use the Zoom H2n, which is my favorite portable recorder, that has both X/Y and Mid-side configurations plus also a surround option.
You can also download a Mid-Side Decoding plugin to control the amount stereo that you want.
If you want to read more on how to use this recorder properly, here’s a post a wrote where I show exactly how to use it!
Conclusion
As I just stated above, it’s a matter of preference. I would suggest you lean them both properly and find out which one you like better for each type of recording.
Hi, thanks for the great article!
Maybe good to know for some people wanting to do portable mid-side stereo recording: the Shure MV88+ Video Kit microphone is a cardioid condenser mic and bi-directional mic in one. The app (iOS and Android) allows you to record in “raw mid-side”, giving you a stereo recording with cardioid left and bi-directional right. All you need to do is to split up the stereo track and then do the invert-and-pan-hard steps as described here.
Big plus: mic alignment is always perfect 90 degrees!