Last updated on January 24th, 2023 at 04:34 pm
FL Studio is the most popular DAW currently out there, especially when it comes to EDM, but also with Hip Hop, and other similar genres.
Now, recording vocals isn’t as simple in FL Studio as one would think and you need to set some things up beforehand.
So, in this article, I’m going to teach you all the necessary steps you need to take in order to be able to do so!
Let’s get started!
Requirements to be able to record Vocals in FL Studio
- A Microphone and a way to connect it to the Computer (USB mic, 3.5mm jack, or USB Audio Interface).
- Proper Drivers (to reduce latency).
- Headphones (closed back if possible).
That’s all you really need to record vocals, or audio in general, in FL Studio. There might be some additional pieces of equipment like a boom arm, mic stand, pop filter, etc. that will make your life easier and also improve the quality of the sound, but these aren’t 100% necessary.
How to Record Vocals in FL Studio
If you already have a recording device ready, it’s time to move on to the steps you need to take in order to be able to record, since FL Studio doesn’t make it as simple as some other DAWs.
Install the proper audio drivers
In order to be able to record a good signal in FL Studio, you first need to get the proper drivers, install them, and select them in the Audio Configuration settings of FL Studio.
If you are using a dynamic microphone and connecting it straight to your computer via the 3.5mm microphone jack, then you will need to download ASIO4ALL, an open-source audio driver that is capable of reducing the latency to a point where you won’t feel it.
If you own an Audio Interface, then install its proprietary drivers since they are the ones that will work the best (you can find them on the interface’s website).
Lastly, if you have a USB microphone, like the Blue Yeti, then you may not need to install any drivers since those devices are usually plug-and-play.
Here’s a list of where you can find some of the drivers you may need:
- ASIO4ALL (For anyone that doesn’t have an Audio Interface).
- Focusrite.
- Audient.
- Behringer.
- PreSonus.
- SSL.
Once the drivers have been installed, it’s time to open FL Studio and actually select those drivers by adjusting the Audio Settings.
Adjust the Audio Settings in FL Studio
FL Studio allows you to use any of the installed audio drivers to input and output audio, but the thing is that some of those drivers introduce a lot more latency and can cause a whole host of issues, which is why you should always use the one that is designed for your interface (If you don’t have one, use ASIO4ALL or try the FL Studio ASIO, which already comes included).
Here’s how to do it:
- Go to the Options Menu and select Audio Settings.
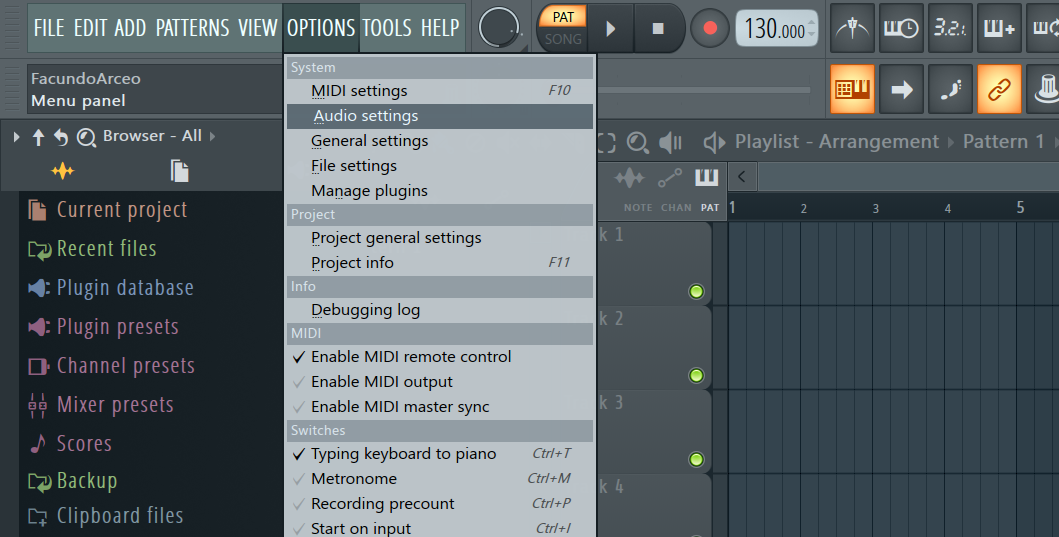
- Click on the Device tab and select the Audio Driver (By default it’s generally FL Studio ASIO but choose the one that corresponds to your interface).

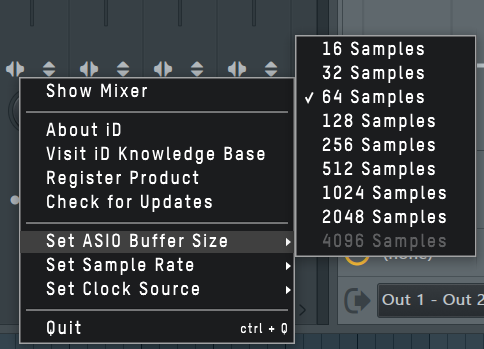
- Click on the “Buffer Length” box right below and change the buffer settings (The lower the buffer, the lower the latency, but this may also introduce pops and clicks if it’s too low).
Note: Depending on the audio driver, you might not be able to adjust the buffer by clicking on that button. In that case, go to your taskbar and right-click on the icon of your audio device to adjust the settings from there.
Assign the microphone input to a mixer channel
In order to be able to record audio, you will first need to ‘tell’ FL Studio what device it needs to record and what channel it’s going to be assigned to.
Like most things in FL Studio, this is very intuitive to do, here’s how:
- Click on the channel you want to record to in the mixer (in my example I’m using the first channel/Insert).
- Select the Audio Input Source by clicking on the dropdown menu on the upper right side of the mixer (right beside the little watch icon).

- If you’re recording a mono signal, which is the case 95% of the time, choose Input 1 (May be labeled as In 1 or something similar depending on the drivers you’re using).
- If done properly, you should be able to see the metering display move when you speak into the mic. This means that FL Studio is picking up the sound.
Note: Your interface may have multiple inputs, so the input you choose needs to correlate with the one which the mic is plugged into. If you’re using a USB Mic or connecting to the PC via the 3.5mm mic input, then choose Input 1.
Arm the track to be able to record
The next step is to “arm” the track, which basically means that you’re letting FL Studio know that you’re going to be recording audio to that track, and this is done by clicking on the little circular dot on the channel.

Lastly, you need to click on the “Record” button of FL Studio’s taskbar (this won’t automatically start to record like in all other DAWs, but it’s just letting FL Studio know that the next time you hit Play all the armed tracks will be recorded).
Note: Make sure that it’s set to “Song” mode and not “Pattern” mode when recording audio.
Record Audio
The last step is to record the audio onto the playlist. To do this, if you armed the track and enabled the record button, all you have to do is press “Play” and it will automatically record, and that’s it!
However, you can also record audio directly into FL Studio’s Audio Editor called Edison:
Record Audio Into Using Edison
Edison is FL Studio’s extremely powerful built-in audio recorder and editor that you can use to record tracks, edit them in multiple ways, add effects, reverse, and do all sorts of things.
Here’s how to do it:
- Click on the track in the mixer you want to record to.
- On the right-hand slide of the mixer, click on “Slot 1”.
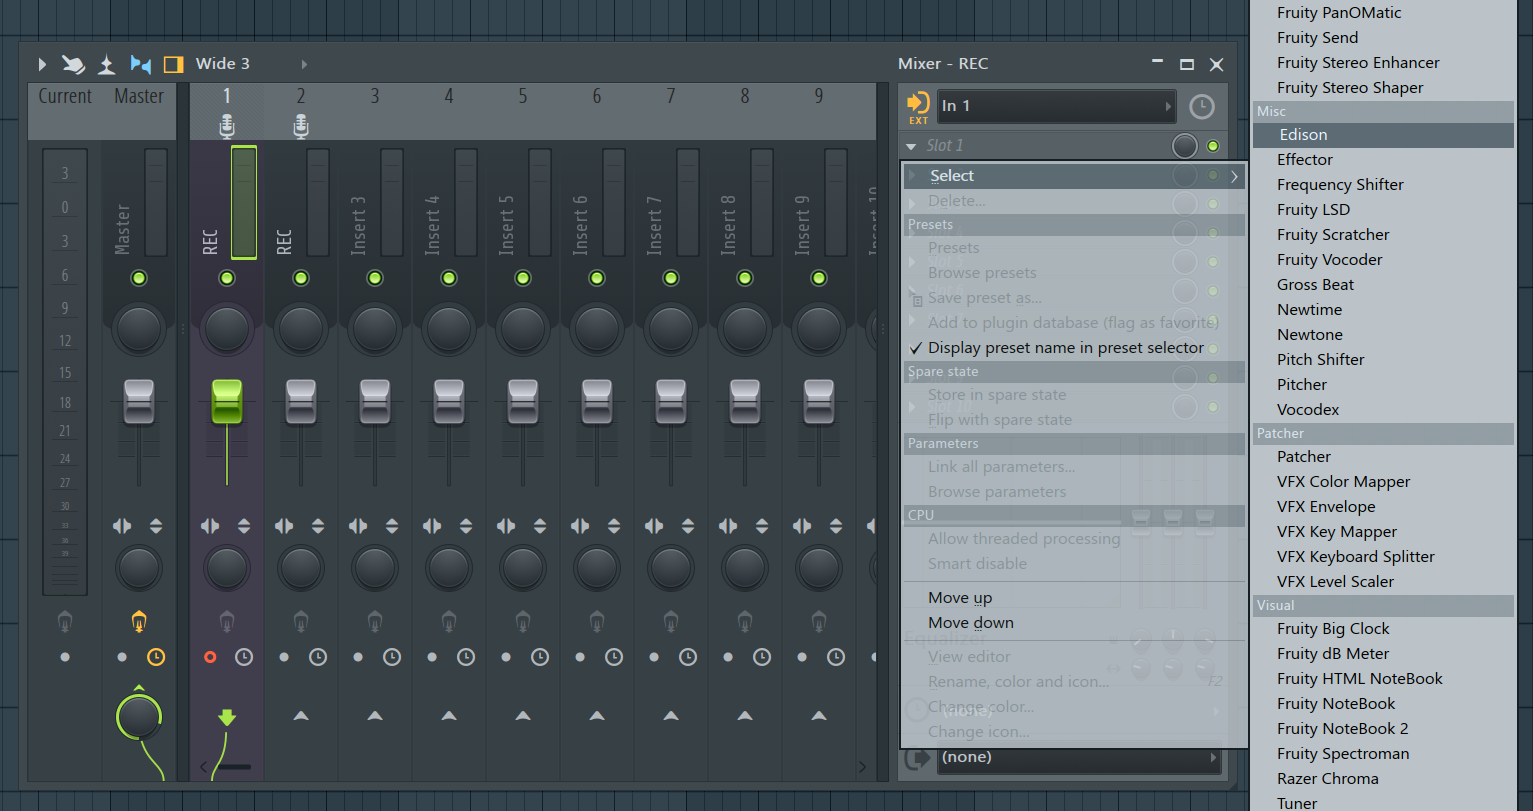
- Look for Edison and click on it.
- Press the record button and, depending on the settings you selected, it will automatically start recording or wait to do so when the song is playing.
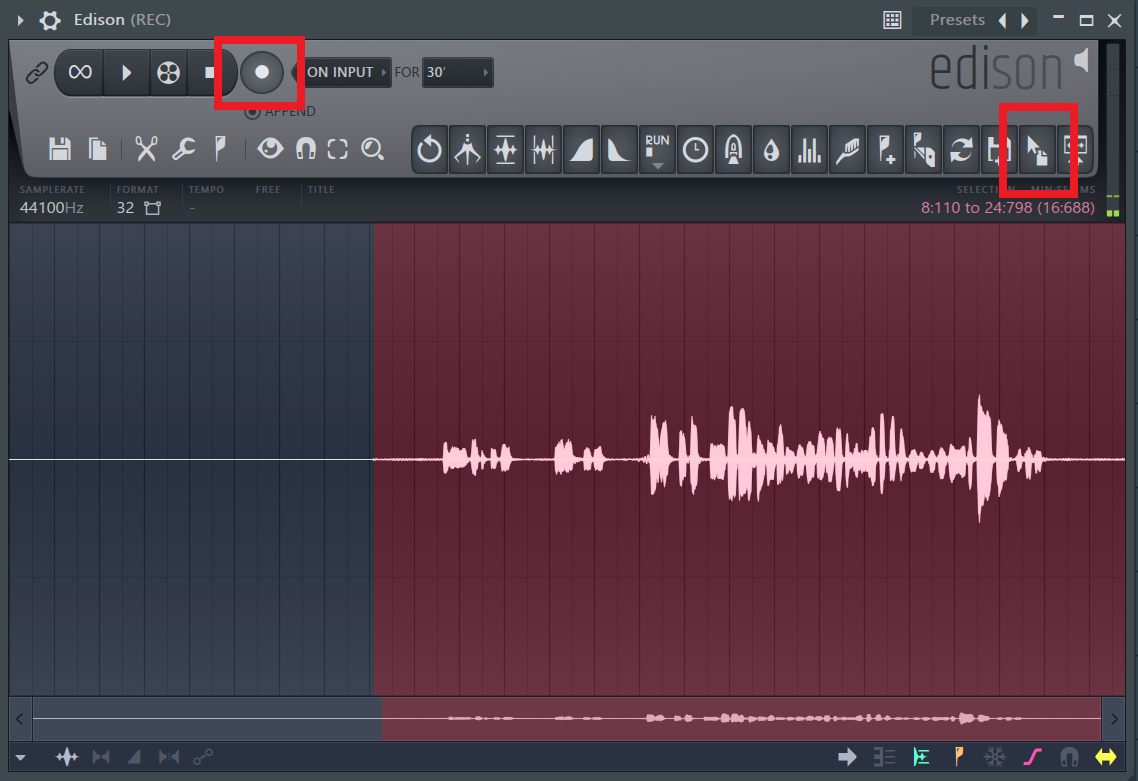
- You can drag and drop the recorded audio sample onto the playlist by clicking on the second icon on the right side.
Conclusion
Recording audio in FL Studio is definitely not as straightforward as in most DAWs, but that’s because it’s a DAW designed for creating mostly EDM, Hip Hop, etc., where you’re not recording multiple tracks at the same time, but rather working with loops, samples, etc.
Make sure to use the proper audio drivers since enabling the wrong one may introduce latency, making it really annoying to record!
I hope this was useful!
Have a great day!