Last updated on January 24th, 2023 at 04:34 pm
FL Studio is one of the most feature-rich DAWs for people interested in producing music, especially electronic music, hip hop, or any genre requiring you to use a lot of virtual instruments.
Now, one thing that tends to happen when programming virtual instruments through MIDI is that it doesn’t really sound “Human” because it’s always playing the notes at the exact same volume, or velocity and because they are always 100% on the grid.
In order to make it sound more realistic you need to adjust those settings a little, I mean, you don’t hear a pianist or drummer playing everything at the exact same volume, right?
So, how can you make it sound more human, or natural, quickly and without having to manually adjust each setting?
That’s where FL Studio’s randomize tool comes in!
So, let’s see how you can Randomize the Velocity of your MIDI notes in FL Studio!
Step 1: Select the pattern you want to Randomize and open the Piano Roll
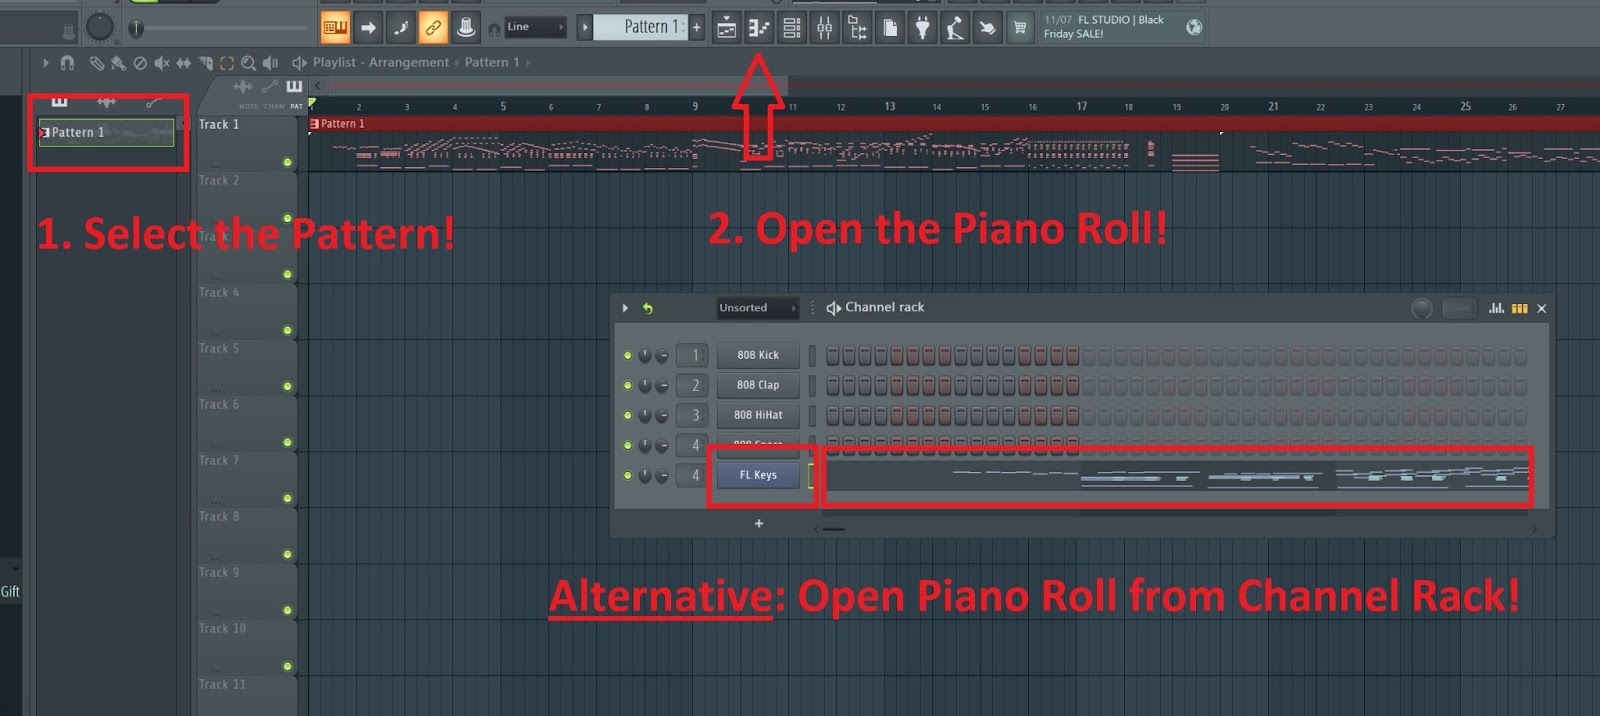
You can do this in two different ways:
- Open the Channel Rack (F6) and either left-click on the Piano Roll or right-click on the instrument loaded in the sampler (in this case FL Keys) and click on “Open in Piano Roll”.
- The other way is to select the pattern on the left-hand side of the playlist (where all the patterns are stored) and then open the piano roll (F7).
Step 2: Open the Randomizer (Alt+R)
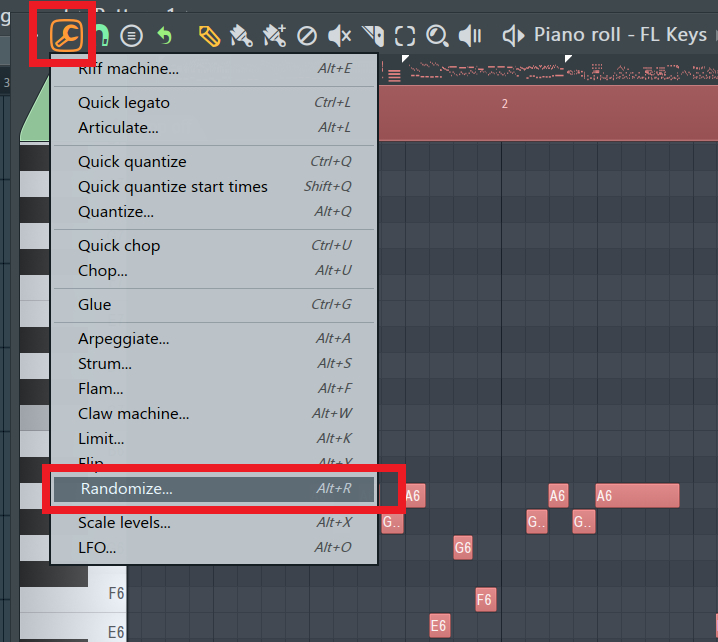
Once you have the piano roll open with all of the MIDI information, open the randomizer by either pressing Alt+R or by clicking on the little wrench icon on the upper left side and then selecting the “Randomizer”.
Step 3: Uncheck the “Pattern” section of the Randomizer
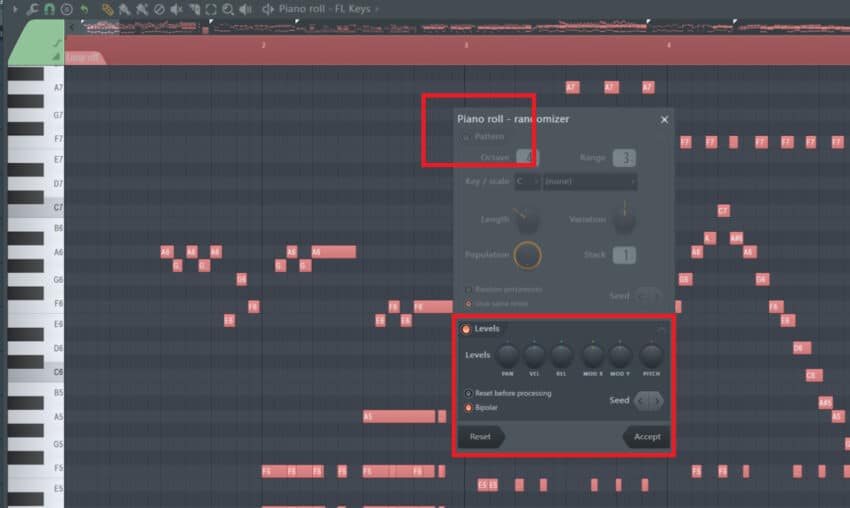
Once you have the randomizer open, uncheck the upper section called “Pattern”, otherwise, it will completely randomize all of the actual notes, making it sound random and weird.
Make sure that the “Levels” Section is enabled. If it’s not, clicking anywhere on it or on the little dot should activate it.
Step 4: Randomize the Velocity
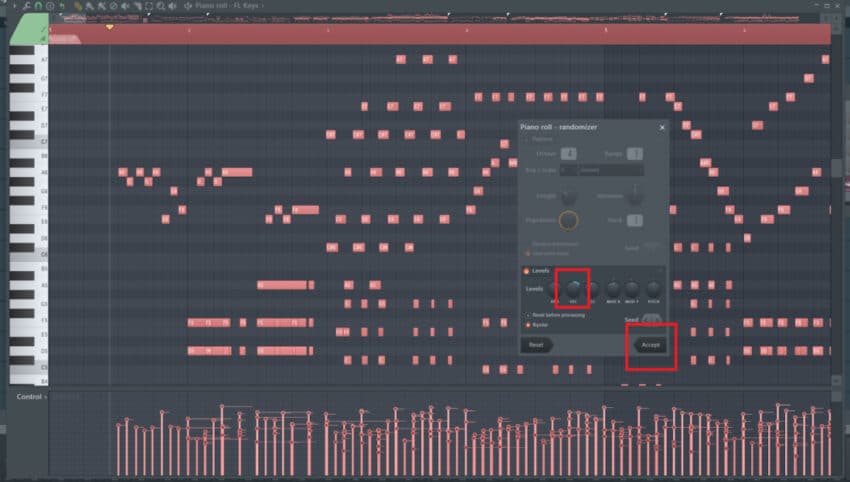
All that’s left to do now is to turn the “Vel” knob left or right. This will randomize the velocity of each note.
Important Note: Always make sure to listen back to how the track bow sounds since it’s probably going to require some manual fine-tuning in specific sections.
Once you’re satisfied with how the randomization was adjusted, you need to click on “Accept”, otherwise the settings won’t save and will revert back to how they previously were.
Randomize Pitch and Panning as well
There are multiple parameters that FL Studio allows you to randomize aside from the Velocity, and you can randomize the panning, the pitch, release times, and more.
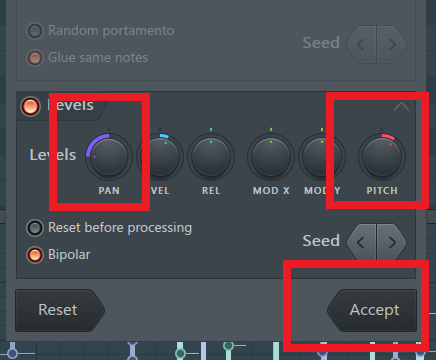
The most useful parameters to randomize are, of course, velocity, panning, and pitch, although it’s worth mentioning that when you randomize the pitch it does so in a dramatic fashion, so do it carefully.
Reasons to randomize the Velocity
The velocity, essentially, dictates the volume at which each note will be played back, and as you can imagine, MIDI notes are usually 100% on the grid and also have the same velocity each, making them sound completely unnatural, which may be what you’re going for if you’re working on a song that’s full of synths, but if you want to make it sound more human, then the velocity of each note needs to be adjusted, and this is especially true for piano and drums.
If you’ve ever programmed drums using something like EZDrummer, then you might have noticed that these types of software usually include a setting called “Humanize”, which generally is just a knob that you can adjust.
This parameter adjusts the velocity of the notes, making some of them sound a bit louder and others softer since this is how a drummer actually plays.
Randomizing the velocity of the notes is an excellent starting point when trying to add realism, but make sure to manually go in and tweak whatever needs to be adjusted since it won’t be perfect.