Last updated on December 17th, 2020 at 05:20 pm
I’ve been using guitar amp simulators for quite a while now, and as far as the actual setup goes, it’s the same for all of them in terms of configuring the Audio Device, Inputs and Outputs.
If you don’t do this, no sound will come out of your speakers.
First I will recommend you a couple amp sims and show you how to adjust the audio settings in order for it to actually produce sound.
And the I will go into how to actually make it sound good, since most presets right of the box sound terrible.
So, without further ado, let’s get started!
Choosing an Amp Simulator
There are dozens of amp simulators out there that you can choose, and they come in all shapes and sizes; You can get free- as well as paid ones, whole suites that include many amps, cabinets, and pedals, or you could choose to go with just one amp.
I wrote many posts where you can find Guitar and Bass amp sims, both free & premium, and here are just a couple of them:
Guitar Amp Simulators
I would recommend most people to get Amplitube 4, Guitar Rig, or BIAS FX, since these are whole suites that features dozens of amps, cabinets, pedals, speakers, etc., and they all have either a free trial, or a completely free version of the software as well.
More information on the best guitar amp simulators here.
Bass Amp Simulators
There definitely aren’t as many alternatives out there when it comes to bass, but here’s a post I wrote about the best free bass amps you can use.
Ok, now that you downloaded and configured your software of choice, it’s time to get into the nitty gritty and learn how to make them sound like actual amps.
Configuring Your Audio Devices
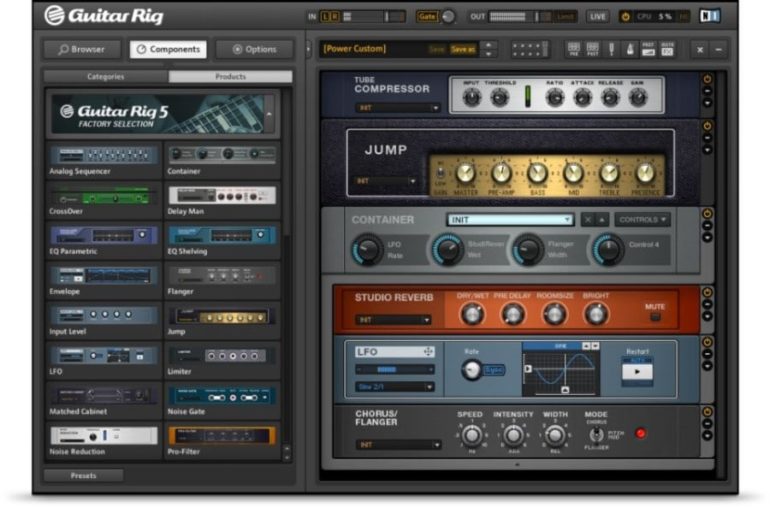
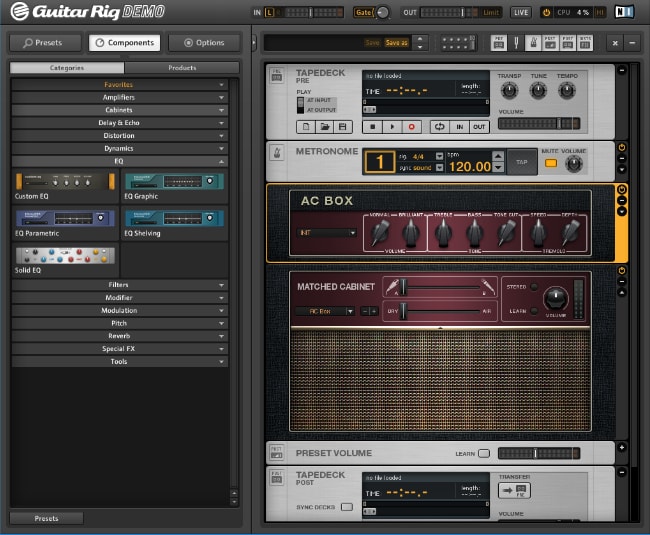
Every amp simulator, be it Guitar Rig, Amplitube, BIAS FX, etc., lets you configure the audio device and drivers that you want to use, and you can also select the input and outputs.
Here’s how you do it;
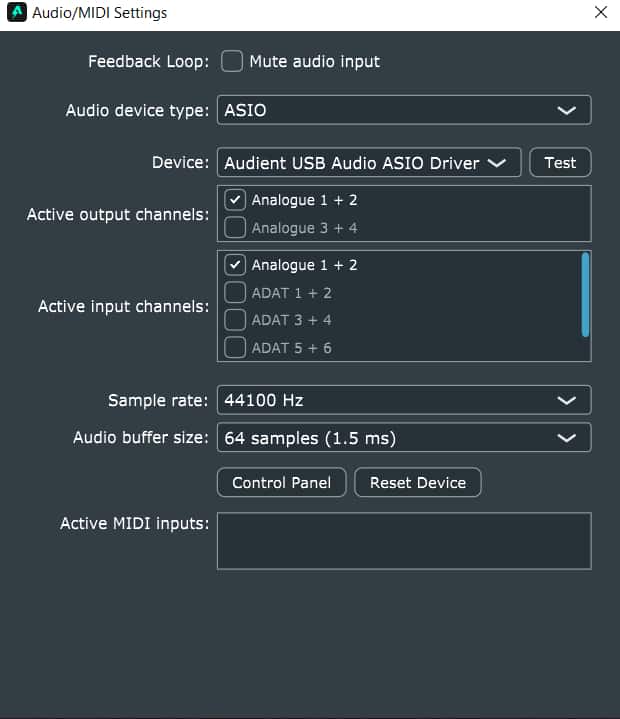
Depending on the software you’re using, you’re going to have to go to “File” and then “Preferences”, or “Audio/MIDI Settings”, “Audio Configuration”, etc.
Then under Audio Device Type select “ASIO”.
Next it’s time to select the actual device you’ll be using;
If you have a Standalone Audio Interface, then you should select it since its drivers are generally better than any other one you can use.
Then simply select the input, and on most Audio Interfaces the Instrument input is on Input 1, and then select the outputs.
If you don’t have an audio interface and you want to use connect your guitar to the 3.5mm line-in jack on your computer’s sound card, you will need to install one additional driver:
Head over to ASIO4ALL, download their latest driver and install it.
Note: You may need to reset the PC after this.
Then go back to the Amp simulator’s device configuration and select ASIO4ALL.
How to get a Good sounding Amp Simulation
First, let’s cover the absolute basics, and these have nothing to do with the software itself, but rather with the equipment you use;
Use the Proper Equipment
The first thing you need to make sure of is that the signal coming into the computer is of the best quality, this means;
- Use a good guitar, if possible.
- Change the strings: Old and rusty strings sound terrible!
- Use a good Cable: You may be tempted to purchase a cheap cable, but these pick up more interference, and may generate unwanted noises.
It’s crucial to minimize all of these factors that could lower the quality of the signal before it reaches the software, and this also applies in a real setting.
Get a D.I. Box or an Audio Interface with Instrument level Inputs
If at all possible, get a high-quality audio interface, like the Audient id14, since every component in it is designed to deliver the best sound quality possible.
Most Audio Interfaces come with an “Instrument” Input, which is designed to handle signals like the one of an electric guitar or bass.
In that case, no additional equipment is needed.
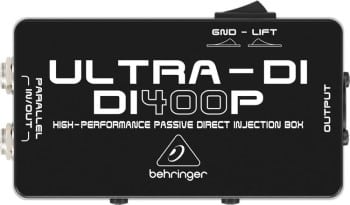
If, for some reason, your Audio Interface has all line level inputs, then you should get a D.I. box to properly level the signal.
I’d recommend getting this one from Amazon.
Lastly, if you happen to have a mixer that has USB connectivity, it might be possible to use that instead of getting an Audio Interface.
You can learn more about that in my post where I compare Audio Interfaces to Mixers.
Once the signal can reach the computer without any interference and sounding as clean as possible, and after you configured the audio settings like I described, it’s time to move on to the software:
Oversampling = Higher Audio Quality
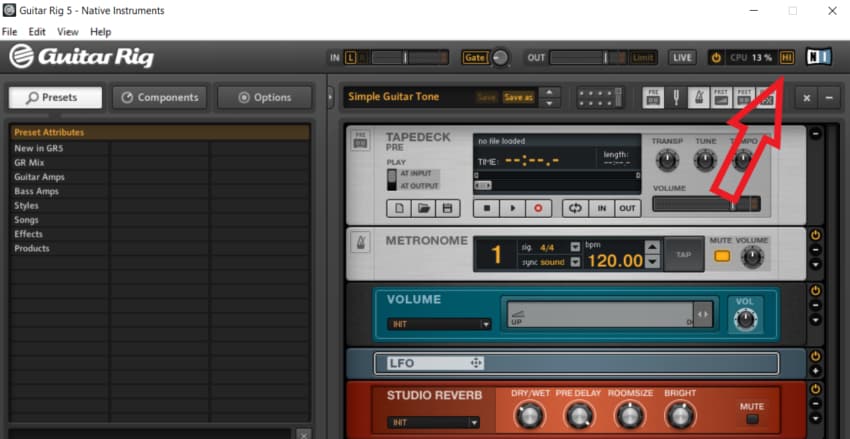
Most of the Amp Simulators have the option to choose between Higher or Lower resolution quality.
In Guitar Rig for example, you can click on the “High” icon next to the NI Logo which will increase the sound quality at the expense of increased CPU usage.
In Amplitube you can choose between Low, Medium and High, and so on.
I highly suggest using the highest audio quality that the software has available since the additional CPU usage isn’t really anything to worry about.
Set the Input Level correctly
The higher the input level, or gain, the harder the signal will drive the amps, and the opposite is also true.
The most important thing is to make sure the signal isn’t clipping on the way in; if you see it getting red on the meter, dial it back.
Additionally, it shouldn’t be too low either.
So, aim for the input level to be at roughly 70-80%.
Ditch the Presets
Presets can work really well as a jumping off point, but they generally don’t sound that great.
In general, I would recommend building the whole setup from scratch instead of using presets.
If you do use them, make sure to tweak them a bit until they sound better.
Use a noise Gate
A noise gate works by cutting off the signal once it goes below a certain threshold.
In other words, while you’re playing, it lets the signal through, but as soon as you stop playing, it cuts it.
This removes that annoying hissing noise you hear when having the guitar connected to a distorted amp while not playing.
Add some light Compression
Adding compression will help with keeping the dynamics in check, making it a lot easier to record.
Don’t go overboard, just add a subtle amount.
Choose the Cabinet and change the Mic Placement
The biggest mistake I made the first time I used an amp sim was to not put a cabinet after the amp, and boy did it sound awful!
Not only do you have to include a cabinet after the amp, but also make sure you use a good one!
Let’s talk about microphone placement;
This isn’t a feature present on all amp simulators, but the ones that do offer it let you use two different microphones and blend them.
Simply move the microphones around until you find the spot that makes them sound how you want them to and control the levels on each microphone to create a nice blend between the two.
Record more than one Guitar
Don’t just record a guitar riff once and use that one for your song.
What you should do is record them twice, or even four times, and use all those tracks combined.
This will make the guitars sound a lot thicker and better.
Use EQ Wisely
EQ before distortion: In general, you want to EQ before doing anything else, to remove any unwanted frequencies from getting processed further along the chain.
Turn down the bass: If you want the guitars to sit properly in a mix, then remove some of the lower end, otherwise it will sound muddy.
Use EQ to remove “Fizz”: Amp simulators are known for exhibiting an annoying fizzing noise in the higher mid frequencies, and these need to be addressed by using an EQ to remove- or at least lower them.
Don’t use too much Reverb
Adding a LITTLE Reverb at the end helps, since with a real amp there will always be some sort of room or acoustic space, and reverb helps emulate that.
But you should wait until the very end to add it and don’t overdo it, since it can completely ruin the sound in no time.
Try using Real Pedals
Try using real analog pedals: Set the amp sim to a clean or slightly crunchy tone.
Once you did that, instead of using a simulated Dirt pedal, try using the real thing. This usually sounds a lot more realistic and yields a better tone, but it does depend on how well the amp sim handles that pedal.
Another thing to take into consideration;
Combine different Amps if the software allows it
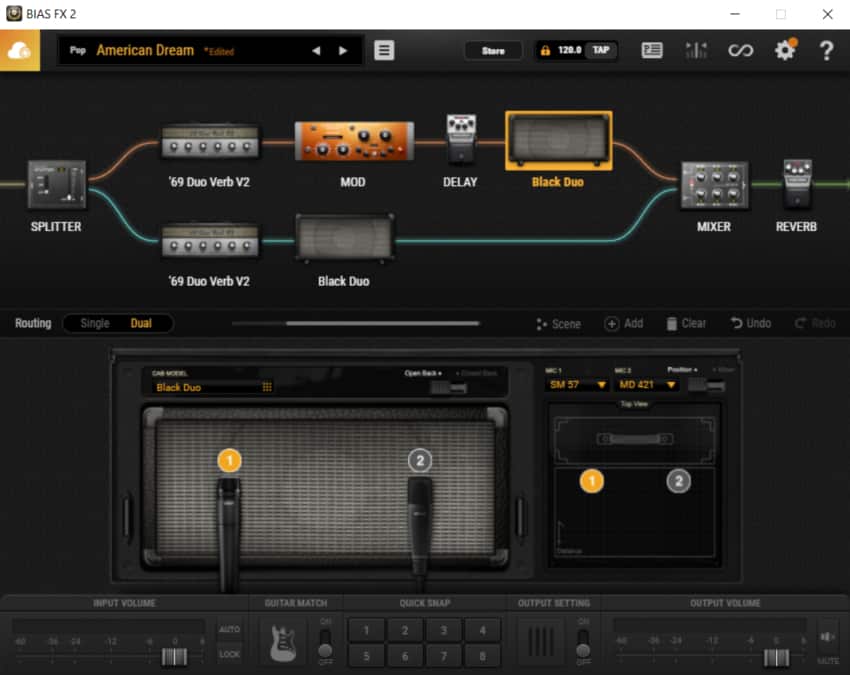
Some amp simulators, like BIAS FX, let you split the signal in two and run them through different amp-, cab- and pedal setups, blending the two at the end into one guitar tone.
This one is a bit harder to pull off since you will have to tweak the configuration on both amps and all the pedals that are in the chain, plus the microphone placement on both cabinets.
But if done correctly, this can work very well!
Lastly, take your time
Like I said in the beginning, the presets that come with Amp Sims are usually bad.
If you want to get a great sound you really need to dive into each component in the chain and tweak them patiently.
Play around with every knob and listen to the changes.
Some Simulators are actually quite hard to use at first and if you are used to playing with real amps you will notice that it’s far easier to get a good sounding tone with the real thing than it is with a plugin.
It´s just a learning curve.
After getting used to it, I assure you that you will be able to make great sounding music!
Conclusion
Follow these few steps and see what happens, you will probably notice that your tone has improved!
The most important thing is to take your time and really get to know the Software, play around with it and have fun.
I hope this information was useful! see you on the next one!
Dear Manager,
Glad to hear that you’re on the market for musical instruments products.
We specialize in this field for more than 18 years, with the strength of handwired amp, guitar pedal, electric guitar bass, etc, with good quality and competitive price.
Have just come out several NEW handwired amp, and some Dumble style SSS, ODS.
Please contact for more details.
Kind regards,
Emma
http://www.bestamp-guitar.com
When using an amplifier, it’s important to pay attention to the sound quality since this can make or break the sound quality of any recordings that the amplifier would pick up. The reason for this is that an amplifier works best when grouped with other recording instruments in order to deliver the best sound quality when working together with another sound cabinet. If I had the time to try out a new set of amplifiers, then I would want to make sure that the sound goes well together and not clash against each other.