Last updated on December 17th, 2020 at 05:57 pm
Nowadays everyone can record music at home thanks to the low cost of the required gear…
But most people don’t know how to actually get professional sounding vocal recordings because they lack the basic knowledge.
In this post I’ll do my best to teach you the basics of how to record vocals at home the right way.
Let’s get started…
Use the right microphone
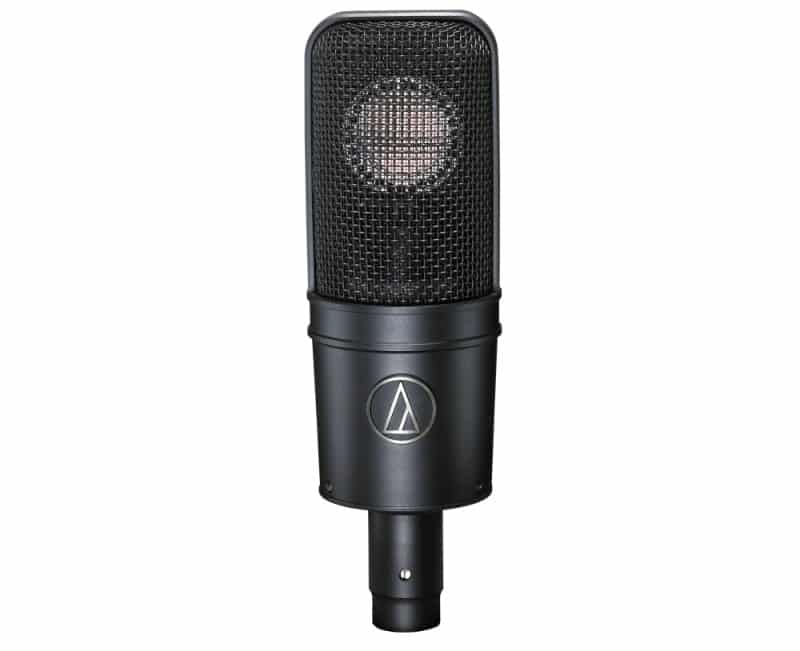
While I understand that most people who are recording music at home don’t have an arsenal of microphones just waiting to be used, it’s still important to know that every mic will affect the sound a certain way.
Microphones come in all shapes and sizes, be it condenser, dynamic or ribbon mics, etc. with cardioid, omni, figure 8 patterns, etc.
Each of them has their place and can be used to record vocals…
However, as a rule of thumb you’ll want to use condenser or dynamic microphones with a cardioid polar pattern.
You should, if you have more than just one microphone, match the microphone to the vocalist…
This means trying out a couple microphones and finding the one that best suits the singer’s voice.
- Related: I wrote an article about the best microphones for recording vocals which should be helpful.
Use the right Microphone setup
The placement of the mic in the room is super important, but so is the actual positioning of the mic in relation to the vocalist.
The recording will sound completely different depending on the height of the mic, the rotation (on- or off-axis), and the distance.
Rotation
Rotating a cardioid microphone slightly off axis will reduce the bass response and increase the treble, as well as pick up more of the room’s natural sound.
Play around with this until you find the sound you’re looking for.
This can also be used to reduce sibilance and other issues…
But more on this later in the post.
Height
This is something that I didn’t use to pay any attention to at first…
But microphone height can have a huge impact on the tone of the vocals.
A microphone positioned under the lip level will sound a bit brighter than one that’s positioned over the lip level, but it will also have a slightly increased bass response.
On the contrary, if you position the mic above the lip level the bass will be reduced, but so will the highs…
In this case you’d end up accentuating the mids.
You could place the mic above lip level and point it downwards, or under the lip level and point it upwards.
This will reduce plosives and affect the sound in different ways.
Again, this is a matter of taste and what the song needs…
So, play around with it until you achieve the desired sound.
Distance
The distance will vary a lot depending on the microphone you’re using, as well as the effect you’re going for.
For instance;
Dynamic microphones are designed to be used up close, meaning that the proximity effect won’t be as much of an issue as with condenser microphones.
This is because they have a reduced low-end.
This is why using a dynamic mic to record vocals is super simple…
Simply get the vocalist to sing directly into it and that’s it.
Dynamic microphones are particularly good for recording loud screaming vocals, like the ones in some of those awesome old rock songs.
Condenser microphones, on the other hand, need to be dealt with in a different way.
The proximity effect can be a real issue, so try and record the vocals at about 6 inches away.
Of course, you could use it up close to get a specific sound, but in general try to stay a bit further away.
Like I just mentioned, singing up close into the mic will increase the bass response and also create a more intimate tone…
However, the further you sing from the mic, the more open, brighter and airy it will sound… usually at about 12 inches.
Moving on…
Position the mic properly in the room
The importance of mic placement can’t be underestimated.
Depending on where you setup your microphone in the room may completely alter the way the recording sounds.
This is because of how sound reflections happen inside the room…
The whole point is to avoid picking up any sort of reflections and room noise, which in a home studio may be a bit difficult because it’s not specifically designed to record music in.
Here are the general guidelines;
- Don’t position the mic in the center of the room (try positioning it off to one side).
- Point the microphone away from reflective surfaces.
Another tip;
A good technique is to get into the corner of the room, this way the soundwaves can’t directly reflect back into the mic.
You could even get some cushions of mattresses and place them against the walls behind you to absorb some of the sound.
Now, there’s one very reasonable question to ask…
Should you get a vocal shield?
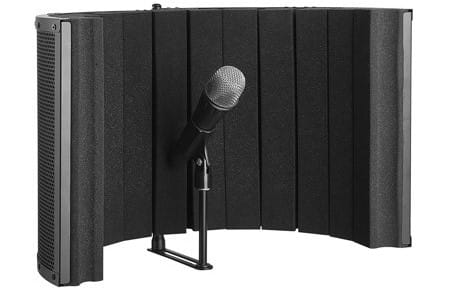
There are a lot of vocal shields available everywhere… you’ve probably even though of getting one thinking that they can improve your vocal recordings.
The thing is that are on the opposite side of where they should be…
You want to reduce the reflections coming into the front of the mic, but the vocal booth is on the back.
Sure, it may reduce the overall noise that’s allowed to reflect through the room, but your best choice is to place some sound absorbing materials behind you, or the singer.
Which brings me to my next point…
Acoustic Treatment
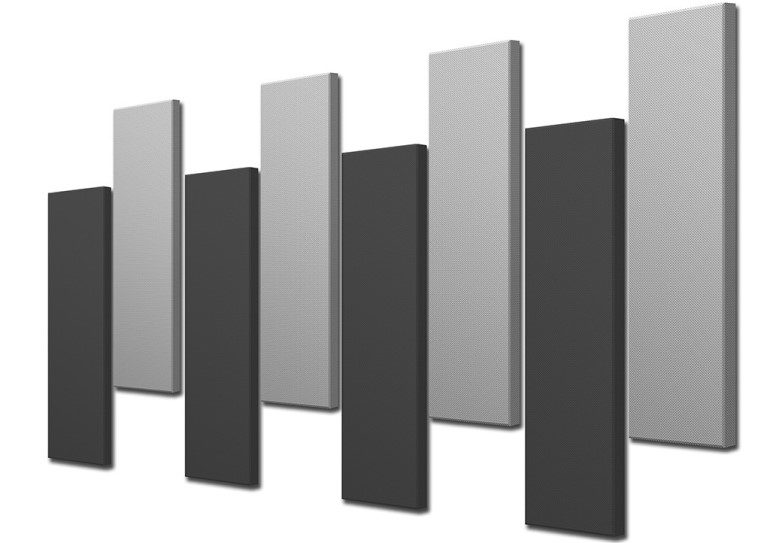
If there’s one thing I learned over the years it’s that acoustic treatment is by far the most important, yet overlooked concept for getting good sounding songs.
If soundwaves are allowed to bounce all over the room, then the microphone will pick those up and your recordings will have a lot of the room’s natural sound in them.
This isn’t the ideal scenario…
What does acoustic treatment do?
Acoustic treatment uses sound absorbing materials to deaden the sounds inside a room not allowing the soundwaves to bounce off the walls, ceiling and floors making sounds die out much quicker.
This is especially good for recording since it removes the room’s natural reverb, making the recording clearer and more professional sounding.
The great thing is that you don’t need to spend a fortune on this, in fact there are some pretty affordable alternatives out there which might help you… such as acoustic panels, bass traps, etc.
- Here’s an in-depth guide about how to soundproof and how to do the acoustic treatment of a home music studio by soundproofanything.com… check it out.
Of course, soundproofing is equally as important since you don’t want your microphone to end up picking up everything that’s going on outside of the studio, but this is usually far more expensive.
Use the correct Audio Settings
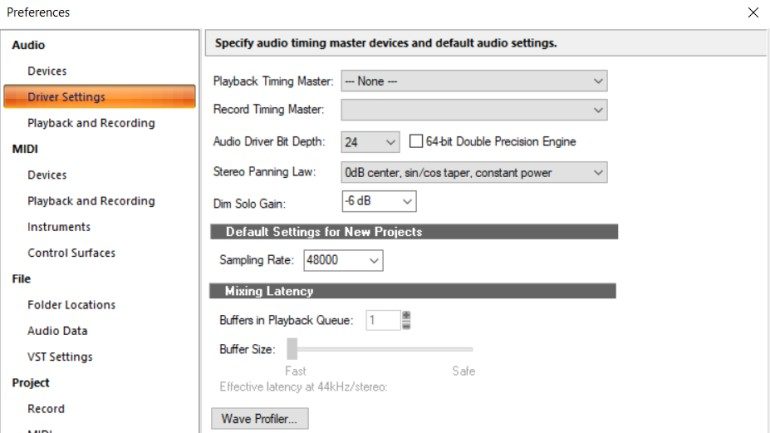
Once you have selected the right mic, the position of the mic, etc. it’s time to decide what settings to use when recording.
By this I mean knowing how hot the signal should be so that it sounds good and doesn’t clip, as well as choosing the right sample rate, bit-depth, etc.
What level should vocals be recorded at?
I’d recommend that you record at 24-bit resolution with the peak being at about -10dbfs.
When recording at a 24-bit resolution there’s no need to record a louder signal since these settings will produce the best signal-to-noise ratio.
The standard sample rates are 44.1kHz and 48kHz. So, you should be fine choosing either of them…
If you want to go higher and record at 192kHz, be my guest… just know that the files will be MUCH larger.
Avoid digital clipping
If there’s one mistake that can cost you the take, it’s digital clipping.
The sound gets distorted in a way that doesn’t sound at all pleasing and it could literally ruin the whole song if it’s too noticeable.
In the earlier days we used to record as hot of a signal as possible to combat the noise floor…
But with today’s technology this isn’t necessary anymore and it’s much more advisable to leave a lot of headroom to completely avoid digital clipping…
Plus, it gives you a lot more room to process the tracks without running into any issues.
Digital Sweet spot
I just mentioned that the peak should be at about -10dbfs when recording, but you should also keep an eye out for the average level since this one should be at about -20dbfs.
Doing this will leave you with a lot of headroom and make your life a lot easier later on.
Should vocals be recorded in Mono or Stereo?
In most cases you should record vocals in Mono.
Since the mouth is just one point source, it should be recorded as such and mono will do just fine.
It makes little to no sense to record vocals in stereo unless you’re recording a lot of people simultaneously.
Use a Pop Filter
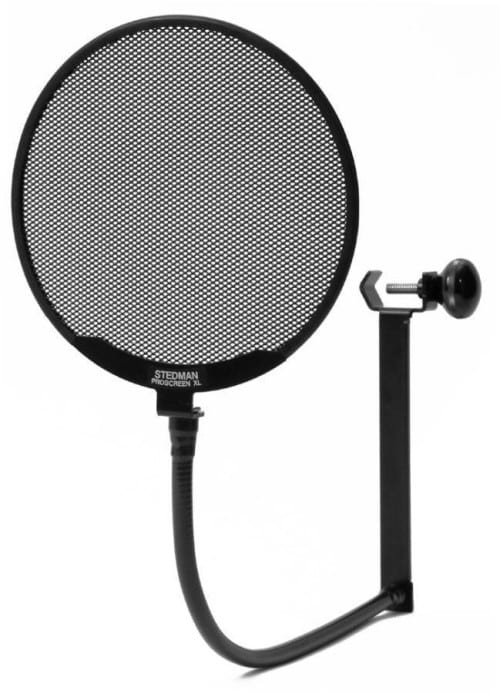
This goes without saying but using a quality pop filter will do wonders for your vocal tracks.
If you don’t use one, then the plosives may ruin a take would have otherwise been perfect for the song.
The great thing is that you don’t need to get a super expensive pop filter since even the ones that are extremely affordable work quite well.
- A classic example would be this pop filter (link to Amazon).
The Pop Filter and Pencil Trick
There’s this one cool trick people used to do back in the day which involved attaching a pencil diagonally across the pop filter.
What this will accomplish is that the pencil will break up the air flow not allowing it to directly hit the mic capsule…
Between the pop filter and the pencil, I assure you that there won’t be any plosives whatsoever.
Give it a try!
Deal with Foot Noise

Most singers tap their feet when they are performing and those vibrations are transmitted through the mic stand and into the mic ending up in the recording…
This is something that happens to me a lot since I can’t sing without constantly tapping my feet and moving around.
How to solve this issue?
The easiest way is by using a shock mount.
The shock mount isolates the microphone from the mic stand, basically stopping the vibrations from ever reaching it.
If you can still hear the tapping sound then simply place a rug under your feet and problem solved.
If you don’t already have a shock mount, which most microphones include…
A simple google search for a shock mount compatible with your microphone should give you the info you need to buy the right one.
Another issue that comes up a lot is…
Dealing with Sibilance
This varies from singer to singer, but sibilance can be a real issue.
Sibilance occurs when the letters “s” or “f” are pronounced.
Some people sound naturally more sibilant than others, but this effect becomes even more apparent when recording vocals up close.
Note: Condenser microphones are much more prone to picking up sibilance, so keep that in mind and maybe switch to a dynamic one.
How to avoid this?
Remember I mentioned something about recording off axis earlier? Well, this strategy can definitely improve the sibilance issue.
Another way is to use the pencil + pop filter technique which will split in half those high frequency air blasts not allowing them to directly hit the mic.
Lastly, you could fix the recorded track by using a software called de-esser.
Note: This isn’t the ideal case… you should always focus on getting the best sounding recording possible and only fix it with plugins if there’s nothing else that can be done.
- Here’s a post about what a de-esser is, plus I also add some free ones for you to download and try out.
Moving on…
Deal with the Proximity Effect
I already mentioned something on this topic a bit earlier, but it’s super important to get this right…
Cardioid microphones, especially condenser ones, exhibit a low-end boost whenever the sound source is too close…
This can be either an issue, if the effect is used unintentionally, or an advantage if it’s used to add a different color to the recording.
The closer the sound source, the stronger the effect will be.
This is certainly something that can be taken advantage off since it can add some warmth to the track…
However, when recording vocals, unless you really know what you’re doing and are using the proximity effect to create a certain effect and trying to make it feel more intimate… I wouldn’t recommend it.
There’s nothing more annoying than being able to hear the proximity effect kick in but then suddenly disappear randomly… and this does happen quite a lot.
How to fix these issues?
Use omnidirectional microphones; Omni directional mics don’t have issues when dealing with the proximity effect simply because of how they are designed.
This would be a very simple solution… however, it’s better to record using a cardioid microphone properly.
Use a dynamic microphone; Like I mentioned earlier, dynamic microphones have an artificially reduced low-end which already deals with the proximity effect a lot better.
Use a pop filter; In this case you’re actually using the pop filter to keep the singer from getting too close to the mic.
I’d recommend at least 6 inches of distance to fully avoid it.
Check the Headphone Mix
Make sure the singer can hear the mix properly as well as the vocals since being able to hear what is going on with great detail will allow the singer to perform better.
You should also consider changing the headphones to better suit the singer’s needs, or even ask them if they own headphones and would like to use those.
It’s extremely important to make the singer feel as comfortable as possible.
Some singers like to sing to a dry track while some other prefer to sing to one that has loads of effects on it.
Basically, find out what the singer wants and needs in order to make him/her feel more comfortable…
A comfortable and happy singer will be much more likely to record a good track.
Use Headphones with good isolation
The whole point of this is so that the mic doesn’t pick up any of the music the singer is listening to.
This can be especially important if it’s just a guitar plus vocals track since any noises coming from the headphones that are picked up by the mic will be extremely noticeable.
Imagine having an acoustic guitar part that you want to record the vocals over and the singer asks you to use a click track…
Unless the headphones can properly isolate the click sound, the mic will pick it up and the final product will be a beautiful song… with a click track sounding in the background.
This is definitely not ideal.
So, get a good pair of headphones that provide good isolation.
Note: DON’T use open back headphones for this… of course.
Double Tracking Vocals
If you’ve never double-tracked your vocals then you could be missing out on something huge…
Double-tracking the vocals can add a lot of flavor to your mix.
But not only that, doubled vocals can be used to add some strength and power to certain parts of the song, like the chorus.
Note: The singer needs to be able to sing the same part of the song twice almost identically, otherwise not only will it sound bad, but if might sound as if you added a chorus effect.
I’ve written an entire post on this topic so check it out if you want to find out more;
Record backing vocals with a different microphone
This is something that should be considered especially if the lead singer is also doing the backing vocals.
The whole point here is to give the backing vocals a slightly different characteristic so that they don’t sound like the lead one.
Of course, the mixing process will also deal with this…
But if you have a couple different microphones, then try this method and see how you like it.
Teach the Singer
Even if you’ve done everything to perfection in your home studio, ultimately the success of the recording will depend mostly on the singer.
And let’s be honest, often times you won’t be dealing with seasoned singers that have spent hours in music studios.
There are some things the singer can do during the performance that can drastically improve or ruin the recording…
So, if the singer has never set foot in a music studio and doesn’t know anything about microphone technique, then teach them the following;
Control the distance
You’ve probably seen this happen in almost every live performance, where the singer will adjust the microphone distance while singing to control the volume.
This is key and something that every great singer does.
Tell them to get closer to the mic when they are singing softly and to the move further back when they need to sing louder.
Another thing this will do is give them control over the proximity effect.
By moving in closer during some quieter parts, it provides that sense of intimacy that would otherwise not be obtainable.
Control Breath Noises
Ever listened to Muse?…
It’s a fantastic band and Matt is an amazing singer, but you can hear every breath he takes… which in his case is definitely on purpose.
However, more often than not, you’re going to want to avoid this unless it’s the desired effect.
How to fix this?
Tell the singer to turn their head to the side with each breath they take… pretty simple!
And lastly…
Make the singer feel Comfortable
This is something I already mentioned a bit earlier, but it’s really important.
If the singer is bad and you tell him that he is doing everything wrong, you lower his confidence…
And even though you might think that correcting or teaching the singer could fix things, it generally does more harm than good.
It’s much wiser to get the best take possible and be done with it…
Which will only happen if the singer can perform with confidence.
That’s why I mentioned earlier that you should tailor the headphone mix to the singer’s taste…
Some singers like a dry mix and some other like one that filled with effects…
Some singers like brighter headphones while some other prefer darker sounding ones… you get the point.
Using effects during the Recording Process

Even though I just mentioned that you should focus on making the singer feel comfortable, adding too many effects can actually hurt the performance quite a lot without the singer even noticing.
Why is this?
Well, it’s simple; The more effects you add to the headphone mix, the better the singer will feel that they sound…
And this is actually an issue… because it masks the mistakes.
If you add a high-pass filter, which is commonly used to reduce the “popping” sound, then the singer won’t be able to notice them and adjust.
The same goes for adding a de-esser which will make it harder for the singer to hear the sibilance and adjust accordingly.
In general, good singers should sing with little to no effects… especially if they know how to adapt and reduce the issues that come up…
If they don’t know how to adapt then adding effects isn’t really an issue because they probably won’t even notice these mistakes.
Conclusion
Recording vocals isn’t as complicated as recording something like drums…
But you need to get it right.
All of the steps in this guide are essential for learning how to record vocals, but if there’s one that often overlooked by beginners it’s acoustic treatment.
Acoustic treatment is absolutely essential. Without it your vocal recordings will never sound professional.
So, make sure to check this article about how to soundproof and how to do the acoustic treatment in a music studio by soundproofanything.com.
Also, once you’re done with the recording process, it’s time to properly mix the vocals.
Here’s a guide on how to do it!
I hope this information was useful.
Have a wonderful day!