Last updated on May 21st, 2021 at 03:06 pm
Here’s an in-depth guide on how to remove background from your audio & video recordings using both free and paid software.
Let’s start with the free alternatives;
How to remove Background Noise for Free
Here I will give you a total of four software options to use, which are; Audacity, the REAfir plugin, Veed.io, and Audiodenoise.com
First things first; To use these methods with video files, you will have to separate the audio from the video, process it, and then replace the original audio with the processed one.
If you have Premiere Pro or Davinci Resolve, then you don’t need to do this and you can skip right ahead to that section by clicking here.
How to Download the Audio from a Video

This is very straight forward, since all you need to do is head over to Video Grabber and follow these steps;
- Click on the “Convert Video” Tab and then on “Select the Files to Convert”, and select the video that has the audio you want to process.
- Click on “Format” and enable “MP3”.
- Click “Convert” and the video will be converted to MP3 (Audio Only) and saved to your PC.
Once that’s done, you can remove the background noise from that audio file.
Let’s start with Audacity:
How to Remove Background Noise for free with Audacity
Audacity is an open source audio editing/recording software that is fairly easy to use, and as far as de-noising a recording goes, it’s all you really need; no extra plugins required.
If you don’t already have Audacity installed, you can download it for free here.
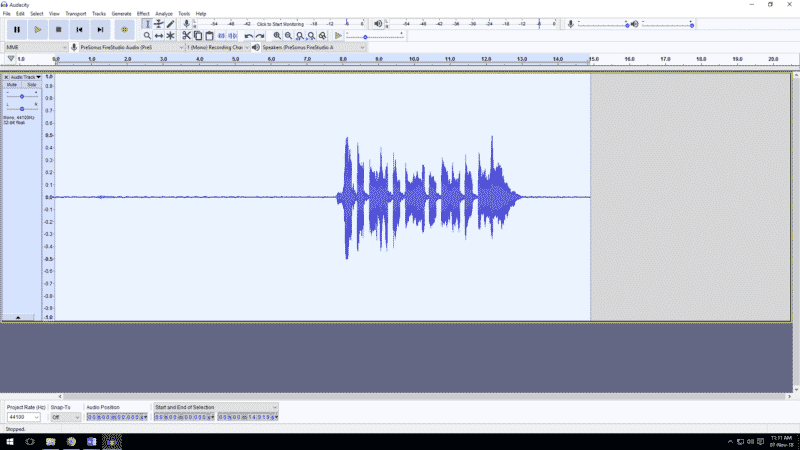
1. Find/Record the background noise you want to remove
If you already have an audio/video recording that you want to de-noise, look for a section of the audio where you can only hear the background noise for 5-10 seconds and where there is no important audio, such as someone talking, music, etc.
If you didn’t record yet, but you know that there will be background noise, then let it record just the background noise for 10 seconds; Don’t talk, sing, perform, etc.
Why is this important?
You want to create a background noise profile that the software can recognize and then remove.
If you don’t give it enough time to create the noise profile efficiently, it won’t be able to remove it as effectively.
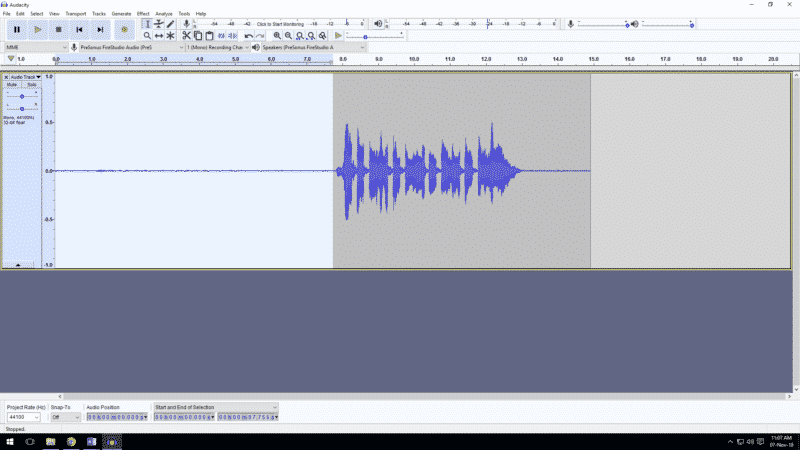
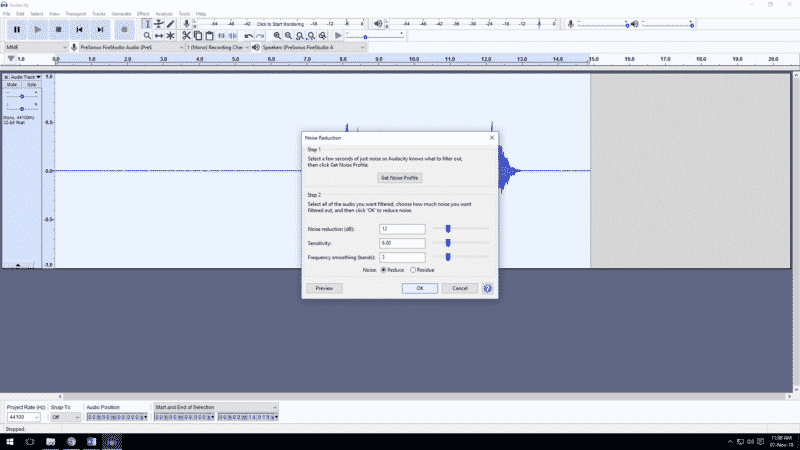
2. Create the Noise Profile
Select the part where you are capturing most of the ambient noise, which in this case is at the beginning of the recording.
After this go to “Effects” and click on “Noise Reduction”
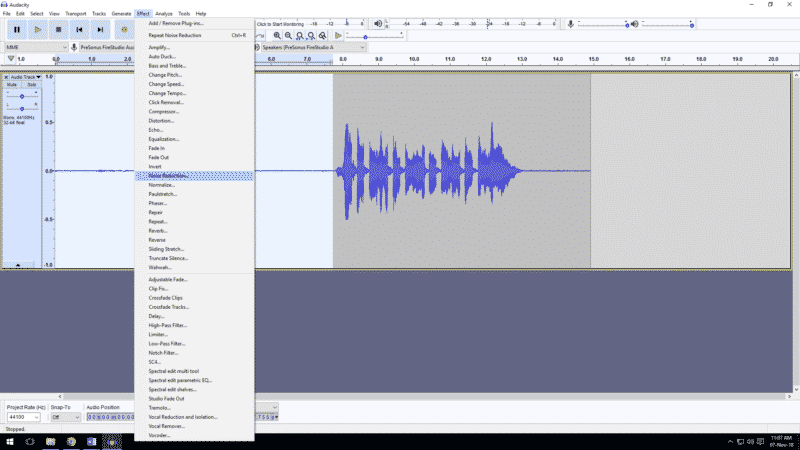
Once you did this make sure to click on “Get Noise Profile”.
This will create a noise profile which will later be cancelled out.
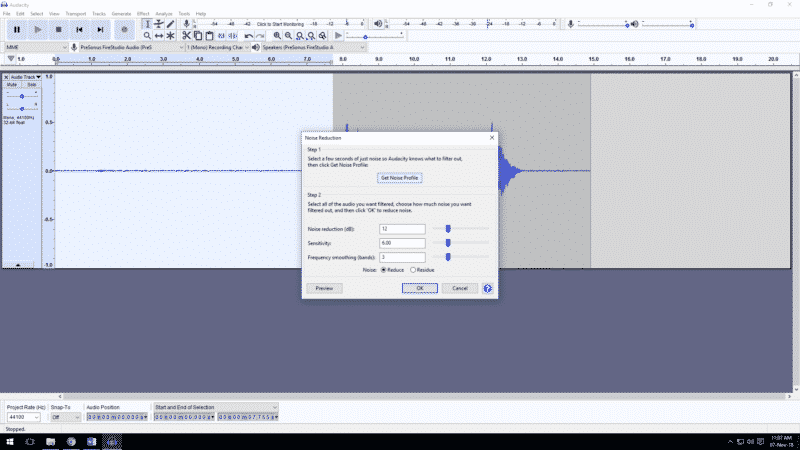
3. Use the newly created Noise profile to remove the Unwanted Noise
Now that Audacity has created the noise profile, it’s time to instruct it to remove it from that specific track;
Select the track by clicking on the far left side of it, go back to Effects, click on Noise Reduction again and click “OK”.
Here you can Preview the effect and check if it’s working properly.
You can choose how much noise you want to filter out manually with the “Noise Reduction”, “Sensitivity” and “Frequency Smoothing” controls.
Now, hopefully, Audacity will have removed the background noise.
Important Note: Reducing too much noise may often leave your recording sounding really bad; it tends to sound very thin and tinny if you take it too far.
Here you can see the before and after tracks;
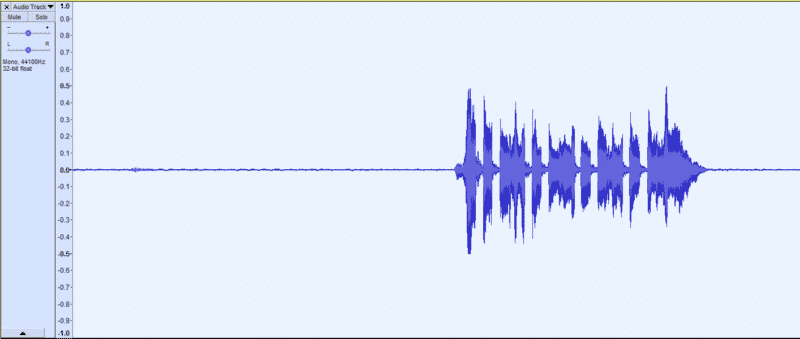
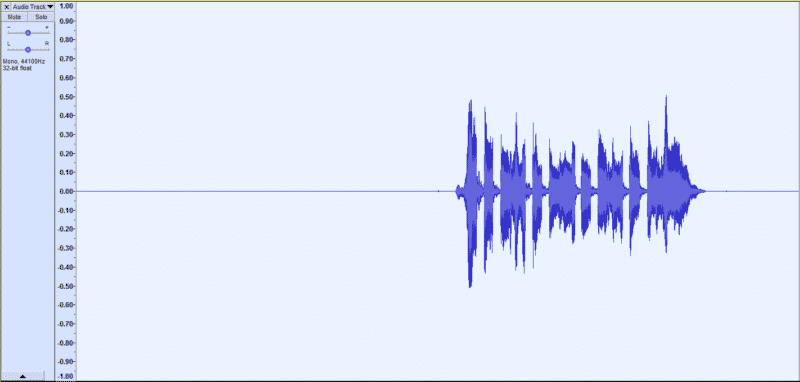
It may not seem like a big difference when looking at the waveforms, but there definitely is a significant reduction in noise!
How to Remove Background Noise for free with ReaFir
ReaFir (link to the download page) is a free plugin by the creators of the Reaper DAW, and it can be used on literally any DAW you want.
If you don’t have a DAW and you would like to get one, check out my post on the best Free ones available here.
Here’s how to remove background noise using ReaFir:
1. Find/Record the background noise you want to remove
If you already have an audio/video recording that you want to de-noise, look for a section of the audio where you can only hear the background noise for 5-10 seconds and where there is no important audio, such as someone talking, music, etc.
If you didn’t record yet, but you know that there will be background noise, then let it record just the background noise for 10 seconds; Don’t talk, sing, perform, etc.
ReaFir will use this section where there’s only background noise present to create a profile to then be able to remove it.
2. Create the Noise Profile
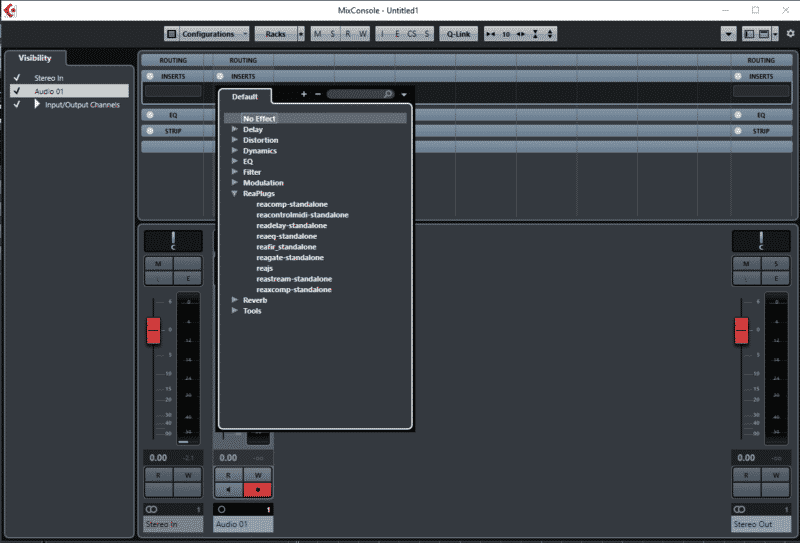
Go to the inserts of that specific track and insert the REAfir Plugin.
Once it opens click on the arrow beside “Mode” and select the “Subtract” Option.
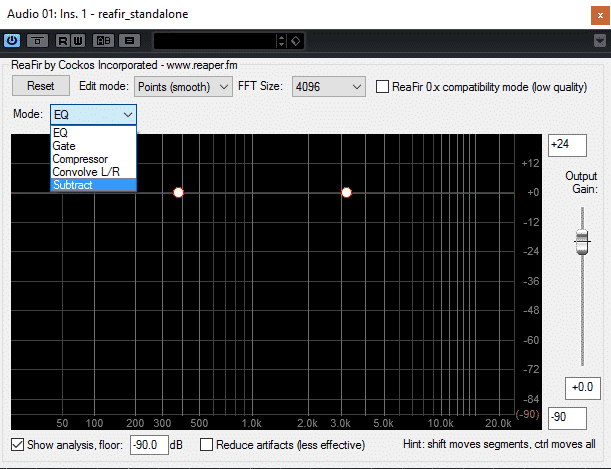
After that, make sure to click on “Automatically Create Noise Profile”.
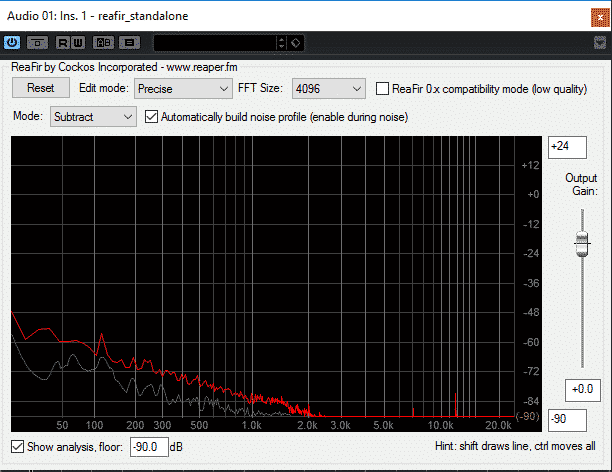
After this, you should reproduce the part of the track where only the background noise can be heard, which REAfir will use to create the noise profile.
NOTE: Make sure to only play the background noise, don’t let it start reproducing your performance or it will try and remove that as well. (If this happens you can always press the reset button and try again).
4. Uncheck “Automatically Create Noise Profile”
Once you’re done creating the noise profile, you should uncheck the “Automatically Create Noise Profile” setting since otherwise it will create a new one every time you press play, including the audio that you want to keep, removing it as well.
Same as with Audacity you can control it manually, should you need to!
How to Remove Background Noise for Free using Veed.io
This is a free online tool that you can use to quickly remove the background noise of your audio/video.
If possible, you should use other software that can give you more control over the audio, but this one does work fairly well most of the times and requires no effort on your part.
1. Upload the Audio File
Head over to Veed.io (link to the audio editing tool) and upload your file:
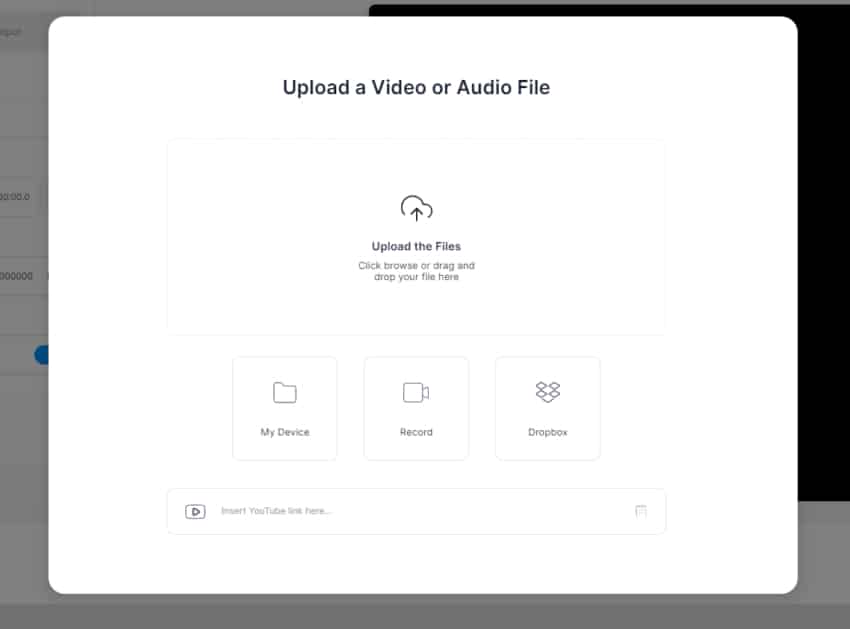
Next, click on “Start with Empty Canvas”.
2. Clean the Audio File
After uploading the audio file simply click on “Clean Audio” and wait until it’s done.
You can always undo the changes if you don’t like the way it processed the audio.
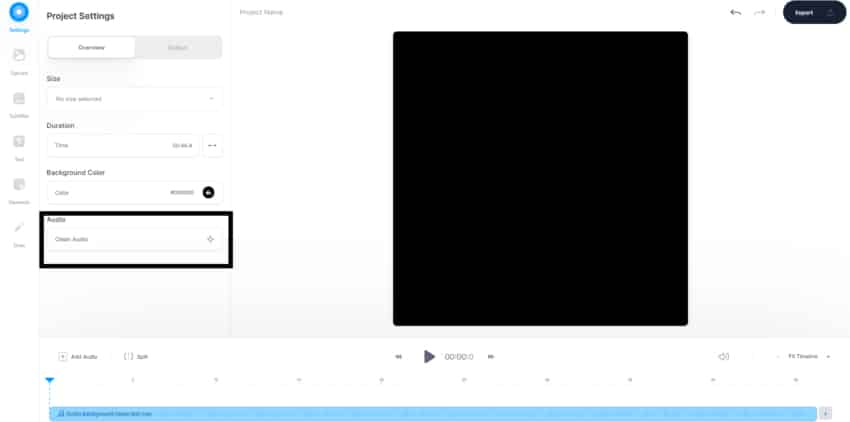
3. Export & Download
Lastly, on the upper right corner click on “Export”, and then you can download the File.
Important Note: This software isn’t as effective as the previous two methods I described.
How to Remove Background Noise for free with Audiodenoise.com
Audiodenoise.com is a free site that allows you to remove background noise fairly effectively, since you can adjust many different parameters that will affect how it processes the audio.
1. Upload the Audio File
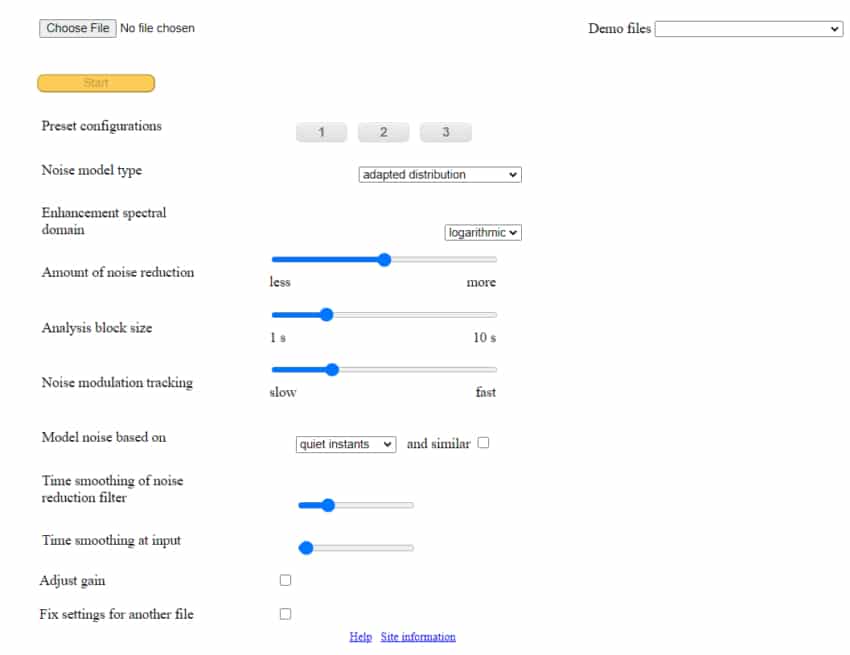
Choose the file you want to upload and then press “Start”.
This will de-noise the audio using a standard preset.
2. Compare the two Audio Files
Once the software is done processing the audio, it will let you compare the original one to the newly de-noised one.
If the first preset didn’t work as planned, click on the second one and then process the Audio again.
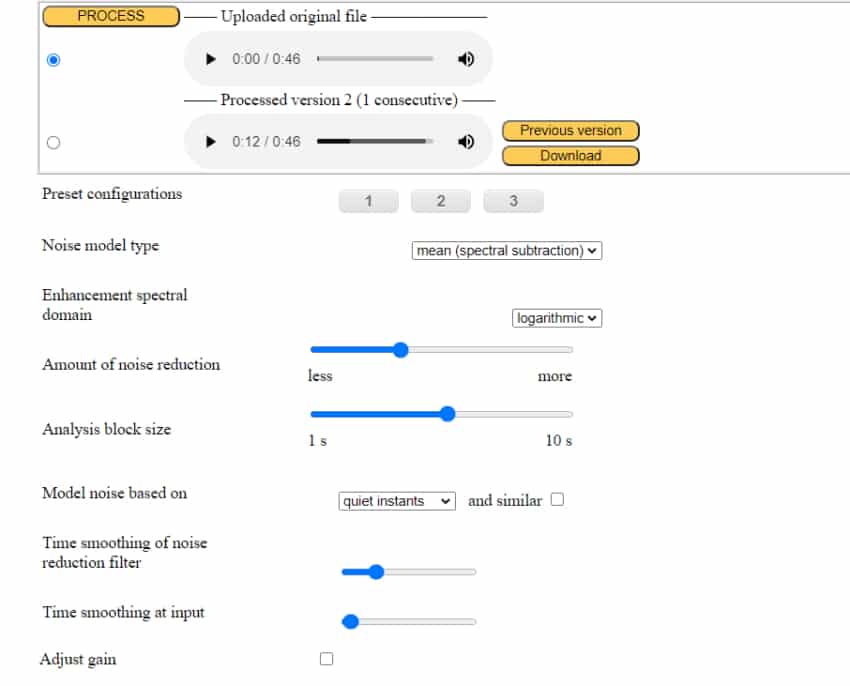
3. Adjust the Setting Manually
If the presets don’t work as intended, then you could definitely adjust the settings manually.
Just note that this will take time and effort.
Lastly, click on Download and that’s it!
Note: This service is much better than Veed.io, but it’s harder to use.
Remove Background Noise from Videos with Premiere Pro and Davinci Resolve
If you need to remove background noise from a video and you have either of these programs, then there’s no need to separate the audio from the video file like I showed in the beginning, since you can remove the noise in the software themselves.
Let’s Start with Premiere Pro:
How to remove Background Noise in Premiere Pro
To remove background noise in premiere Pro follow these steps;
- Go to the Audio Editing tool by clicking on “Audio” on the upper toolbar.
- Click the little Arrow to the left of the mixer to be able to add effects.
- Insert the DeNoiser to the audio track that needs to be processed and adjust.
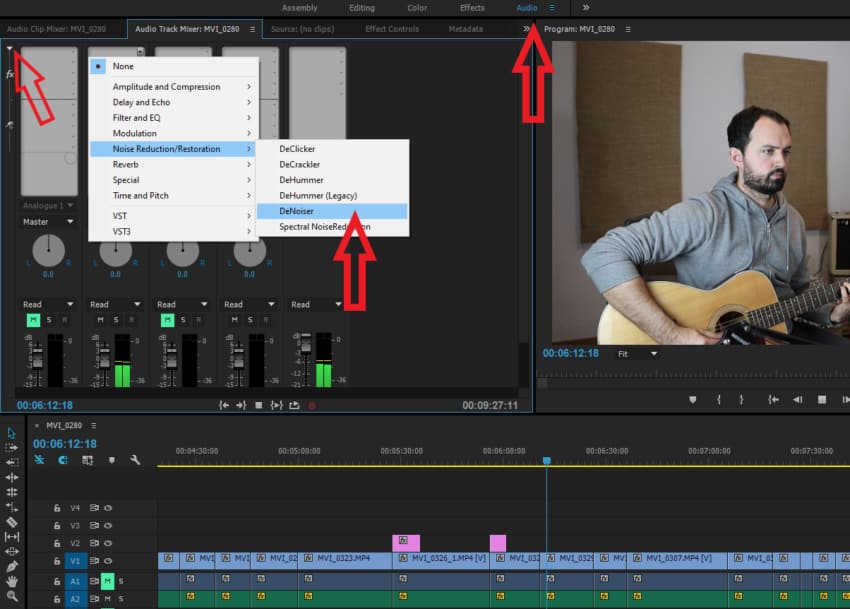
The amount of noise reduction is controlled by one slider, which makes this quite easy to accomplish.
How to remove Background Noise in DaVinci Resolve
DaVinci resolve gives you a lot more audio processing option than Premiere Pro since it works as a VST Host -a software that can load audio plugins-, which means that you could use REAfir, or any other noise reduction plugin inside of Resolve.
Plus, you can get a Free version of Davinci Resolve on their website; It’s a stripped-down version that lacks some features, but it works well for basic editing.
To use the stock noise reduction software you will need to;
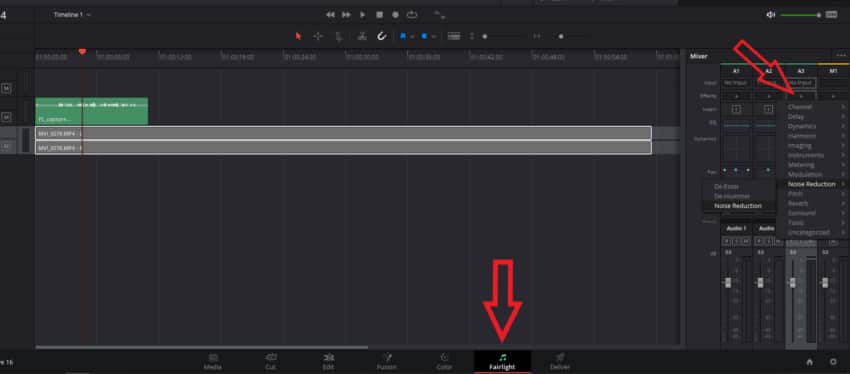
- Go to the Fairlight Tab (the one with the “music notes”)
- Go to the mixer on the right and click on the “+” sign on the specific track you want to process.
- Go to “Noise Reduction” and click on “Noise Reduction” in the next tab.
- Go to a portion of the audio where you can only hear the background noise you want to remove.
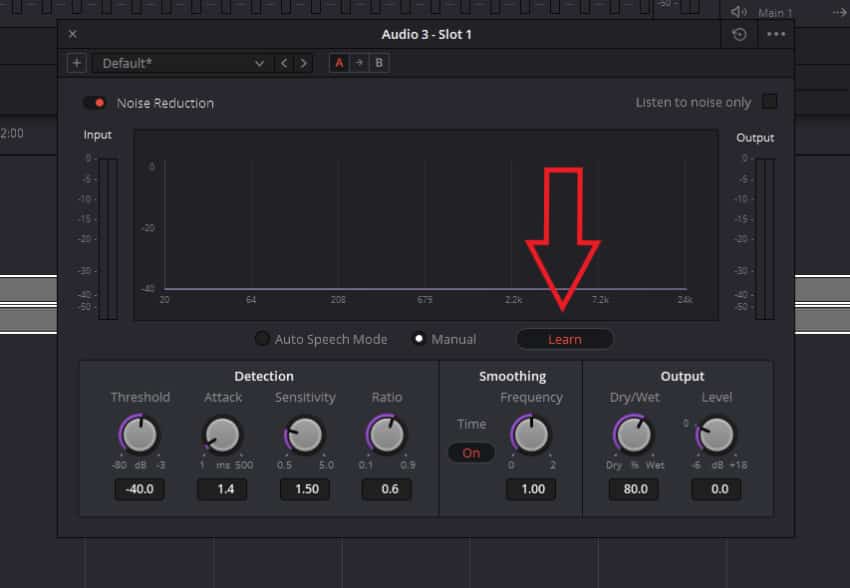
- Click on the Learn” Button.
- Play the section where only the background noise can be heard for a couple seconds
- Uncheck the “Learn” button if the software didn’t do it automatically.
Note: Make sure to let the noise reduction software create a good noise profile by using the “learn” function on a section of the audio where only the noise that needs to be removed is present.
Basic steps to get a High-Quality Recording
While software might be quite good at fixing a couple bad takes here and there, the truth of the matter is that you should always aim to get the best quality recording right from the start instead of trying to fix them later.
Here are a couple pointers;
Turn off anything that creates unwanted noises
- Computers: If you can’t lower their noise by lowering their fan speed, try placing the microphone as far from the PC as possible, also the microphone should never be facing it.
- Air Conditioners: You should never record while the Air Conditioner is on, or at least use a High-Pass Filter.
Anything that is creating unwanted noises should be turned off, otherwise there will be no way to avoid it.
Use Cardioid Microphones
Cardioid Microphones are directional, and this play a huge role when trying to avoid background noises.
Omnidirectional microphones, which are designed to record everything in a 360-degree angle, won’t help in this scenario.
So, use cardioid microphones and always aim them straight at the source.
Get the microphone close to the sound source
The closer the microphone to the sound source, the louder the source will sound in comparison to anything else that’s going on in the background.
Basically, use a cardioid microphone and place it a close as possible to the source while making sure that it’s facing it as well.
Conclusion
The software that I use the most to reduce background noise are;
REAfir when I’m strictly recording audio in my DAW, and the Noise Reduction included with Davinci Resolve.
Give those a try since they are free and let me know if they worked!
I really hope this was useful! Have a great day!
Is there a number to someone who can do this
I just want a number to someone I could call them pay to take down some background noise