Last updated on February 27th, 2020 at 04:05 pm
So, you bought your first Audio Interface and your first set of microphones and decide that it’s time to start recording, only to find that your mixes don’t sound quite the way you expect them to.
Learning to mix is a tough process, but it’s also really rewarding once you start getting it right!
There are no real shortcuts when learning to mix, it takes time and patience.
But there are several mistakes that you might be doing, so I wrote this article on the top mixing mistakes that I consider you should really pay attention to in order to improve as fast as possible.
Let’s get right into it!
Mistake 1: Digital clipping
You might have heard that in order to get the best sounding recording possible you should always record it as hot as possible, but that is because in the earlier days analog gear was the name of the game.
The reason to do this was because every single part in the analog chain would add noise and you wanted to keep the noise floor as low as possible while keeping the signal as high as possible.
But today, since we’re using digital equipment which doesn’t really add any noise at all… we can record at a much subtler level without losing any quality.
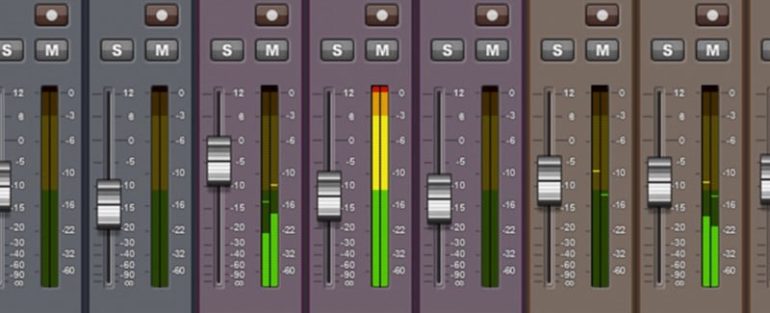
So, you shouldn’t record too hot of a signal and also make sure that you leave yourself enough headroom on each track so you don’t slam your master bus and end up in the red zone the whole time.
Start by creating a rough mix by setting the volume of each track properly while keeping an eye on the master bus, if you see the signal getting to close to where it starts to clip, simply pull all the faders down. Every DAW has an option where you can pull them all down simultaneously.
Try and get the average level of the mix to be about -10db.
IF you recorded tracks too hot, you can simply turn them down… no problems there, just make sure that the recording itself didn’t clip!
Finally, if you turn everything down to get more headroom but you feel like the volume is too low, simply turn your monitors up, don’t increase the volume of your tracks or the master bus.
Related: Learn how to remove unwanted noises in a recording here.
Mistake 2: Listening in Solo
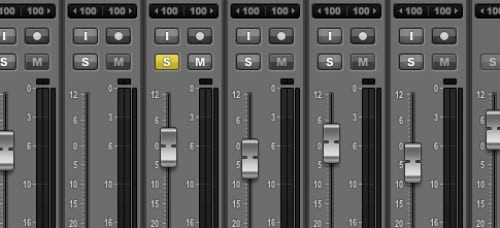
Soloing tracks isn’t wrong, you should do it but only for a breve moment and for a specific reason, then listen back to the full mix and see how the changes make to that specific track fit within the mix.
When should you solo?
There are many instances where you would want to solo a track, for instance if on the vocals you can hear a frequency too much and you want to identify which one it is to tone it down.
Same thing applies to guitars, etc. But just remember to go back to the mix and see how the changes affect the whole song.
The problem that you can run into, and lots of people do, is that if you consistently listen to tracks in solo you will lose the perspective of how that track actually fits into the mix and as soon as you play all the tracks together it may sound terrible.
Only use the solo button to clean a track up a bit, to find those frequencies that might be a bit too high, etc.
Mistake 3: Not Taking Enough Breaks
There’s no real time limit here, everyone is different so this particular point won’t apply the same way to everyone.
But you should always take breaks when mixing, maybe every 25 minutes or so, but you need to make sure to give your ears some rest… especially if you are mixing at high volumes.
Mixing at high volumes will fatigue you a lot quicker! Always try and turn it down a bit from time to time.
An added benefit of turning the volume down is that it will make certain mistakes that need to be fixed more apparent, since listening to music at higher volumes will fool your ears into thinking that it sounds great.
Mistake 4: Don’t get too caught up in a single thing
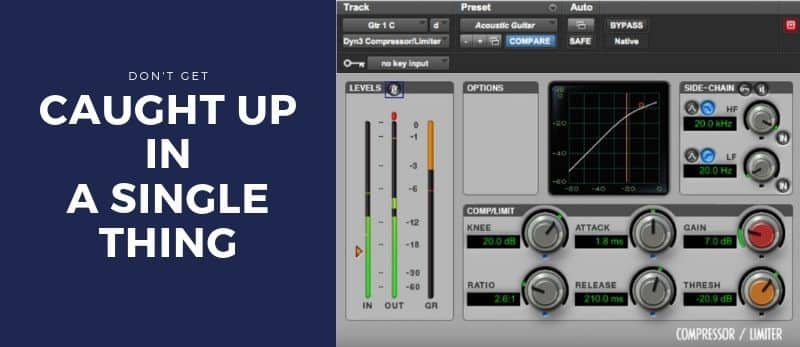
Don’t forget to listen to the song as a whole.
Being very technical while mixing can be a great thing.
Trying to apply certain techniques that you learned to make a specific track sound good might sound very tempting, but we tend to get too caught up in the technical aspect and lose sight of what the song actually needs.
A common mixing mistake is thinking that you need to be able to hear everything equally, which of course isn’t true.
Depending on the part of the song, you might need the piano to come through a bit more to better support the vocals, while a bit later on you may want the acoustic guitar to be featured more, etc.
Don’t just think of a song in a technical term but also take into consideration what kind of song it is and what the main drivers of that song are.
Which brings me to the next mistake on this list…
Mistake 5: Not using Volume Automation
This is the hardest one to get right in my opinion and if done right, it can get your mix to a whole new level.
Why is Volume Automation so important?…
Of course, every step of the mixing process is important, but the thing about volume automation is that it lets you feature different instruments at different parts of the songs. You might do it in a very subtle way, but it will give the mix a lot more personality.
If there’s a part where the piano or the guitar need to come through just a bit more, you do this with volume automation.
EQ, Compression, etc. are very important, but they just affect the character of the sound and help the tracks to better fit in the mix.
My suggestion is that you really invest some time in learning how to use Volume Automation properly, like I said earlier, I think it might be the most important mixing technique to learn.
Mistake 6: Don’t master during the mixing process

This one is easy to understand because who doesn’t want their mix to sound extremely professional, right?
And while it may be really hard to achieve the necessary amount of “glue” in the mix without resorting to all sorts of plugins in your master bus, you should really hold off on it, at least until your mix is actually ready for mastering.
Try and achieve the best balance possible of your tracks before actually applying any plugins to your mixing bus.
That being said, don’t be afraid to use compression and EQ on the Master Bus even at early stages of the Mix, but don’t master it!
Mistake 7: Boosting EQ instead of cutting
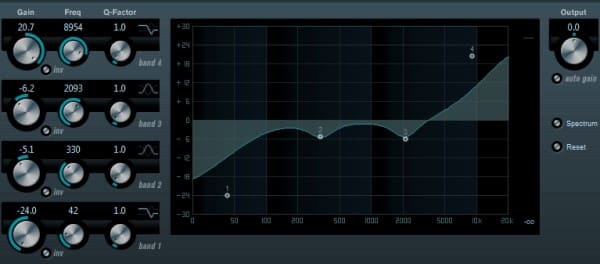
Let me just make this really clear, the most important thing to pay attention to when applying EQ, is how it sounds. If it sounds right, it doesn’t matter if you Cut or boost… it simply sounds right, which is ultimately what you needed to achieve.
Also, you should be boosting, otherwise EQ’s wouldn’t have that option.
But it all comes down to what you are trying to do…
If you want to apply a GENTLE tonal shaping, you should boost. For instance, if you feel the vocals sound a bit dark you could use a shelf EQ and increase the High-end a bit.
On the other hand, if you need to correct a sound more dramatically you should always cut. The way to do this is by using a narrow parametric EQ, boosting it and then going over the frequency range until you find the one that is bothering you and cutting it down.
Why should you cut instead of boosting though?…
The first reason is to not eat up all the headroom in the EQ circuitry quite quickly.
The second reason is that when using narrow bandwidth EQs, the human ear seems to be a lot more sensitive to the effect when boosting rather than cutting. This means that cutting more dramatically is far subtler than dramatic boosting.
Third and last reason applies to live shows only. Using EQ boosts will increase the risk of feedback.
Mistake 8: Mixing too loud
Like I mentioned in mistake No. 3, if you mix too loud you will get fatigued a lot quicker and you will need to take breaks a lot more frequently.
There’s a couple of benefits to lowering the volume;
First: You avoid causing damage to your hearing. Being exposed to high levels of noise can certainly harm your hearing in an irreversible way.
Second: Turning the mix down to the point where you can have a conversation with someone in the room without having to scream, will let you pick up on certain imbalances in the mix, especially volume ones.
I learned this at the recording studio where I first started studying audio engineering, and they told me to lower the volume a lot and see if I could still hear every instrument clearly.
If one got absolutely lost, it probably meant that it needed some adjusting.
Third: Everything sounds a lot better loud.
This can get you in a lot of trouble, because you might think that your mix is sounding great when in reality the volume is fooling you. This tends to happen a lot with drums and bass, it makes them sound a lot better.
So, make sure not only to take breaks, but also lower the volume often and have another listen, you will most likely pick up on a lot of subtleties that went right over your head.
Mistake 9: Relying on effects too much
Especially when starting out, we all tend to pile lots of plugins on individual tracks and I think we do this mostly because when watching pro producers, we see that they also do this… the difference is that they know exactly why they are doing and each of those plugins serves a specific purpose.
If you see a producer use six or even seven plugins on a single track, this might be because he knows that one specific EQ might be right for a High-pass filter and the next one on the chain might be better for boosting the mids. Why the compressor he chose might actually compliment the tone better than another one, etc.
Related: Want to know the difference between reverb and delay and when to use each of them? Read this article I wrote on that topic.
It’s great to experiment and look for new tones in your mix, but you need to at least have an idea of where you’re heading, otherwise you might run into some issues.
Which brings me to my next mistake, which is…
Mistake 10: Know where you want the mix to end up
One important thing to take into consideration when mixing is the direction you want your mix to go.
You should at least have a plan of how you want it to end up sounding, otherwise you will end up mixing mindlessly hoping for the best result.
What tends to happen in this situation is that you will add way too many plugins, fix issues that don’t need fixing, solve problems that don’t need to be solved… in other words, you start mixing proactively and not reactively.
What I mean by mixing proactively is that since mixing is part of music production, you think that you absolutely NEED to mix, adding effects everywhere even if the track doesn’t require it.
Every time you change something, add plugins, etc. you need to ask yourself why you’re doing it. More often than not, you won’t have an answer to that question, which means that you probably didn’t need those changes at all.
Always keep your focus on how you want the resulting product to sound, it’s best not to add too many effects unless you’re absolutely certain your mix needs them.
Mistake 11: Too much Low End
The lower frequencies have huge waveforms, which means that they are naturally more demanding – both to listen to, but also to reproduce in sound systems.
This means that when too many Low-End frequencies start to pile up, they can get out of hand really fast and mud up your mix.
The usual way to address this issue is by adding a high pass filter to remove some of those unwanted frequencies, especially on the tracks where there is no real Low-End present like Vocals, Hi-Hat, or any other instrument that doesn’t benefit from those lower frequencies.
This also tends to give a better Low-End feel… By this I mean that when removing the lower frequencies from tracks that don’t need it, you clear up the whole mix and the actual tracks that provide that low end now become more present and cut better through the mix.
This is really noticeable in heavy rock, where you might have a huge number of guitars with distortion. Using a High Pass Filter on them will allow you to hear the Bass Guitar a lot better, effectively giving your mix a better low end.
You should also consider, if you are the one composing the song, to only have one or two elements responsible for the Low-End. It’s easier to start at the source rather than fixing it later.
Mistake 12: Never changing perspective
We always try and mix on the best equipment we have, which isn’t wrong… but switching from time to time to cheaper monitors, headphones, listening back to the mix in your car or even on your smartphone’s speaker can help you a lot!
Especially if you are having trouble getting your mixes to translate to the real world.
The idea behind this is to listen to the song the way your actual audience will, and let’s face it, most people don’t listen on high-end monitors or headphones.
This means that if you get the mix to sound right on those cheap monitors, it will sound right almost everywhere.
Mistake 13: Relying too much on convention
When mixing, we tend to generalize and create certain rules of when to use a certain plugin or what to do in a given situation, or even how to proceed when mixing certain genres of music.
This may work at first when you are starting out, because it’s a great way of learning quick and getting your mixes to a reasonable level. But always mixing the vocals in the same way because that’s how you’re used to doing it, won’t really work!
Every song is different and so should be your approach. Always focus on what the song needs, on what you feel it needs rather than how convention dictates.
Mistake 14: Not paying attention to phase issues
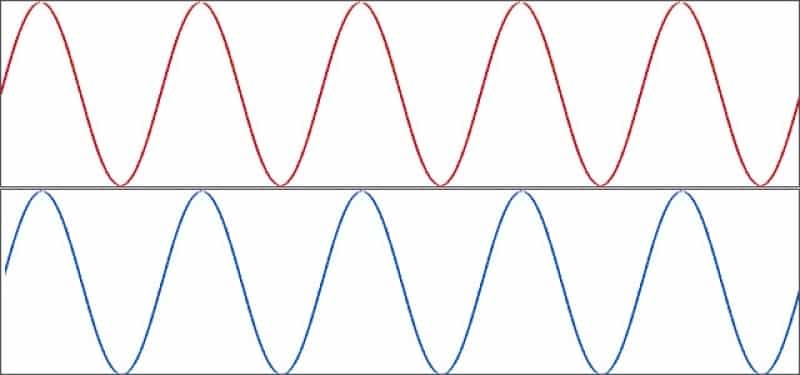
If you use more than one Microphone to record any source, chances are that at some point you are going to run into phase cancellation issues.
This happens when the sound waves hit both microphones at a slight time difference. When combining those two channels, since the waves aren’t in perfect alignment, they will cancel each other out (slightly or a lot, depending on how “out of phase” they are).
The way that I like to describe out of phase sounds is “Hollow”, they tend to sound as if they had absolutely no body to them.
How to fix this issue
You could try clicking on the polarity flip, which will simply invert the waveform of the track you selected.
This MIGHT help but only to a certain degree, because if two tracks are out of phase just slightly, using the polarity flip won’t really get them back in phase but rather change which specific waves are out of phase.
This would only really work if the tracks are 100% out of phase, or at least really close to it.
The best way is to zoom in and check the wave forms directly.
You will be able to see that on e.g. Guitar 1 the peaks may not align directly with peaks on the Guitar 2 track. Here you can take one of these tracks and move/nudge them a bit in the right direction until the phases align.
I find this to be the best way to go about it, it requires a bit more work but the result is great.
There’s a third way which involves using plugins such as Audiocation’s Phase, etc. But I always use the Zooming in and nudging the wave in the right direction way.
Mistake 15: Not checking the mix in mono
The simplest way to check for phase issues in your mix is by simply listening to it in mono.
If you have two tracks that are panned and their waveforms are out of phase, you won’t really notice any issues, but flip that mono switch and now both tracks will come out straight through the middle… If they are out of phase, they will cancel each other out and you will hear it.
Tip: Try and do a lot of you mixing in mono, it will force you to EQ, compress, etc. properly and not get fooled by panning. It will also help with the whole phasing issue.
I wrote this entire article about why you should mix in mono, make sure to check it out!
Mistake 16: Not referencing with a professional mix
When you are mixing and mastering, you should always reference with a song that fits your mixes genre, this will help you keep track of how your mix is actually sounding.
If you’re mixing a pop-song, you should always compare it to other similarly sounding pop-songs.
Why is this important?…
Well, it may seem to you that your mix is sounding absolutely fantastic, and it probably is… But it’s healthy to compare it to the standards, especially since we are talking about how to record radio quality music.
Just import the song to your DAW, adjust the volume so it matches your mix and have a listen. This will allow you to get a feel if something need a bit of tuning.
This will allow you to take note of anything that might be missing, go back to the mix and change it!
Conclusion
If you are making some of these mistakes, which is more than understandable since it’s a big list, just try and focus on the ones that you really feel you need to improve on.
It will take time, learning to mix is a really long and hard process… but it’s fun and very gratifying, so don’t give up!
Just keep at it and before you realize it, you will be mixing like a pro!
I hope this information was useful! See you on the next one!
Hi Facundo,
Appreciate your time & effort. Learned a couple of things I’m guilty off, yikes!
How old are your posts? Have just read your post re: background noise removal & it seems ancient. Been using Spectral Layers SW for years & lately the iZotope R6/R7. Both apps are far superior to Audacity or REAfir. Just saying.
Keep up the good work.
AWESOME MAN JUST FREAKING AWESOMEEEEE