Last updated on January 24th, 2023 at 04:33 pm
So, you just opened up FL Studio and decided to create a song or a beat only to find that there are some strange popping and crackling noises coming out of your speakers, but is it really the speakers or is it actually something going on in FL Studio?
Luckily, you don’t need to throw out your speakers since it’s most definitely a configuration issue in FL Studio’s audio settings.
So, in this article, I will be going over what causes the crackling noise and how to solve it.
Let’s get started!
Why the Audio is Clackling in FL Studio
The most common culprit for crackling audio is if the buffer size (the number of samples it takes for your computer to process any incoming audio signal) is too small since this puts more strain on the computer and when it can’t process all of the audio in the required timeframe, the crackling noise appears.
Now, why not simply use the largest buffer size and be done with it?
Well, increasing the buffer size introduces latency, and recording when there’s a lot of latency present in the system is nearly impossible and quite annoying to have to deal with.
This is why you should try to use the smallest buffer size possible, as long as there is no crackling noise present.
You may also notice that the more processing you start adding to a project (more tracks, effects, plugins in general), the more that crackling appears, and this is also true when running any additional software on your PC, such as a screen recording software, since these take away resources that may otherwise be used to process the audio faster.
How Sample Rate affects this
The sample rate represents how many samples there are per second (Frequency represented in Hertz) and latency is calculated as follows:
Buffer Size/Sample Rate = Latency.
Now, you may have noticed that the higher the sample rate, the lower the latency, sounds counterintuitive, right? But this is the case.
However, let’s compare using sample rates of 48kHz and 96kHz. Although you might get about half the latency when using a 96kHz sample rate, this means that your computer will also have to process a lot more data in the same timeframe which, if the audio starts crackling, may force you to increase the buffer size which, in turn, introduces more latency.
How to Solve this issue in FL Studio (Change Buffer size and Sample Rate)
All you need to do is go to FL Studio’s audio settings and adjust the sample rate and buffer size.
Here’s how to do it step-by-step.
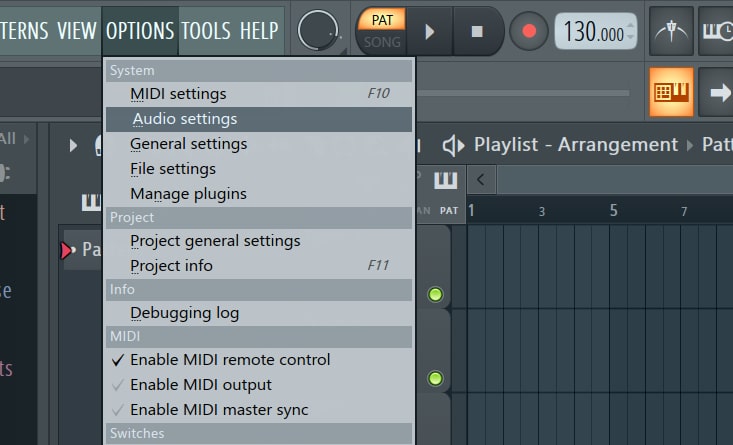
- Go to Options>Audio Settings.
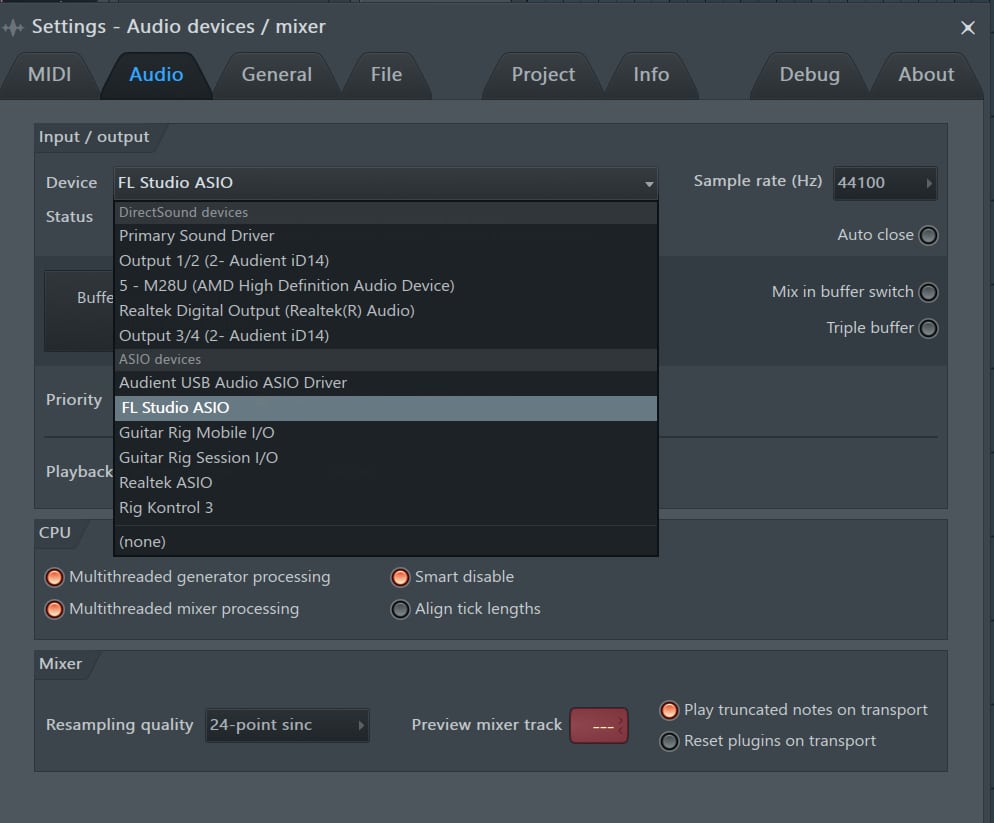
- Click on the “Device” Drop down menu and select the audio driver (generally the one specific to your audio interface but FL Studio ASIO works well).
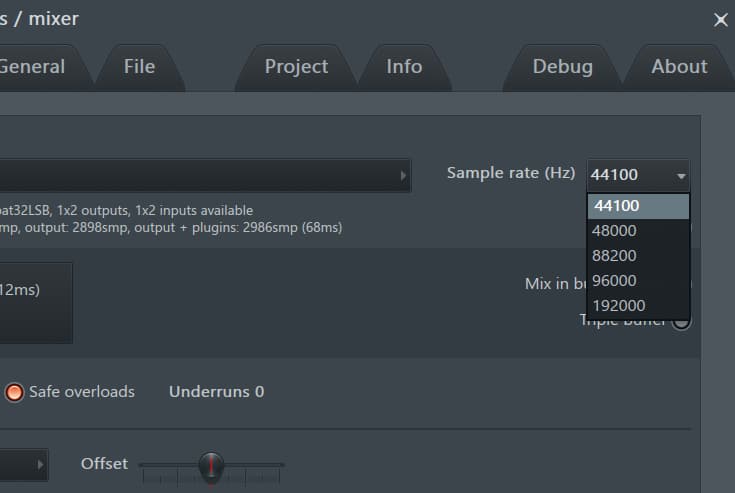
- Click on the “Sample Rate (Hz)” Drop Down menu and choose the lowest one (introduces slightly more latency but isn’t as hard on CPU).
- Click on the “Show ASIO Panel” to adjust the buffer size and select the lowest setting (the lower the buffer the higher the risk of audio crackling).
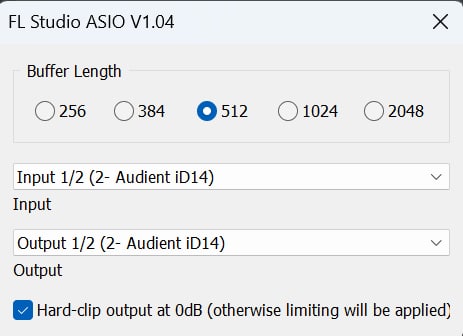
- Test to see the results. If there’s crackling, go back to the buffer settings and select a larger one. Keep on increasing it until the crackling is gone.
Note: Depending on the audio driver you’re using, you may need to adjust the buffer settings in the OS’ audio settings or by clicking on the Audio Driver’s icon on the taskbar (this happens with my Audient Interface).

Other causes
There may be other causes for this issue, not just buffer size, such as plugins not working like they’re supposed to, or plugins actually clipping the sound without this showing up in the metering of the mixer.
Faulty Plugins
My first recommendation would be to bypass the plugins you think might be the culprit, and if this solves the issue, then try a different one. Sadly, not much else that can be done here.
Plugins clipping the sound
A very common beginner mistake is to add multiple plugins onto a track which may increase the signal’s level to a point where it starts clipping (adding multiple plugins is not the issue, but the signal level getting out of control is). Addressing this issue by lowering the mixer fader of that track is not the answer.
The clipping occurs because of the plugins in the chain, and lowering the signal after those plugins won’t fix the issue since you’re simply lowering the gain on an already clipping audio signal.
Make sure to not push the gain on the plugins too hard and to keep the signal throughout the entire chain below the clipping threshold.
What is the best buffer size for low latency?
The truth here is that the lower the better.
If your interface’s driver allows for 16 samples, then that’s the best one as long as it doesn’t introduce too much noise.
Furthermore, as I previously mentioned, the higher the sample rate the lower the latency, so increasing the sample rate will reduce the latency even more.
However, this is generally not recommended unless you have a very powerful computer since the CPU will be under a much heavier load the more you reduce the buffer size and the more you increase the sample rate.
Summary
If you hear a crackling noise when recording and playing back audio in FL Studio, it’s probably because of the buffer size is too small and all you have to do is go to the audio settings and increase its size slightly.
Of course, this may introduce latency, so it becomes sort of a balancing act of how much latency you’re willing to tolerate.