Last updated on May 5th, 2022 at 10:21 am
In this article, I will be covering all the different methods that there are to record guitar straight into the computer without using microphones since this can really come in handy when recording with amp simulation software.
I will start with the method that I consider to be the best one in general, especially for anyone who is a musician in general and who may need to record with microphones down the line.
However, there are plenty of really affordable and almost free alternatives that you may want to consider first.
So, without any further ado, let’s get this thing rolling!
Best Method: Audio Interface or Mixer

Audio Interfaces and Mixers are designed, among other things, to convert the analog signal from your guitar into a digital one so that it can be recorded by the computer, and even though the built-in soundcard in your computer essentially does the same thing, Audio Interfaces and Mixers are much better at doing so, yielding a cleaner signal overall.
In addition to this, they generally also feature dedicated D.I. inputs or a Hi-Z switch that is strictly designed to let you record high-impedance instruments, such as electric guitars and basses.
One more advantage is the dedicated drivers since these will allow you to record at extremely low latencies (I got mine close to 2ms), which is generally not achievable otherwise.
Some Audio Interfaces, as well as a handful of mixers, feature built-in DSP chips that can run guitar amp simulators without having to tax your computer, and all of this is done latency-free since the signal doesn’t need to be sent to the computer, processed, and then back out to the monitors/headphones.
It’s worth noting, however, that audio interfaces with built-in DSP are generally not on the affordable side of things ($200 and up).
Note: You will probably need some Guitar VST and Amp Simulator plugins in order to record high-quality guitar tracks. Check out this list I wrote on the subject.
How to connect a USB Audio Interface or Mixer to the computer:
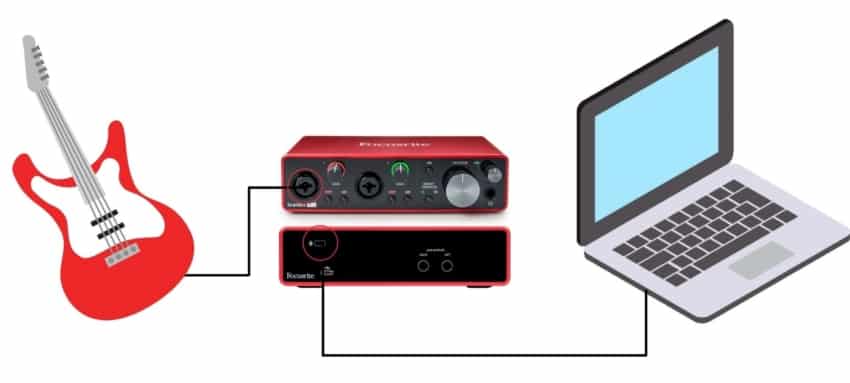
Interface connected to PC via USB.
- Connect one end of the USB cable to the Audio Interface.
- Connect the other end of the cable to a free USB port on your computer.
- If required, connect the Audio Interface to the power supply.
- Install any necessary drivers (generally required for most audio interfaces).
- In your DAW, go to the Audio Configuration and select the Audio Interface or mixer as the recording device.
- Connect the guitar using a 1/4″ TRS cable to the Hi-Z input of the audio interface and adjust the gain.
IK Multimedia iRig HD 2

This is a tiny interface made especially for guitar that can be used both for recording or as a live tool to add effects to your signal chain directly into your amp, or you could even use Amp Sims with it if you want to go straight to the mixer.
iRig HD 2 works with Amplitube on both your PC (Windows or Mac) and any iOS Mobile Device (sadly not on Android), and you can control all the sounds directly from your phone/computer, which is actually why it can be used in a live setting since you load up Amplitube on your phone and connect the output of iRig to the input of your Guitar Amp, and that’s it! It’s really simple.
Of course, you get Amplitube with it, which already sells for the same price as the iRig HD 2.
This little device is part of a huge post I wrote about the best audio interfaces for recording guitar, and while it does work great, I think that if you’re already considering spending about $100 on it, you should instead buy an audio interface in that price range.
Multi-Effects pedal
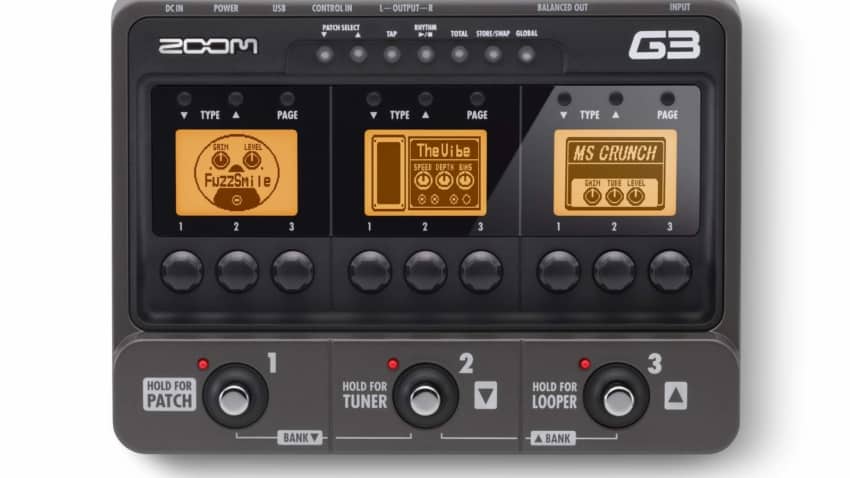
Some of the more modern multi-effects pedals come with a USB port that allows you to connect it to your computer, essentially doing the job of an audio interface but strictly for your guitar while also adding effects.
This is a great alternative for anyone who is strictly interested in recording guitar. However, unless these pedals also feature amp and cabinet simulations, you’ll probably end up using it just as an interface and running the amp simulation plus the effects on the computer.
USB Microphone with D.I. Input
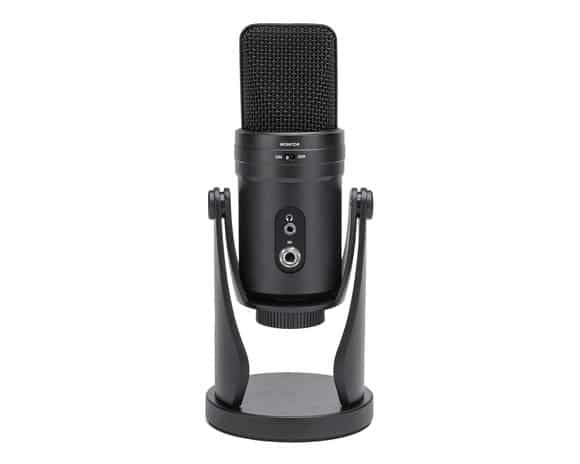
USB microphones work just like an audio interface in the sense that they convert an analog signal into a digital one that can then be recorded by the computer.
However, most of them are only capable of recording the mic signal, but there are a handful of interesting alternatives out there, like the Samson G-Track Pro, that also feature a D.I. input for recording guitars and basses.
What’s even better is that you don’t have to choose whether you want to record the vocals or the guitar, since these types of microphones allow you to record the two tracks separately, and you can even run an amp simulator without much latency at all (you may need to install the ASIO4ALL driver for Windows, but more on this in a second).
How to connect a USB microphone to the computer:
- Connect one end of the USB cable to the Microphone.
- Connect the other end of the cable to a free USB port on your computer.
- Install any necessary drivers (generally not required).
- In your DAW, go to the Audio Configuration and select the USB microphone as the recording device.
- Connect the Guitar to the D.I. input on the USB microphone.
Modelling Amp with USB output
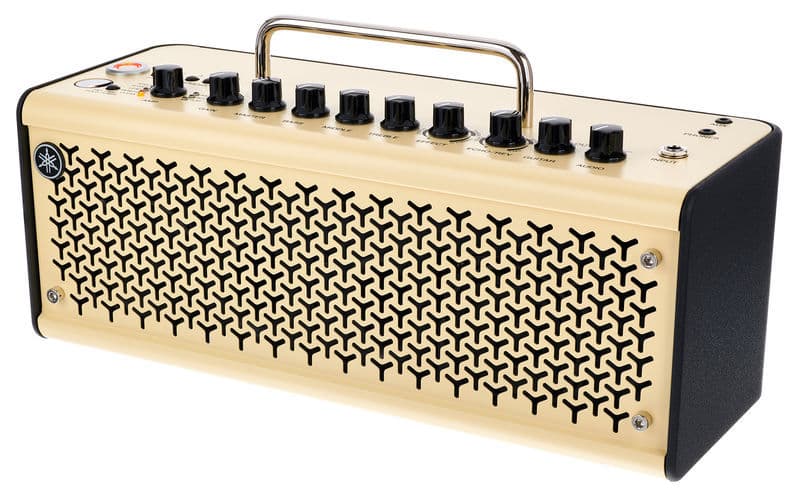
Some modelling amps come with a USB port that allows you to use it as an interface to record audio straight to your computer. The THR10II by Yamaha, for example, is a practice amp strictly designed to be used for recording through USB, and it even comes with software that allows you to tweak the sound, create presets, and even save those to the amp itself.
Since most of these amps are designed with recording through USB in mind, they let you do so without any latency, which is a definite plus. However, as far as sound quality goes, they will never sound as good as a proper tube amp, at least not yet, but the added versatility and cost-efficiency is something to consider.
Connect the guitar to your Computer’s Sound Card
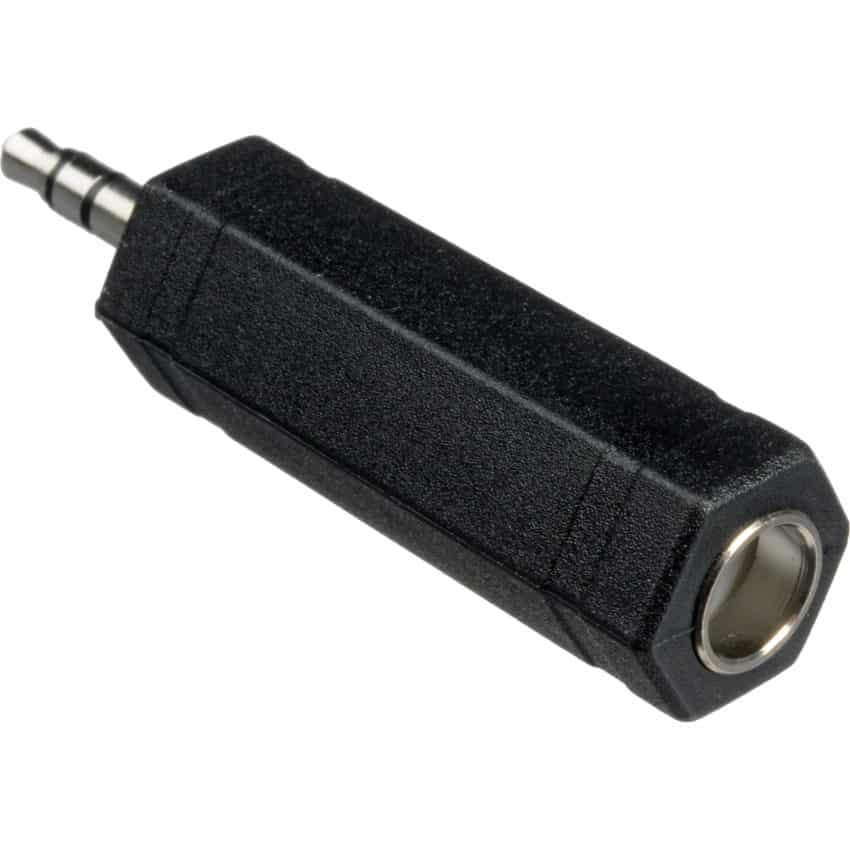
This is definitely not the recommended way of hooking up your electric guitar to your PC because it will introduce some latency and the audio quality won’t be as good as with some of the other methods, but it works and will only cost you about $1 since all you need is a ¼” TRS to 3.5mm adapter (I’d recommend going to your local music store and buying a generic one there since they are dirt cheap), and it’s the way I’d recommend most people who are just starting out to do it.
All you need to do is connect one end of the guitar cable to your guitar and using the ¼” to 3.5mm adapter, connect the other end to the Line-In jack (the green one) on your computer’s sound card.
However, the main problem with doing this is that the PC’s sound card isn’t as good as a dedicated audio interface at converting the analog signal into a digital one, and it doesn’t feature the interface’s high-quality preamps.
In addition to this, interfaces and mixers come with dedicated drivers which are designed to let you record with minimal latency, or may even have built-in DSP chips which do all the processing inside of the interface.
In this particular case, you would need to download ASIO4ALL, a Windows-specific driver that allows you to record with fairly low latency (I managed to get it down to approximately 15ms on my computer) which you can get for absolutely free.
How to install ASIO4ALL
- Head over to the ASIO4ALL website and download the latest version.
- Install the drivers (May need to reboot the system).
- Open the DAW, Amp Sim, or whatever software you’ll be using to record music and go to its audio settings and choose ASIO4ALL.
- Set the buffer size (the lower the better, in terms of latency). If you hear any crackling or popping while recording, increase the buffer size.
- Find the ideal buffer size to achieve the lowest latency possible while still avoiding pops in the audio.
Use a USB Guitar Cable
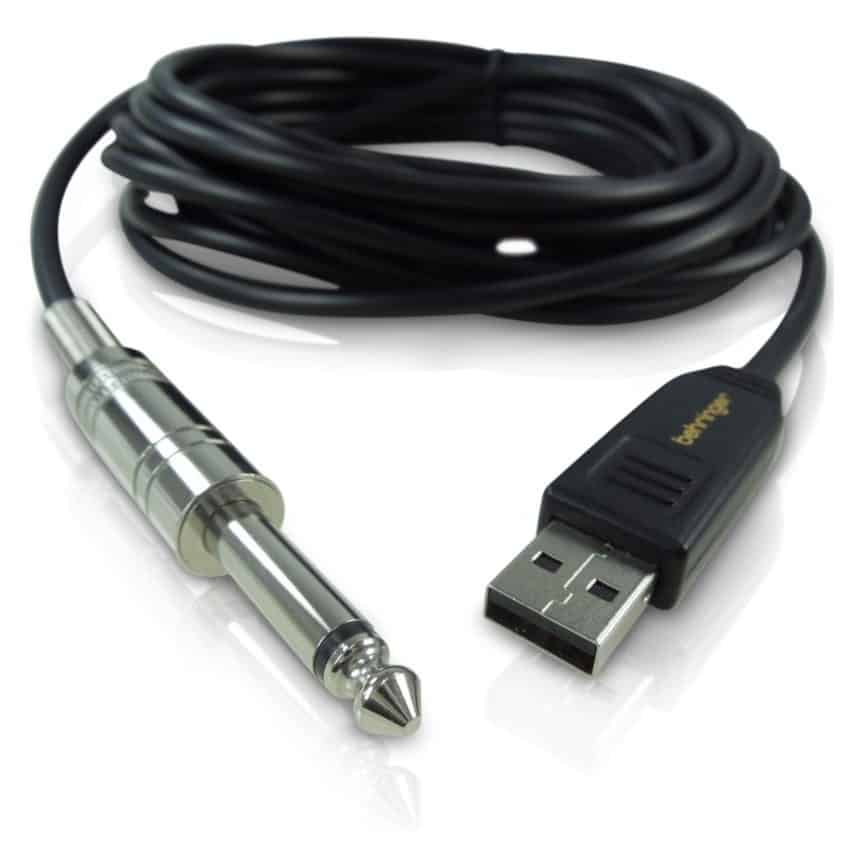
USB guitar cables take the incoming guitar signal and convert it into a digital one. However, the main issue these cables tend to have is latency, and if you ever recorded guitar with a little bit of latency, you know it’s not fun at all.
Most of these cables are pretty bad and will make the latency/delay completely unbearable, however, you could get the “Rocksmith” cable, which is the one that comes with the Rocksmith guitar learning software/game, and this one actually works really well with little to no latency.
And the best part about it is that you can use it both to play the game as well as to play guitar using amp sims, or record it straight into your DAW.
Free Guitar Amp Simulators for you to Download
I wrote an entire article about the best free guitar VSTs currently available, and I also keep updating it every so often since new freeware amp sims keep coming out and are becoming better and better every day.
Here are some of my favorite ones that you can download and use for free:
Guitar Rig 6 Player

Guitar Rig is an Amp suite that features multiple amps, cabinets, stompboxes, and more, and Guitar Rig’s Player edition is the free version of the software which only includes a handful of these features, but it’s 100% free.
It sounds very realistic, is easy to use, and it it’s not that CPU intensive. The one con about Guitar Rig’s Player edition, however, is that it only comes with one matched amp/cab combo that is mainly designed for clean and crunchy tones, but getting a high-gain metal tone out of this free amp sim will be near impossible.
Amplitube 5 Custom Shop
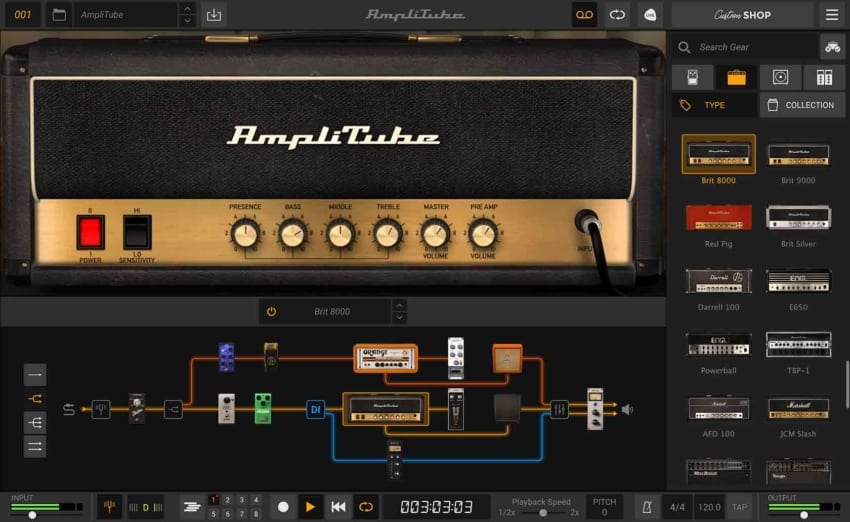
Amplitube 5 CS is almost identical to Guitar Rig in the sense that it’s a full amp suite, and not just one amp, and this means that it includes different amp and cabinet models, stompboxes, microphones as well as microphone positions, and more.
The free version of Amplitube 5 comes with a couple more amps than Guitar Rig, making it overall a better freeware alternative, plus I think that it sounds more realistic and getting metal tones with it is definitely doable.
Amped Roots Free
Amped Roots Free is by far the best Metal and High-Gain amp sim I’ve ever tried: It sounds absolutely fantastic, it’s really easy to use, and it comes with about a dozen presets that all sound great straight out of the box.
Most amp sims require a bit of tweaking to get them to sound great, but that’s not the case with Amped Roots Free since it just works!
This is by far my top recommendation for anyone interested in metal tones!
Emissary by Ignite Amps

The Emissary by Ignite Amps is a very versatile Amp Simulation software that can do it all, from clean tones to crunchy, and really high-gain tones as well (I think that the high-gain channel is where this amp really shines).
It’s worth noting that it doesn’t come with a cabinet simulation (IR), so you’ll need to download the NadIR as well from their website.
Conclusion
The best way to connect a guitar to a computer is by using a dedicated audio interface or a mixer since these will provide the cleanest signal as well as the lowest latency.
All the other methods I described still work really well, even the one where you simply connect the guitar straight into your PC’s sound card using an adapter, just remember to install the ASIO4ALL driver unless you want to be dealing with 300ms+ latency.
In all honesty, if you’re just starting out or if you only want to record guitar for fun using nothing but amp sims, then just get a ¼” to 3.5mm adapter and see how you like the results. Generally speaking, the difference in audio quality when doing this is barely noticeable, but you may suffer from latency in some cases.
I hope this information was useful!
Have a great day!