Last updated on April 29th, 2022 at 11:33 am
Well, there’s a good answer to this question… one that I will try and explain as thoroughly as possible in this post.
I will go into why it’s useful to mix in mono, as well as why you should also consistently check it in mono.
So, without further ado, let’s go into the guide:
Should you Mix in Mono?
While Mixing in mono is generally harder than mixing in stereo, you will get better results since mixing in mono only allows you to separate different instruments by adjusting their relative level and spectral content, instead of relying on panning.
This means that a mix that sounds good in mono will sound even better in stereo, but not the other way around.
First, let’s start with the basics.
What is Mono?
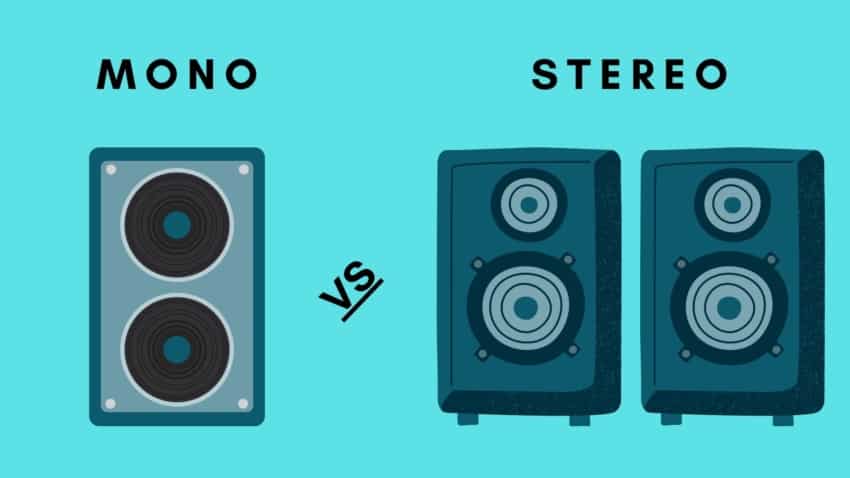
In essence, mono is like listening to the entire mix through only one speaker since all the tracks are being played through the middle, without any panning.
We usually listen to mixes through either two speakers or headphones, and this means that we can listen to the right- and left channels simultaneously.
When panning an instrument to the left for example, we can hear it moving to the left in the stereo image.
This isn’t possible in mono, since every track is summed to a single mono channel and all instruments are right in the middle.
And this can be beneficial for mixing, let me explain:
Why listen in Mono?
One could argue that the mixing process should be done in the same way that we listen to music, which would be in stereo… at least in most cases.
But there are several reasons to mix in mono, and here are a few of them:
Clubs and Restaurants play in Mono

Since the speakers in clubs, restaurants, and stores in general, are spread out throughout the venue, they have to play the song in mono, otherwise some listeners will only be able to head the right channel and some others only the left.
This is why, in most stores, music gets automatically summed to mono and you need to have a mix ready to go with it!
It solves Mixing problems that Stereo won’t show you
Adjusting the levels for each track at the start of the mix in mono will force you to set them properly, without relying on panning to make room for competing frequencies.
This also applies to EQ, compression, and processing in general.
Panning instruments out of the way can lead you to believe that you have a great mix going, but summing it to mono will reveal all the flaws that still need to be addressed.
That’s why it’s a good idea to start in mono.
How to put your mix in Mono?
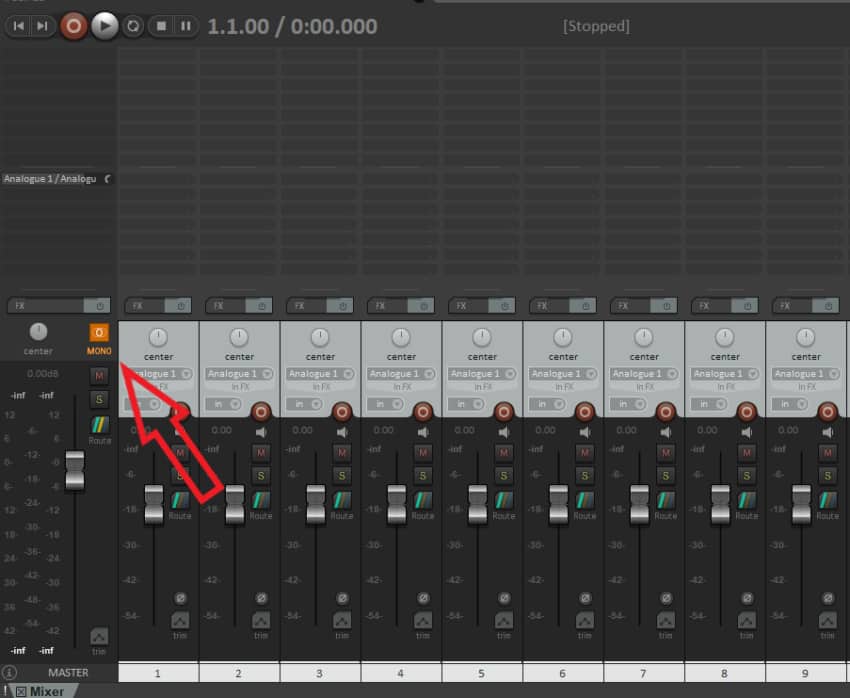
Now that you understand why mixing in mono is so important, let’s see how to actually play your mix in mono, and this will vary depending on the software you’re using to mix and your equipment:
If you have an Audio Interface with a mono switch, you can use that to collapse your mix into mono. But if your Audio Interface doesn’t give you that option, here’s a way to achieve this through your DAW.
With ProTools you can use the “Air Stereo Width” plugin on the master output and decrease the width to zero.
In Reaper you can simply click on the Mono button on the master Channel.
If you’re using Cubase and you don’t have a stereo enhancer plugin, download A1StereoControl and put it in the master output. Then decrease the stereo width to zero.
You can download it for free from this link.
If you’re using another DAW, a quick google search for “DAW name” + mono should tell you how to achieve this.
What problems can Mixing in Mono fix?
Let’s get right into all of the benefits of mixing in mono, as well as swapping from stereo to mono every so often to see how the mix is doing.
It forces you to mix properly
At its core, mixing is just about adjusting the relative volume of the tracks, the frequency content and the stereo position properly.
If you remove the stereo position, it will let you focus more on the other two and it will make it obvious where things need some tweaking.
If you have two tracks, one totally panned to the right and the other to the left, it will be easy to discern what’s going on in each one because of the stereo position.
But as soon as you switch it to mono and they are both coming out through the middle, if the volume wasn’t set properly or if some more EQ or compression is needed, it will be much harder to identify what is being played in each track.
It exposes Phase Problems
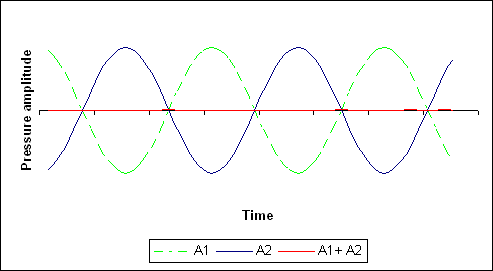
When panning instruments, since one is coming out the right monitor one the other one is coming out the left monitor, phase cancellation isn’t a problem.
But as soon as you collapse everything to mono, if those tracks are slightly out of phase with each other, you will run into some issues.
This is especially true in the low-end.
An easy way to recognize if you have phase issues is if as soon as you hit the mono switch, some instruments go from sounding full to thin, or there may be volume variations.
The Mid channel will sound fantastic
A stereo mix that sounds great won’t necessarily sound good in mono, but the opposite is true.
If you manage to get good separation between the different instruments in mono by relying on proper level adjustment, EQ, compression, etc., then your mix will not only sound great in mono, but even better in stereo.
How to Mix in mono?
First you need to set your Mix to mono by following the steps I previously described, or by doing a quick google search of “DAW name” + mono.
It’s important to note that while you could certainly mix most of your song in mono, you should be checking how well it’s doing in stereo quite often, and if you adjust something in stereo, then you should check how those changes affect the mono side of things as well.
1. Start by adjusting the Levels
The first step is to properly set the levels for each track.
What track you want to start with depends on how you’re used to doing things, but starting with the most important ones can definitely be beneficial, like the vocals, drums, etc.
It’s also worth noting that this could be done in stereo, and to also pan the instruments to where you want them to be while you’re at it.
However, panning lowers the overall level of the track, about 3dB when hard panned, so you may have to compensate for that later once you set the mix to mono again if your DAW doesn’t do this automatically.
2. Use EQ to prevent Masking
The reality of the matter is that panning instruments out of the way makes it easy to hear them all in the mix, since they are not competing for the same frequency ranges in the middle.
Using EQ wisely to make room for different elements in the mix that are competing over the same frequency range, is essential if you want it sound clear and intelligible.
This step is the one that will probably yield the best results, so really take your time here and make sure that every instrument has a place in the mix.
3. High-pass the low-end
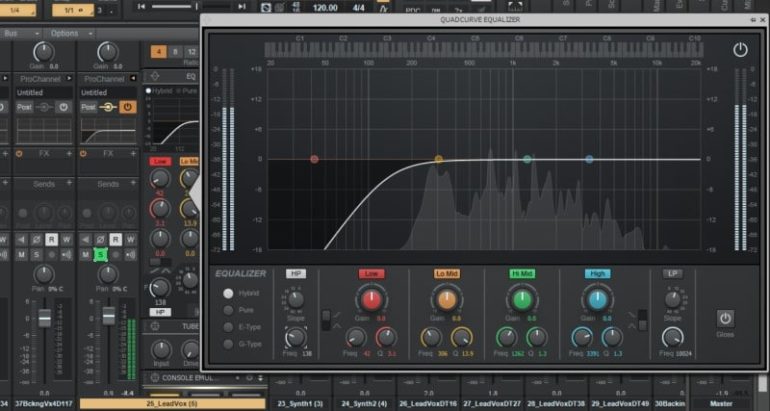
High-passing the low end will do a couple things;
It will improve some of the phase issues since phase misalignment tends to happen more in the lower end.
Removing unnecessary low end from tracks that don’t really need it will make room for the bass, the kick, etc.
This isn’t as noticeable when listening in stereo since some of the instruments are panned to the sides, but mono will let you know if the electric guitars, the piano, a synth, or any other instrument is masking the bass or the kick.
Essentially, high-passing the low end around 150Hz and below on most tracks will open up room for the ones that actually need it, making the mix sound clear and less muddy.
This is especially true in rock music, because the bass tends to play exactly the same part as the guitar, so it all ends up blurring together.
4. Apply Compression
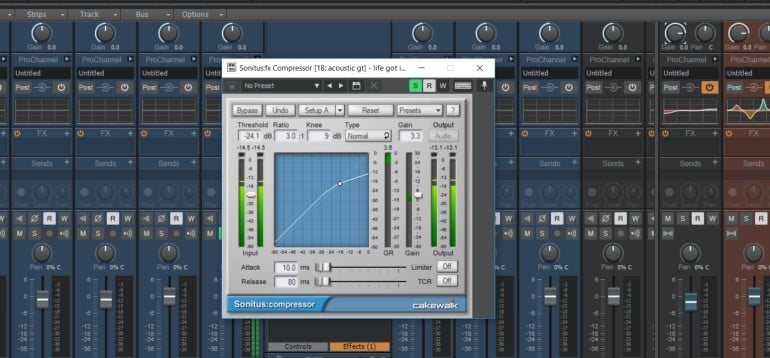
In stereo, it’s easy to think that the dynamics are well balanced, but as soon as you listen to the mix in mono you might notice one instrument masking another one at certain times because of volume spikes.
Compression will help you achieve a better dynamic consistency across the entire mix, which will keep certain instruments from being too prominent at times.
5. Fix Phase Issues
This usually happens when recording a source with a stereo mic configuration, like guitar of piano, that wasn’t ideal, and now the polarities of both signals don’t align.
There are a couple ways to fix this;
- Flipping the polarity of one channel: Inverting the phase of the right or left channel might fix the problem, but that’s rarely the case.
- Use a Phase alignment plugin: There are specific plugins out there designed to do this, like the Waves InPhase.
- Delay either Channel: This is the easiest method since it involves gently delaying one of the two channels to make the soundwaves of both channels align.
I personally adjust it by hand, by delaying one of the channels; I zoom in as close as I can and then I nudge one slightly to the right or left until the soundwaves align with the other channel/track.
6. Check the Levels & Panning in stereo and readjust if needed
Now, before you add any time-based or spatial effects, it’s time to listen to the mix in stereo and see how it all sounds.
If you adjusted the panning in the beginning, there should be a noticeable difference now in terms of clarity.
If you didn’t adjust the panning earlier, then now is the time to do so.
You may need to re-adjust the levels as well as the panning, but make absolutely certain to re-check the mix in mono once those changes are made.
Move back and forth between stereo and mono until you have a well-rounded mix.
7. Add Spatial & Time-based Effects
The last step is to add all the effects such as reverb, delay, chorus, etc., but make sure to place them in a Bus since they will consume less CPU resources, but also will allow you to EQ them separately from the rest of the tracks.
Why is this important?
Spatial and time-based effects are the easiest way of ruining- and adding mud to a mix, and being able to EQ them to clear up the mix is an absolute must.
Once you added the effects and they sound great in stereo, go back to mono and EQ all those effects until the mix sounds how you want it to.
You will notice that the mix will sound absolutely fantastic now when playing it in stereo again.
What elements should be panned?
Of course, there are some things in the mix that can and should be panned, but there are some others -always depending on the genre of the music you’re mixing-, that should be dead center.
What usually goes in the center?
Lead Vocals, Bass, Kick- and Snare-Drums.
Everything else can be panned.
Depending on the part of the song, you can pan stuff only half-way to the left or to the right and then in the choruses create an automation to hard-pan to create a wider feeling.
This all comes down to what you feel the song needs.
Finish the mix in Stereo but check it in mono frequently
I told you to start the mixing process- and to do most of it- in mono, but the closer you get to finishing the mix, the more important it is to listen consistently in stereo and to only check in mono from time to time.
This is because most listeners will be listening in stereo since it yields a much better experience, and we have to make certain to create the best-sounding stereo mix possible, without losing sight of the mono side of things.
Should you use Stereo Width Plugins?
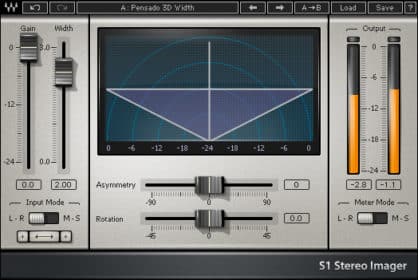
While getting a huge stereo image might sound great in theory, I find that it’s not worth your time mainly because most people won’t even be able to listen to it.
If you’re in a mall, restaurant, etc., and if they are playing music in Stereo, you won’t be able to hear it because of the distance.
Also, in most homes you might find that one speaker is in the living room while the other is really far away, maybe even in another room.
There are some plugins you can use to increase the stereo width, but in many cases these cause more problems than they solve.
Can you mix in mono using headphones?
While you will probably do the bulk of your mixes with Studio Monitors, mixing on Headphones can be done as well.
But, can you actually switch to mono while using Headphones?
Absolutely, there’s no reason not to. The only thing, I find, is that I feel every sound right inside my head which I don’t personally like that much. I find it better to use them in stereo.
But go ahead and try it!
I wrote this article on how to get great sounding mixes using only Headphones, which you may also find useful.
Should you master in mono?
While this may at first seem like a ridiculous question, I think it’s worth exploring.
I don’t necessarily think that most of the time spent mastering should be done in mono, since you’re also listening to the stereo field to find out if you need to use a stereo enhancer plugin as well or not, but it’s definitely a good idea to listen in mono while mastering to check for issues.
If it sounds good in mono, it generally translates well to stereo, but not the other way around.
I wrote an article about the best mastering VST plugins currently available that you should definitely check out as well!
Conclusion
Mixing in mono will definitely help your mixes translate into the real world a lot better, but remember that you will ultimately want to mix it the way you want your song to be heard, which would be in stereo.
Also, since you will have to work twice as hard on applying EQ and compression when working in mono to get every element to cut through the mix, as soon as you switch to stereo everything will sound even better.
Don’t mix the entirety of the song in mono, but switch between mono and stereo to be able to compare how everything is going.
This is a simple step that can save you a lot of time and hard work.
I hope you found this information useful!
See you on the next one!
Just because vocals are recorded on to a mono track doesn’t mean that they have to be mixed in a mono mix. You should consistently check how they sit both in the mono- and stereo mixes.
A mono mix is when your music is played at equal volumes on both speakers, meaning that no instruments were panned to either side, and listeners will perceive this as a single channel instead of two separate ones, called center- or mono channel.
Stereo sends one channel to the right speaker and one channel to the left speaker.
Mono sums both of them into one center- or mono channel where the same information gets played on both speakers.
Great article. so if im working with vocals that has a lot of panning in it, how would i approach that? would i centre all the vocal tracks (including lead, harmonies, ad libs etc) and mix in mono? and at what point do i start adding panning? do i start adding pans when i switch to stereo, OR before switching to stereo when im still mixing in mono?
Do i set the vocals to the desired pan, mix in mono then switch to stereo?. or do i have them all set to centre while mixing in mono, then switch to stereo and start panning as desired? thanks for your help