Mixers are known for their live applications, while audio interfaces are better known for recording in a studio. However, you can connect all your gear to a mixer, process the audio and create a nice-sounding mix that gets sent to the main output while still having the option of recording all those tracks as well for later use.
Now, this does depend on multiple factors, which I’ll be getting into in this article. But in short, you can use your mixer in a live setting while still being able to record either the stereo out or even every single track into your DAW.
In this article, I will be talking about how you can connect your mixer to an audio interface (there’s more than one way), what cables to use, and what better alternatives there are.
So, without any further ado, let’s get started!
How to connect a Mixer to an Audio Interface
To connect a mixer to an audio interface you need to connect either two XLR, ¼” or RCA cables from the main output on the mixer to the inputs on the audio interface, or you could use the inserts on the mixer to connect to the inputs on the audio interface (generally used for connecting high channel-count mixers to interfaces that offer multiple inputs).
Hooking up a mixer to an interface isn’t as complicated as it may seem, since all you need to do is find where the signal is being output on the mixer and connect that to the inputs on the audio interface.
It’s worth noting, however, that even though some mixers nowadays come with a USB port that would allow you to record directly into your PC, most of them only let you record the stereo out (Left and Right Main outputs).
This isn’t an issue when you’re recording only two inputs, say two microphones, but if you want to record something like a drum kit, having everything summed to a single stereo file doesn’t leave you with much post-processing room in the DAW, but more on this in a second!
Using the Mixer Main Outputs
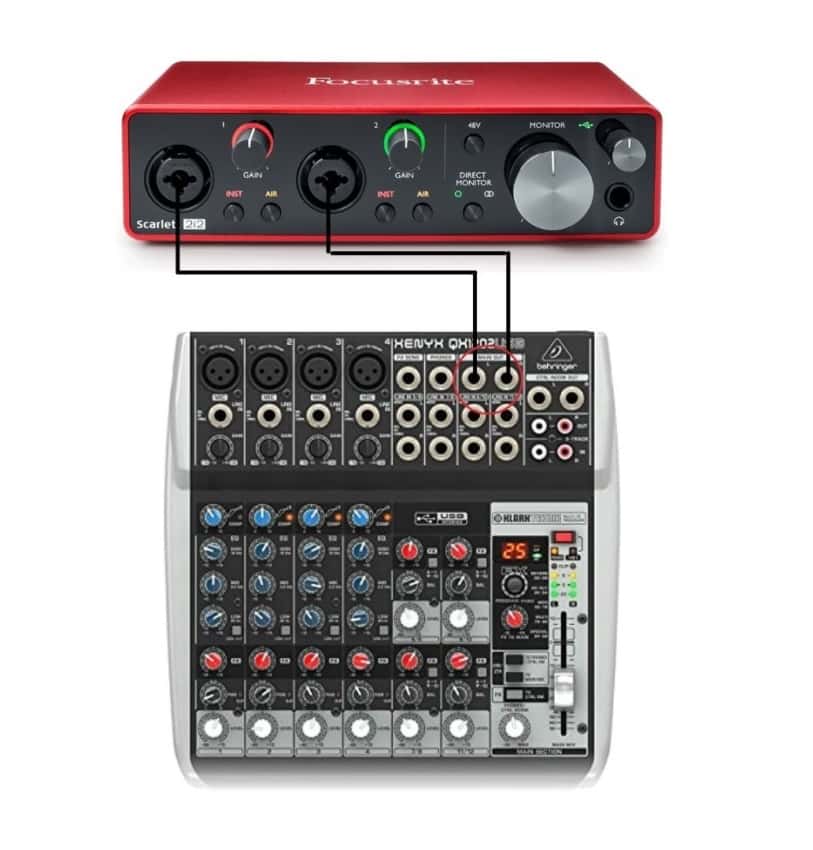
To connect a mixer to a USB audio interface using only the Main Output on the mixer you will need either an XLR, ¼” or RCA cable, depending on your mixer, and connect those outputs to the inputs on your Audio Interface.
Now, if you are recording two microphones, for example, you will need to pan one mic 100% to the right and the other one to the left on the mixer, so that only one mic can be heard through the right and left channels respectively.
The left main output will carry the signal of one microphone and the right main output will carry the signal of the other one, which will in turn be plugged into inputs 1 & 2 of the audio interface, essentially providing you with two separate mic signals.
Using the Mixer Inserts
If you have a mixer that’s got something like 16 inputs and you want to use those to record an entire band, if it’s not a mixer capable of doing multi-track recording, you’ll need to connect it to an Audio Interface via the inserts.
Important note: You will need an interface with the same number of inputs you want to be able to record. So, if you need to record 12 simultaneous tracks, then the interface would need to have 12 inputs (1/4” or XLR/1/4” TRS combi), and the same goes for the number of inserts on the mixer since some of them feature 20 inputs but no inserts.
Here’s how to do it:
- Connect the Microphones/instruments to the inputs you’ll be using on the mixer.
- Insert a ¼” cables into each of the “Insert” jacks that correspond to the input channels that are being used.
- Connect the other end of those ¼” cables to the inputs on the Audio Interface.
- In your DAW, select the input of each one of the tracks and you’re done.
Now, when you push the TRS cable all the way into the “insert” jack it cuts the sound from the main output, meaning that it now works as a direct output only.

However, if you want to be able to record the tracks while simultaneously having them being sent to the main output, like for example in a live show where you want to multi-track record everything at the same time, there’s a trick you can use that involves not inserting the plug 100%, but rather just half-inserting it.
To do this you need to push the plug in until it clicks once (you’ll notice that there’s still a part of the plug that can be pushed in further). If it clicks twice, this means that you pushed it all the way in and the signal won’t reach the main outputs and you’ll need to pull it out just a little bit until it clicks again (check the image above to see how it looks).
It’s worth noting that this method is only recommended if you already own both a high input count audio interface and mixer, since most modern mixers now allow you to do multitrack recording and also come with additional features, such as recording to an SD card, and more, but more on this in a bit.
What cables should you use?
What cables you use will depend entirely on your mixer since not all of them provide you with the same options, but basically you can go with Balanced (XLR & TRS) or Unbalanced cables (TS, RCA).
I Wrote an entire article comparing balanced and unbalanced cables, but here’s the basic rundown:
Balanced Cables
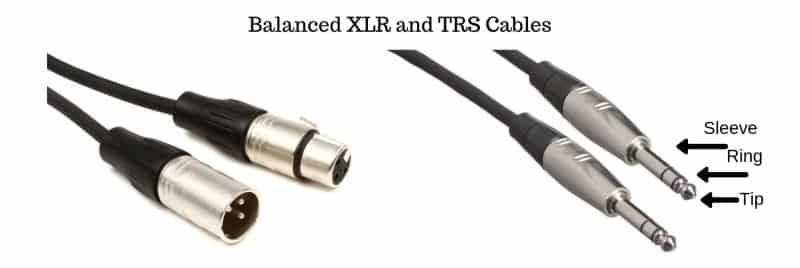
Balanced Cables, such as XLR and TRS (one type of ¼” cable, different from TS), are designed to filter out noise and interference. They have two signal wires and a ground wire. One of the signal wires inverts the polarity of the signal at the beginning and then flips it back into phase at the end, cancelling out any outside interference and leaving the audio signal intact.
Balanced cables are ideal for long cable runs for this reason, since they are not susceptible to noise and yield the absolute cleanest signal, which is why they are used in live shows.
Unbalanced Cables
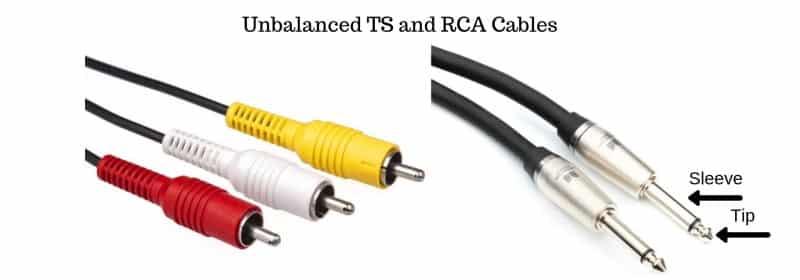
RCA and TS (one type of ¼” cable) are considered to be unbalanced signals because the cable only has two wires, a signal- and a ground wire, which means that there is only one copy of the signal being sent through the cable (in this case from the mixer to the audio interface), making it much more susceptible to picking up noise & interference since there isn’t another signal wire available that gets its polarity flipped to eliminate noise.
While still more susceptible to noise than balanced cables, unbalanced cables don’t pick up any measurable interference unless it’s a really long cable, making them ideal for home studios.
Like I previously mentioned, your mixer will dictate what cables to use since most of them don’t offer XRL, ¼” and RCA connections, but rather just one of them, but the reason for this is because they all work great!
If you can choose which one to use, go with XLR, especially if you’re going to be using really long cables, otherwise just use the appropriate cable for the connection you have on your mixer.
Mixers with a built-in Audio Interface
I touched on this previously, but not all mixers are created equal: Some of them come with a built-in audio interface while some others don’t, and there are even more expensive alternatives out there that feature multi-track recording.
Now, why did I make that distinction? Isn’t a mixer that has a built-in audio interface capable of multi-track recording?
Well, not always!
Mixers without a built-in audio interface require an external interface to be able to record, using any of the two methods I described earlier of connecting them to the interface.
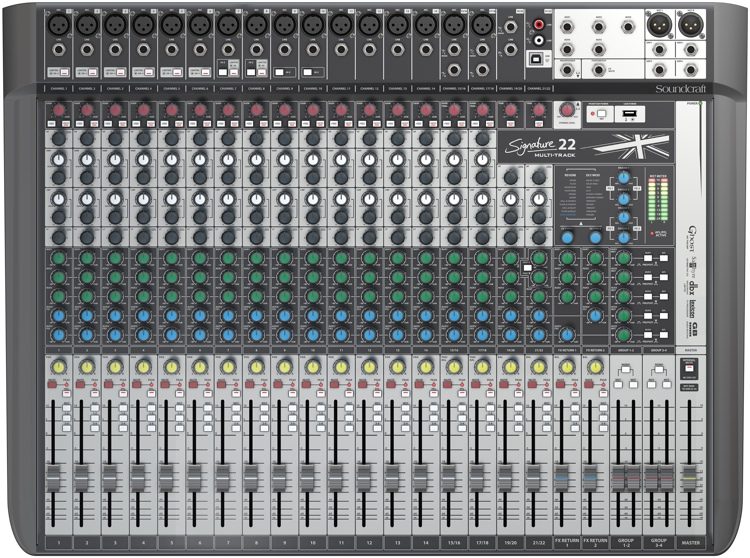
Mixers with an audio interface, especially the cheap ones, only let you record the stereo out via USB, meaning that if you have a 22-input mixer, all those tracks will be summed to a single stereo file which you can then record.
While this may work for recording rehearsals or live shows, it’s certainly not the best way to go about it since you won’t have any control over the individual tracks once they have been recorded. All you can do is process that single stereo file.
This is where mixers with multi-track capabilities come in!
Mixers with a built-in Multi-Track Audio Interface
Multi-track mixers do just that: They let you record each individual track onto your DAW without the need of an additional audio interface. Some of them even let you record those same tracks to an SD track at the same time.
This means that you can record an entire live show and then import all those tracks into your DAW of choice and mix them, which gives you a lot more control over every single track than if you only had the stereo mix.
These mixers are generally more expensive, but if you consider the cost of getting a mixer plus an additional audio interface with enough inputs, the cost ends up being roughly the same, only now you have everything on the same device.
Summary
Here are the steps you need to follow to connect your Mixer to an Audio Interface:
- Connect your recording equipment (microphones, instruments, etc.) to the mixer using XLR or 1/4” cables.
- Using XLR or ¼” cables, connect the main outputs of the mixer to the Audio Interface’s inputs.
- You can also use the inserts on the mixer to send the signal to the inputs on your Audio Interface as well.
- Connect the Audio Interface to your computer.
- In you DAW select the input for each track and you’re done.
If you need to record multiple inputs, say a full live band, the best option is to go with a mixer that can already record multitracks since this will save you a lot of time as well as money, and you won’t have to deal with dozens of cables going from the mixer to a separate audio interface, which can be a tedious task.