Last updated on December 31st, 2023 at 06:06 pm
Many people seem to think that studio monitors are just a marketing gimmick and that you can produce music on any Hi-Fi system, or even on PA speakers. Of course, the opposite is also true, where you get told that unless you spend 2k per monitor your mixes will suck.
In this article, I will go over why I think that studio monitors are extremely important, if you need any additional equipment to make them work, how much you need to spend to get quality results, and how to properly position them in your home studio to get the most out of them.
So, without any further ado, let’s get started!
What are Studio Monitors?

Studio monitors are loudspeakers specifically designed for professional audio production applications, such as recording studios, filmmaking, television studios, radio studios and project or home studios, where accurate audio reproduction is crucial and they are used for “critical listening”.
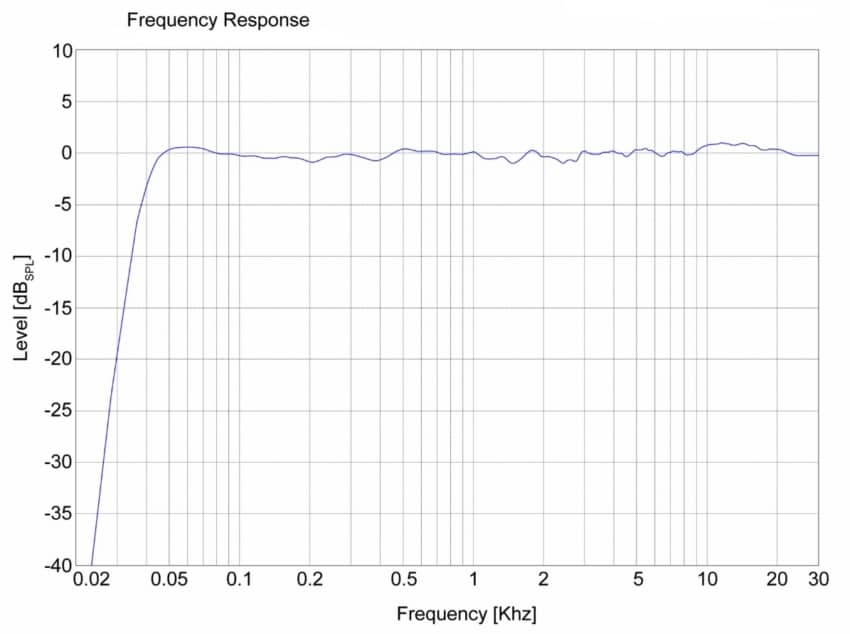
Generally, studio monitors are designed to sound as flat as possible, or to have a flat frequency response, where there’s no extra EQ cutting or boosting specific frequencies to make them sound better, but rather to help them reproduce audio as accurately as possible since you need to be able to hear what is going on in the mix.
Studio monitors are also Close-field, or Near-field speakers, which means that they are small enough to sit on a stand or desk in proximity to the listener, so that most of the sound that the listener hears is coming directly from the speakers, rather than reflecting off of walls and ceilings (and thus picking up coloration and reverberation from the room).
In short; Studio monitors are designed with accurate audio reproduction in mind, where no frequencies are boosted or attenuated on purpose to color the sound, or to make them sound better, which is why they are often referred to as “flat” and why they are used in music production, filmmaking, etc.
Why are studio monitors important & necessary for music production?
Studio monitors are designed to have a flat frequency response, where there’s no obvious sound coloration going so that the producer can accurately hear how the mix is sounding and what adjustments need to be made in order for it to sound balanced.
With a Hi-Fi system, for example, some frequencies are being boosted to make the end product sound better, or to enhance the sound, but this is not what you want when producing music since you need to be able to critically listen to the entire mix to make decisions.
Like a mixing engineer I know once told me; “Studio monitors tell you the truth about the sound”, and I couldn’t agree more with him.
They provide a Flat Frequency Response

Sounding “flat”, or having a flat frequency response, just means that there are no specific frequencies being cut or boost to make the music sound “better”, “punchier”, etc., which is something that you can find a lot today on commercial headphones, for example, where the bass is being boosted quite a bit.
My Hi-Fi system also does this and, in all fairness, the way it sounds is much more interesting and appealing to me, but it’s not the best system for mixing since it’s not representative of how the different instruments actually sound in the mix, plus you may not be able to discern if some frequencies are being boosted too much or if they are being masked by other frequencies, making the mixing process a lot harder.
They are designed with sound quality in mind
Since Studio Monitors are mainly designed for music production, the quality of the audio needs to be better than what you normally get with a Hi-Fi- or PA system (I don’t mean that they sound more interesting, just that every little nuance in the sound comes through and can be heard).
This is a similar concept to one I mentioned earlier about studio monitors having a flat frequency response, since the producer has to be able to make the right decisions while mixing & mastering.
They provide audio Crossover
This is an often-overlooked aspect when comparing monitors to headphones, since with headphones you can only listen to the right channel in one ear and the left channel in the other. In other words, you listen to each channel in isolation.
With speakers, on the other hand, even though you should mainly be listening to the left speaker with the left ear and to the right speaker with the right ear because of how the speakers are positioned, both your ears will receive information from both speakers, which can help you better adjust the panning for a better and more realistic stereo feel, as well as diagnosing specific issues, and it’s also a more realistic representation of how people listen to music, so you should mix it that way as well.
They don’t distort the sound
One of the cons of regular speakers is that they distort audio, although very slightly, once they exceed a certain volume threshold, and this is far from ideal for music production, mixing and mastering.
Now, even though studio monitors are definitely not meant for reproducing music at really high levels, they can generally be pushed to their limits without distorting since, again, they are used to listen to music critically to gauge whether or not something needs to be adjusted.
Improved Dynamic Range
Dynamic range is the difference between the softest and loudest signals a device can handle, in this case audio intensity (measured in dB), and speakers that have a wider dynamic range will be able to reproduce louder and quieter sounds more accurately than ones that have a lower dynamic range, which, again, is crucial for music production.
Better Build Quality
Even though I don’t consider this to be one of the major pros of studio monitors, they are usually built a bit better than general commercial speakers since they aren’t always reproducing processed music that has a relatively low dynamic range (difference between the loudest and softest parts), which means that they have to deal with very quiet audio signals that may be followed by a loud volume spike.
Over time, this may end up causing some harm to speakers that are not made with this purpose in mind. But essentially, they are more prepared for reproducing music that hasn’t been mixed yet.
Do studio monitors require additional equipment?

Generally speaking, studio monitors don’t require any additional equipment to be used aside from a device that can reproduce music, such as a computer, phone, etc., since they are active speakers that don’t require an additional preamp.
In most cases, you will need to get a 3.5mm to 2x ¼” Y-cable to be able to connect both speakers to a single device.
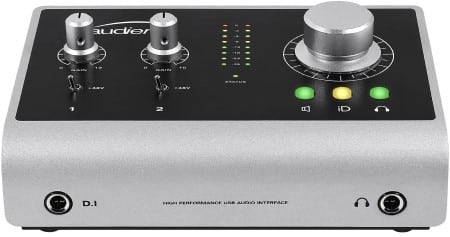
If you are into music production, then investing in an audio interface may be better since it allows you to connect the speakers to it using balanced cables, either TRS or XLR, which are much better at minimizing noise, and the audio quality an audio interface can produce is also generally better than the one coming from a computer’s sound card, and of course it allows you to record music as well.
How much do you need to spend to get quality studio monitors?
Of course, here the sky is the limit, since you can get studio monitors that cost about 10k for just one speaker, not the pair, and if there’s one thing that I’d recommend investing in, it’s studio monitors.
Studio monitors are your ears in music production and they allow you to detect and correct issues, balance frequencies, and create a great product, which is why I think that the majority of your budget should go towards high-quality studio monitors.
That being said, there are more and more monitors being produced on the budget side of thing (about $300 for the pair) that are performing really well and that allow you to get your foot into the whole recording scene without having to put a mortgage on your home.
On the cheaper side, you will be spending about $300 for a pair of studio monitors, while if you’re looking for something more high-end, you may have to spend somewhere around $1400 for a pair.
Here are the ones that I’d recommend getting:
Studio Monitor Recommendations for every budget
For most people, who I assume as beginners or just enthusiasts who like to produce music every now and then, I’d recommend going with something affordable. Just make sure that they are decent speakers and not the ones being marketed as “Studio Monitors” when, in fact, they sound like garbage! Yes, I’m looking at you PreSonus Eris e3.5 and e4.5.
In this case I have two recommendations:
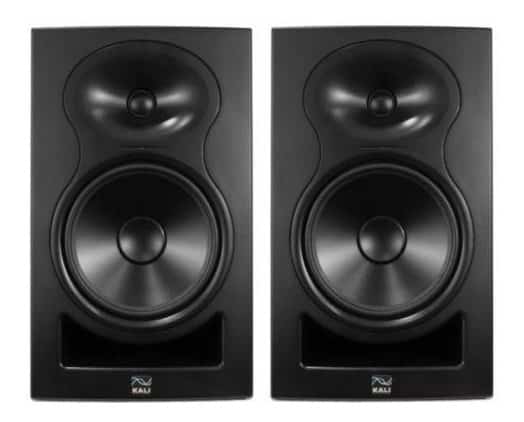
- Kali LP-6 (Get these if you can): Amazon, Sweetwater.
- Adam Audio TV5: Amazon, Sweetwater.
I tried both and, in fact, I own a pair of the Kali LP-6, and they sound great and only cost about $300 a pair.
For people looking to up their game, I’d recommend these:
- Yamaha HS8: Amazon, Sweetwater.
Now, once you get your new monitors it’s time to figure out how to position them inside your studio. So, let’s take a quick look at that!
How to position Studio Monitors
Studio Monitor placement, despite being crucial and something that make or break your listening ability, is far simpler than you might think.
Here are some pointers to help you get it right:
Speakers should form an equilateral triangle with your listening position
There are a couple different ways of positioning your studio monitors, but the simplest and most effective one is to place them with the tweeter at ear-height and each facing towards you.
Essentially, you need to be in the listening “sweet spot” which is really easy to achieve: Simply angle each speaker so that the tweeters form an equilateral triangle with your head—that is, the speakers are the same distance from each other as they are from you.
The speakers’ back side shouldn’t be too close to the wall
The sound that comes out the back of the monitors, especially the lower frequencies, will get reflected back forwards and mix with the direct sound of the monitors, which can cause of kinds of phase issues.
Most high-end studios, therefore, build their studio monitors directly into the wall to prevent this issue, but I assume that most people won’t be doing that, so here’s the next best solution:
You need to create the maximum separation between the speakers and the wall., although this, of course, depends on the room’s size, and then you should consider installing thick acoustic panels behind the speakers to absorb those reflections.
Position monitors against the longest wall
To avoid those pesky side reflections, position the monitors along the longest wall and at a different distant from the side walls than from the back wall.
Can’t you just mix on headphones?
While mixing on headphones is doable, studio monitors allow for audio crossover, allowing you to listen to both the right and left channels with both ears instead of listening to each channel in isolation, which is much more representative of the real world, can help resolve phase issues, and to better adjust the panning for a more realistic stereo feel.
Of course, plenty of people are able to create high-quality mixes on headphones and, in fact, headphones do have a place in the mixing process since they allow you to hear click and pops much more easily. But it’s not the ideal- or recommended way.
Still, if you find that the mixes you produce on your headphones are sounding phenomenal, then by all means, keep at it!
Conclusion
I think we’ve established that studio monitors aren’t just a marketing gimmick and that they serve a very real purpose, which is allowing you, or any producer, to critically listen to what is going on with an audio file, mix, etc., since they don’t color the sound and have excellent audio quality.
It’s also true that you don’t need to spend a fortune on studio monitors to get professional results since, over time, you’ll learn how your specific monitors sound and how you need to make the mixes sound on them so that they properly translate into the real world.
I hope this information was useful!
Have a great day!
