Last updated on February 27th, 2020 at 04:11 pm
I think that this is a problem that many musicians have ran into a lot of times in their career and I know that there are a lot of opinions and controversy regarding this topic, so in this post I intend to at least give you some pointers on when to use a real drummer and when to use samples, plus how to use samples to enhance your sounds.
But first…
What is the Difference between Real Drums and Samples?
Real Drums, as the word implies, requires an actual drummer to play the drum kit, which are then recorded and mixed.
Samples, on the other hand, are pre-recorded Drum sounds, sometimes including full beats and even fills, which can be added to the song and then modified to taste.
There are three basic ways of using samples;
Creating a midi file that triggers the samples
This is fairly straight forward; you simply need to lay down a MIDI track which then plays back the drum samples.
This is great for musicians who don’t play drums, but also if you are simply creating a demo, because recording real drums can be a real hassle since you need to mic the whole kit properly, record, mix, etc.
Plus, some drummers can’t really keep time to perfection, which means that you will need to edit every beat that’s a bit off.
When creating a MIDI file, you ensure that every beat is perfectly in time, this makes the whole process easier.
One con to this method is that it may not have the same feel to it, even though Plugins like EZDrummer try to achieve that human feel, it’s never exactly the same.
Another issue is that if you don’t have a lot of experience in laying down MIDI tracks for drum parts, then it’s going to take you a lot of time to do so.
There is some good news though, since some of these Plugins like EZDrummer, Superior Drummer, etc. also include presets that you can simply copy and paste into your DAW, with Fills and everything.
This should make the whole process of laying down the tracks easier.
Replacing the recorded drum sounds with samples
Another way samples can be used is by having a real drum player play the part and then replacing the sound of the real drum with samples. This works especially well when the drum set doesn’t sound the way you want it to but you still prefer having a real musician play the part.
You just need a plugin that triggers the sample every time the Snare, Kick Drum etc. gets hit. This will effectively replace the real drum sound with the sample, giving you a much better sound overall.
Important note: Try and find a sample that complements the sound of your drum kit well.
Lastly, sample-augmentation
In this case you wouldn’t be replacing the recorded drum sound with the samples, but you would actually be adding a sample and blending it with the original sound.
The idea behind this is to simply give the recorded drums a bit more personality and feel. Adding samples to an already existing Drum part can often times complement its sound.
There are some other important things you need to take into consideration when thinking about using samples or not.
Are you recording a demo or is it the end product?
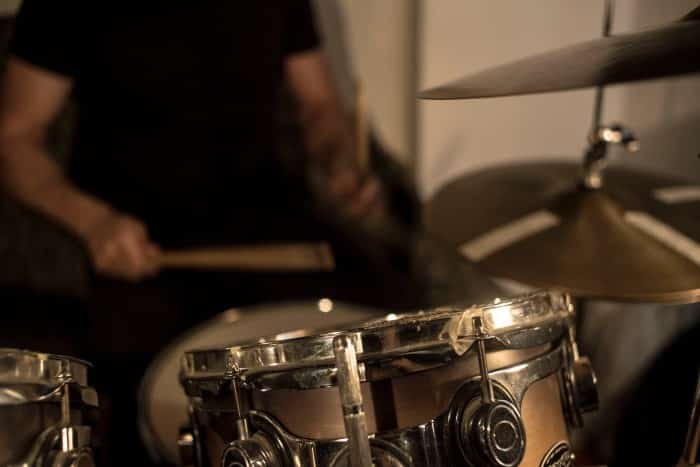
This is an important question to ask. If you are working on a demo, I’d say that almost always your best bet would be to go with samples, especially if you’re not the drummer, but even if you are it might be better to skip the whole recording process since it’s going to take you a lot of time and effort.
Mic’ing up the drum set and then recording it will definitely consume a lot of your time, dialing in a couple of samples will surely be quicker.
Almost every DAW out there will provide you with some basic virtual drums, which can sound almost identical to real drums. If your DAW doesn’t have virtual drums then you could always download some VST plugins such as EZDrummer, which sadly, is a quite expensive one.
There are some free drum samples out there which you can use though.
Taking the Genre into Consideration
One key aspect of using samples is knowing when to use them, this is where the genre of the music will help you determine what to do.
Just listen to music that is somewhat similar to the one that you’re producing and check if they are using a real drum sound or if they are using samples.
Many of the more popular songs today actually use samples, such as 24k Magic by Bruno Mars, or many songs by Imagine Dragons. It all depends on the style of the music you’re creating.
Many songs go for a more “synthetic” drum sound, which is only achievable by sampling.
The great thing about using samples is that you will get an extremely good sounding drum mix, since each component of that drum kit was recorded in a high-grade studio with high-quality equipment.
Maybe you want to use your old drum kit and let’s face it, it probably sounds terrible, to record this song…
If you use samples, no matter the sound quality of your kit, the end result will be great or at least a lot better than using the original drum sound, since you can simply replace every part of the kit in your DAW.
Are you a drummer?
Like I stated earlier, for non-drummers the easiest way to go about this is by simply using samples, but even if you are a drummer the answer isn’t as obvious as “play it yourself”.
If you are the drummer playing on this record you might often find yourself getting carried away by how you’re going to play a certain part which may not be exactly what the song needs. Playing that fill to perfection is certainly not as important as the needs of the song as a whole.
Focusing on the whole rather than on a specific part often comes easier when dialing in some samples.
Difference between sample replacement and sample augmentation
Sample replacement, as the word implies, replaces one drum sound with another. Most of the times this is done on either the Kick- or the Snare-drum.
When using Sample augmentation, you’re actually adding extra personality to the already existing drum sound. You do this by mixing the original sound with an extra added sample, combining both.
You will be able to do both sample replacement and sample augmentation with almost every DAW. You do this by using MIDI to replace or replicate the audio of the drum hits.
When to use sample replacement?
The reasons for doing this are mainly when the recorded drum sounds end up being unusable, be it because the mic pre got distorted or if you used a bad cable, etc. Basically you would do this any time the drum sound wasn’t recorded properly.
The correct way to approach this is by looking for a different kick/snare sound in your library while making sure that it blends correctly with the whole drum set. You achieve this while listening to the overheads and playing the sample sound in the context of the whole kit.
If you really like the way the kick/snare of your actual drum sounds, try finding a hit in any part of the song that doesn’t sound distorted and use it. This would be the ideal case, if this isn’t possible, replace it with a sample.
Another completely different way to use Sample Replacement involves a much more creative and fun approach. Here you replace one sound, the Snare for instance, with something completely different and synthetic, like a clap.
Doing this with a previously recorded drum will keep the human flavor in the recording while adding some creative differences.
Of course, this will depend entirely on the style of music you’re producing, if it’s a rock song… probably go with a more traditional drum sound, if it’s something like a Bruno Mars song, have fun and find samples that may surprise the listener.
Ensuring good samples
When recording the song, you can do two things to ensure that you will get the best samples recorded.
First: Record at the part of the process when you are dialing in the gain for each microphone. Sure, this will not get you the best sounding samples, but you will get some hits that sound good and don’t distort.
Second: Try, if time allows it, to record each part of the drum kit on its own.
Record some Snare hits, then some Kick hits, Toms, Hi-Hat closed and open, and so on. In this case you should only record one hit until the decay dies down completely.
Get at least a few samples for each component of the Drum set.
When to use sample augmentation?
You are going to want to use sample augmentation when you want to add flavor or personality to a certain component of the drum kit.
If you feel like the kick-drum isn’t really sitting in the mix the way you would like it to, or if it doesn’t have that “snap” to it and you know that EQ, compression, etc. isn’t going to solve the problem, then adding a sample that adds that “snap” can be really useful, then just mix them together until you get the desired effect.
One thing to take into consideration is that you always need to check the phase of the original drum kick and the added sample and make sure that they align, otherwise you could completely mess it up.
Another reason to add samples is that they sound very professional, since they were recorded in a studio with outstanding gear.
One thing you could use augmentation for is to add something completely different to the drums, on the one hand to enhance the sound but on the other, to also help it cut better through the mix. What I mean by this is, for instance, adding a kick-click to a kick drum in a heavy metal song.
If you record your drums at home, without proper sound treatment, then you might want to add some samples to give it that extra professional sound. Maybe your snare doesn’t have enough attack; just look for a sample that compensates for this and you are set!
I knowIt’s very important to find the right sample that suits your drum sound, it should complement the original drum sound well. After sampling, everything should sound like one drum.
This is why, when looking for a sample you should;
Find ones that match the original timbre of the drum, and also know the way you want it to sound, so you know what to look for.
When not to use either?
Once you get accustomed to using sample augmentation and sample replacement, you kind of fall into this rabbit hole where you think that you need to do it on every song.
Maybe the sound of the drums you recorded don’t really please you, but in the context of the whole song they might really work, remember to always take into consideration the whole song and don’t focus too much on a specific thing.
I think it’s much harder to recognize when not to use samples and trusting that with a bit of processing, the drums will really sound how you want them to. If you got a good capture of let’s say, the snare, working with EQ, Compression, etc. properly will get it sounding fantastic, removing the need for sampling.
One added benefit of working with the whole recorded drum kit is that it will retain the whole personality of the drummer, while sample replacement will most likely get rid of that.
Best Drum Simulation Plugins
While there are huge varieties of plugins that you could download, some which are also free, I’m going to share with you the ones that i like the most.
Note: Most of them aren’t free and tend to cost about $200, but if you’re looking for great sounding samples, these will definitely give you what you need.
EZDrummer 2
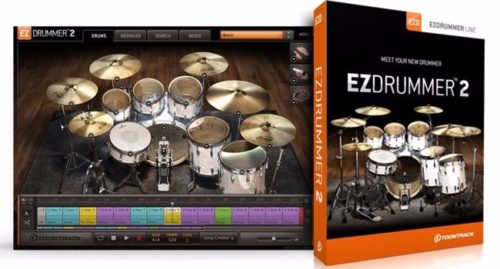
This is the number one selling drum sample software in the world. It’s a great tool, especially for musicians who aren’t drummers, because it comes with a huge library of MIDI grooves played by professional session drummers which you can simply drag and drop into your DAW.
If the standard EZDrummer samples you get aren’t enough, you could also purchase one of their many expansion packs which come loaded with grooves and samples designed for jazz, hip-hop, and many other genres.
It also features an on-board mixer which comes with many presets and effects, should you want to modify anything about the current drum sound.
It sells for €139 on its official website.
XNL Audio Addictive Drums 2
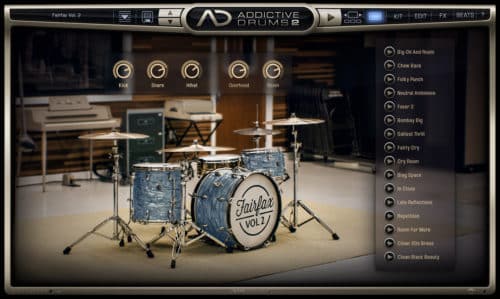
XNL Audio Addictive Drums 2 combines drums, which where recorded in high-grade studios, with authentic recorded performances of professional session drummers.
This software allows you to select any sample preset you like or even build your own kit from scratch using a simple drag-and-drop interface.
It comes loaded with grooves, beats and fills which are very easy to utilize, added to this you also get EQ, Compression, Distortion, Reverb, and a dedicated bus for parallel processing.
The basic pack of XNL Audio Addictive Drums sells for $169 on its official website.
Next I will list two of the free sample softwares that I think you should try. Also, you should make sure to check the included plugins on your DAW, since most of them already provide at least a basic set of drum samples.
DrumMic’a! by Sennheiser
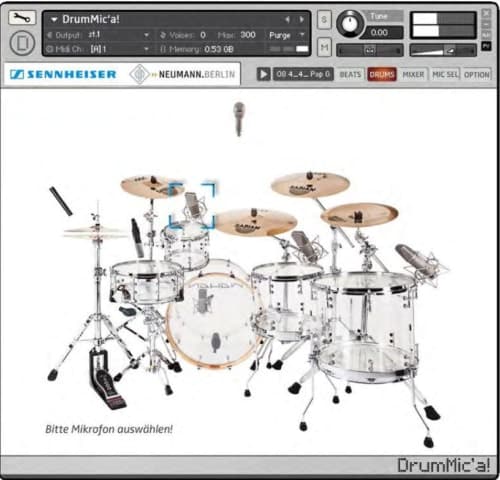
This is a Free drum sample Software which loads inside of the free native Instruments Kontact Player. This one allows you to change between Sennheiser and Neumann Microphones, which will change the drum sound a bit.
This one also comes with a mixer where you can adjust the volume of each individual component of the kit and also allowing you to EQ, Compress, add reverb and delay, pan, etc.
This is a fantastic option, especially because it’s free, check its official website here.
MT Power DrumKit 2
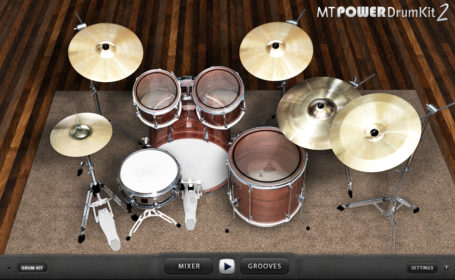
The MT Power DrumKit is a free sampler which offers high-quality samples of an acoustic, realistic drum kit.
The Samples come pre-processed which should make them sit nicely in any mix without any tweaking.
It also comes with a mixer where you can adjust the levels of each component, plus you can control the level of compression and panning.
Make sure to check out the official website here.
Conclusion
A lot of people seem to think that using samples is bad, they view it as “cheating”, but in reality, it all comes down to is, if it works for the song or not.
Too many times one tries to get the perfect sound but loses objectivity. Don’t get too bogged down in the specifics.
If you are going for a more synthetic sound, go with sample replacement… if however, you just want to change the personality of certain elements of the drum kit slightly, got with sample augmentation.
Don’t worry too much about EQ’ing and compressing a bad drum sound, it’s easier to replace it with something that has been well recorded.
